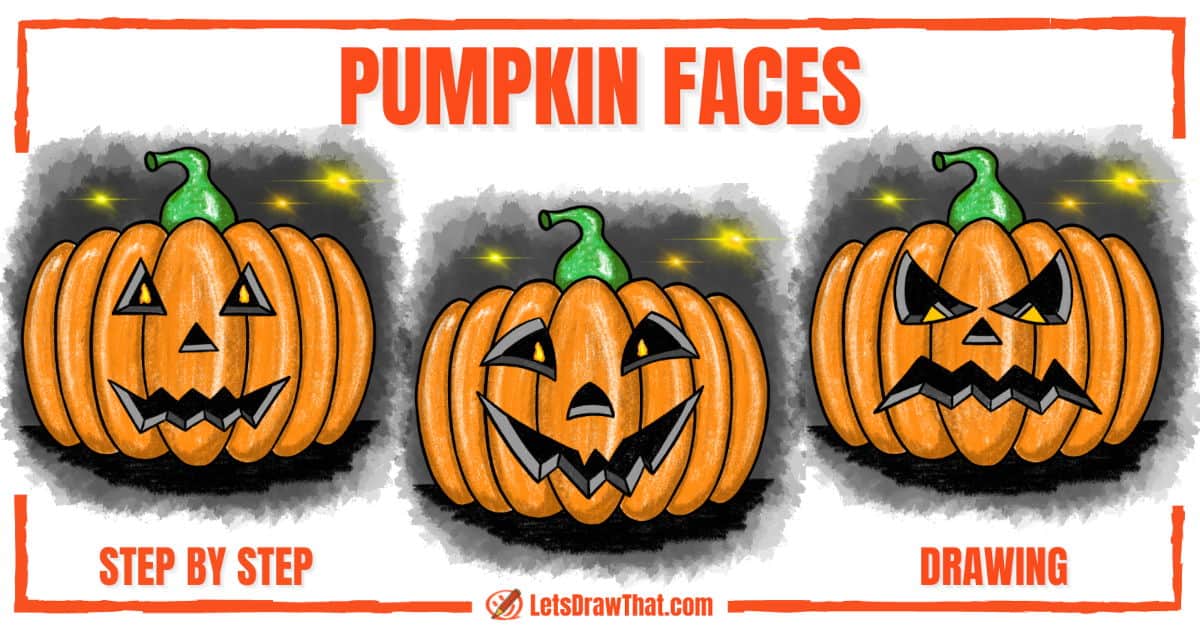
Drawing pumpkin faces: Classic pumpkin face

The first face we draw is the “classic” Halloween pumpkin face – made of simple shapes with straight lines. It would be easy to carve out with a knife into a real pumpkin, and it is also easy to draw. We have simple triangles for the eyes and nose. The mouth is again a series of straight “cut” triangle teeth. But for an optional challenge, we add perspective to eyes and mouth.
Drawing pumpkin faces: classic pumpkin face sketch
Step 1: Sketch the base pumpkin
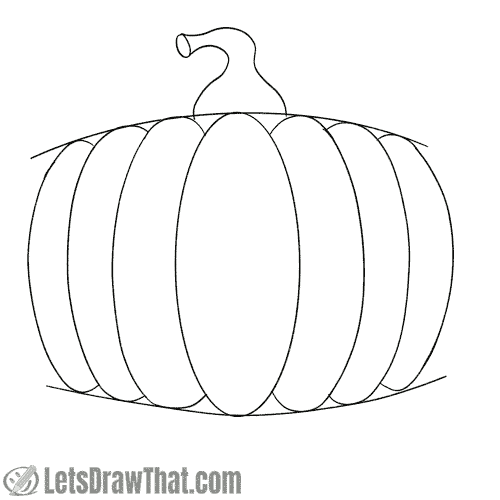
We start with a sketch of the simple front view of a pumpkin, which is perfect for drawing pumpkin faces onto. You can copy the picture from here, or jump to our how to draw a pumpkin tutorial for the detailed step by step instructions.
Step 2: Draw the classic pumpkin face

Here is our first pumpkin face sketched out. Draw two simple triangles for the eyes and one smaller for the nose.
The mouth is two zig-zag lines with a series of straight “cut” triangle teeth. Connect the upper and lower zig-zag lines with two straight lines for the corner of the mouth. That gives our pumpkin face a nice jagged smile.
If you want to experiment, try to turn the eyes and nose upside down, or slightly sideways, for a different expression.
Step 3: Option: Outline the pumpkin face for a simple drawing

If you’re after a nice and simple pumpkin face drawing, you can just outline the face as we have drawn it and be done.
But if you are up for a bit of a challenge and want to make your pumpkin face even more interesting, keep drawing with us.
Step 4: One-point perspective for the eyes and mouth

Oh, you are still reading? That means you are ready for the drawing challenge. Do not worry, it is not that hard. Although we have drawn many lines here, you do not need to do the same. They are here because it is easier to explain the concept of perspective when the complete guidelines are laid out.
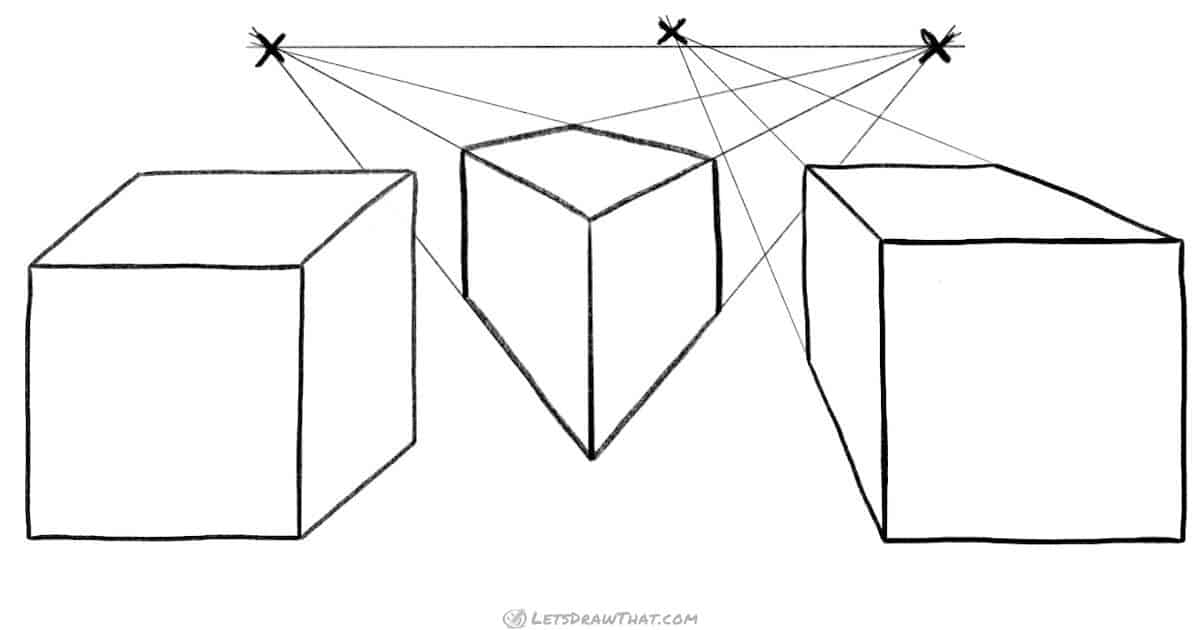
If you want a quick refresher on a one-point perspective, check out the “Draw a cube in 1 point perspective” tutorial.
What we’re preparing here is to give depth to our pumpkin face, eyes, and mouth, so you can see how thick the pumpkin skin is.
Step 5: Draw the eye and mouth side lines
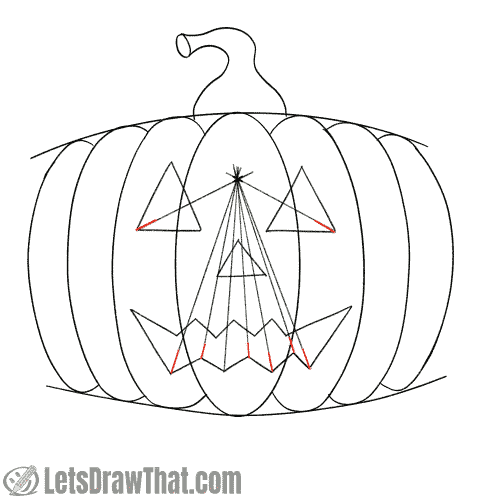
Here is the reason for all our guidelines. Draw short lines from the outer corners of the eyes and all the points on the lower jaw of our pumpkin face. The angle for each line is different, but they all point to the same single point between the eyes – the vanishing point for our one-point perspective.
As mentioned before, you do not actually need to draw all the guidelines, only the short lines marked in red. The guidelines are there just to make it really obvious for you in which direction each of the short lines is drawn. Let’s add all our side lines now.
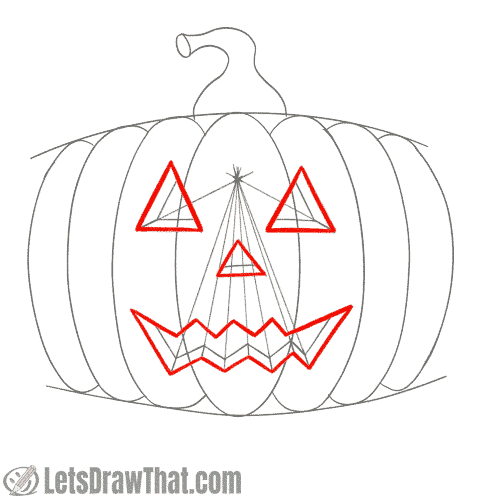
Step 6: Complete the perspective drawing

Now that we complete the inner sides of pumpkin’s eyes and mouth, we can finally see what are we drawing here.
Let’s start with eyes: we draw lines parallel with the outer edge and bottom of the eye triangle. It is a mouthful when written down, but simple when you just look at the picture.
Now for the mouth. Again, all the lines we are adding are parallel with the existing bottom zig-zag mouth line. We connect all the ends of our short perspective lines by redrawing the shape of the mouth a bit higher.
Can you see what we have done here? Our pumpkin face is now carved from a thick pumpkin skin!

Drawing pumpkin faces: classic pumpkin face outline
Step 1: Outline the pumpkin face
Well, the rest of this tutorial is just easy sailing. All we are doing from now on is tracing our sketch and outlining the drawing.
We start with drawing out the pumpkin face.
Step 2: Outline the inner sides of the eyes and mouth

In this step, we keep tracing the sketch and draw out the fancy perspective we have drawn for the pumpkin’s eyes and mouth.
Step 3: Outline the pumpkin

Finally, we complete the drawing by outlining the actual pumpkin and stem.

Drawing pumpkin faces: finished classic pumpkin face drawing
Drawing pumpkin faces: finished classic pumpkin face outline drawing
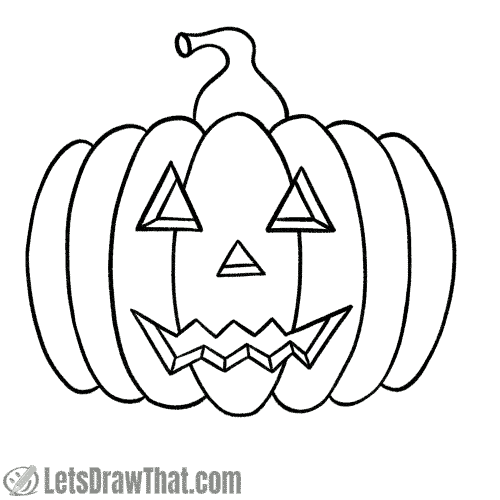
Use your eraser to clean up the drawing and erase the extra sketch lines, as well as the perspective guidelines, if you have decided to draw them out.
Here is our completed drawing of the classic pumpkin face, carved out off a nice thick pumpkin skin.
Drawing pumpkin faces: finished classic pumpkin face drawing coloured-in

As usual, it is up to you if you want to finish your drawing in colour. But we feel colouring in is a great way to make your line art stand out even more.
So here we are – we like our pumpkin bright orange. Since we have spent so much time drawing the volume for the eyes and mouth, we have coloured the sides in a light grey to make it stand out and contrast with both the orange pumpkin skin and black inside of the pumpkin.
Finally, add small yellow flames to finish the eyes. And a black starry Halloween night completes the picture and adds contrasting background to the bright orange pumpkin.
Drawing pumpkin faces: Angry pumpkin face

For the second pumpkin face we draw a scary and angry Halloween pumpkin. We use the same simple triangle for the nose and same zig-zag teeth for mouth. But this time the mouth is upside down and angry and the eyes are large, upset and scary!
Drawing pumpkin faces: angry pumpkin face sketch
Step 1: Sketch the base pumpkin
We will again use the same simple front view pumpkin from our how to draw a pumpkin tutorial as a base for the angry face. You can either copy the picture here or jump to the tutorial for detailed step by step instructions.
Step 2: Draw the angry pumpkin face

Start drawing the face with the same simple triangle for the nose. Next, draw the mouth. It is also drawn the same way as above – two lines of zig-zag teeth joined in the corners. But this time the mouth is upside down – so we connect the upper and lower mouth line with corners pointed down. That gives us a rather angry mouth look.
For the eyes, we are moving to cartoon exaggeration. They are still triangles, but much larger and with curved sides. The top corner is drawn up and sideways, to give a scary, angry look. We have also added two small triangles for eye pupils.
Overall, this is one very upset and scary-looking pumpkin face!
Step 3: Option: Outline the angry pumpkin face for a simple drawing

If you feel like finishing the pumpkin face drawing here, you can just outline the simple face we have just drawn, as shown in this picture.
But since we have already spent the time to learn and practice perspective on the first face, let’s do the same for our angry face as well!
Step 4: Sketch the inner eyes and nose
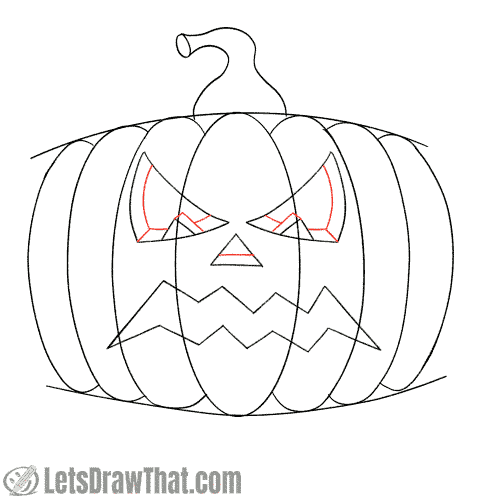
In this step, we add the thickness to our eyes and nose using the same one-point perspective trick learned before. We skip drawing the full perspective guidelines – we have explained the concept on the previous face, so we roll a bit faster here.
Start with drawing the short angled lines from outer corners of the eyes. Then add the two lines from the top of the eye pupil triangles. All these four lines are pointing to the perspective vanishing point between the eyes.
Next add the all the parallel contouring lines: First the simple one for the nose. Then redraw the outer and bottom lines for the eyes and the inner side for the pupil triangle.
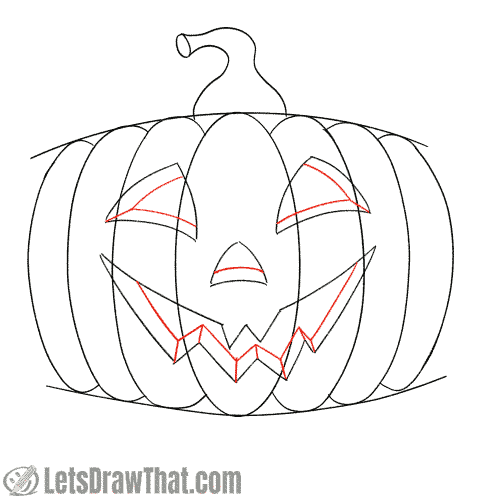
Step 5: Sketch the inner mouth line
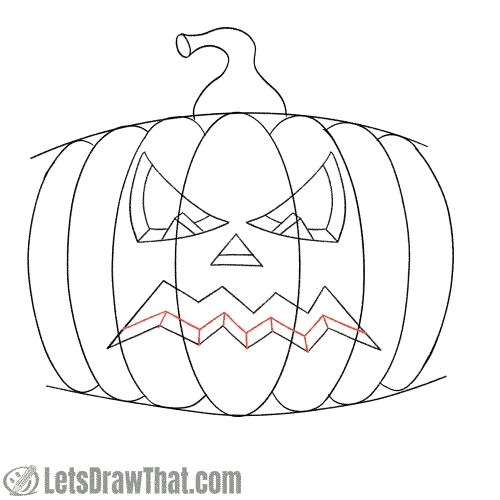
Next add the thickness to the mouth. Again, start with all the short cross lines pointing to the vanishing point – one from each of the upper and lower points.
Then redraw the zig-zag bottom of the mouth to join all the short lines.
That completes the angry pumpkin face sketch.
Drawing pumpkin faces: outline the angry pumpkin face
Step 1: Outline the face

With the sketch done, it is time to start outlining our drawing. First we start with the face.
Step 2: Outline the inner eye and mouth contours

We keep outlining our drawing by drawing out the inner eye and mouth contours.
Step 3: Draw the pumpkin

Finish the drawing by outlining the actual pumpkin.

Drawing pumpkin faces: finished angry pumpkin face drawing
Drawing pumpkin faces: finished angry pumpkin face outline drawing

Now it is time to clean up the sketch lines and our angry pumpkin face is done.
Drawing pumpkin faces: angry pumpkin face drawing coloured-in
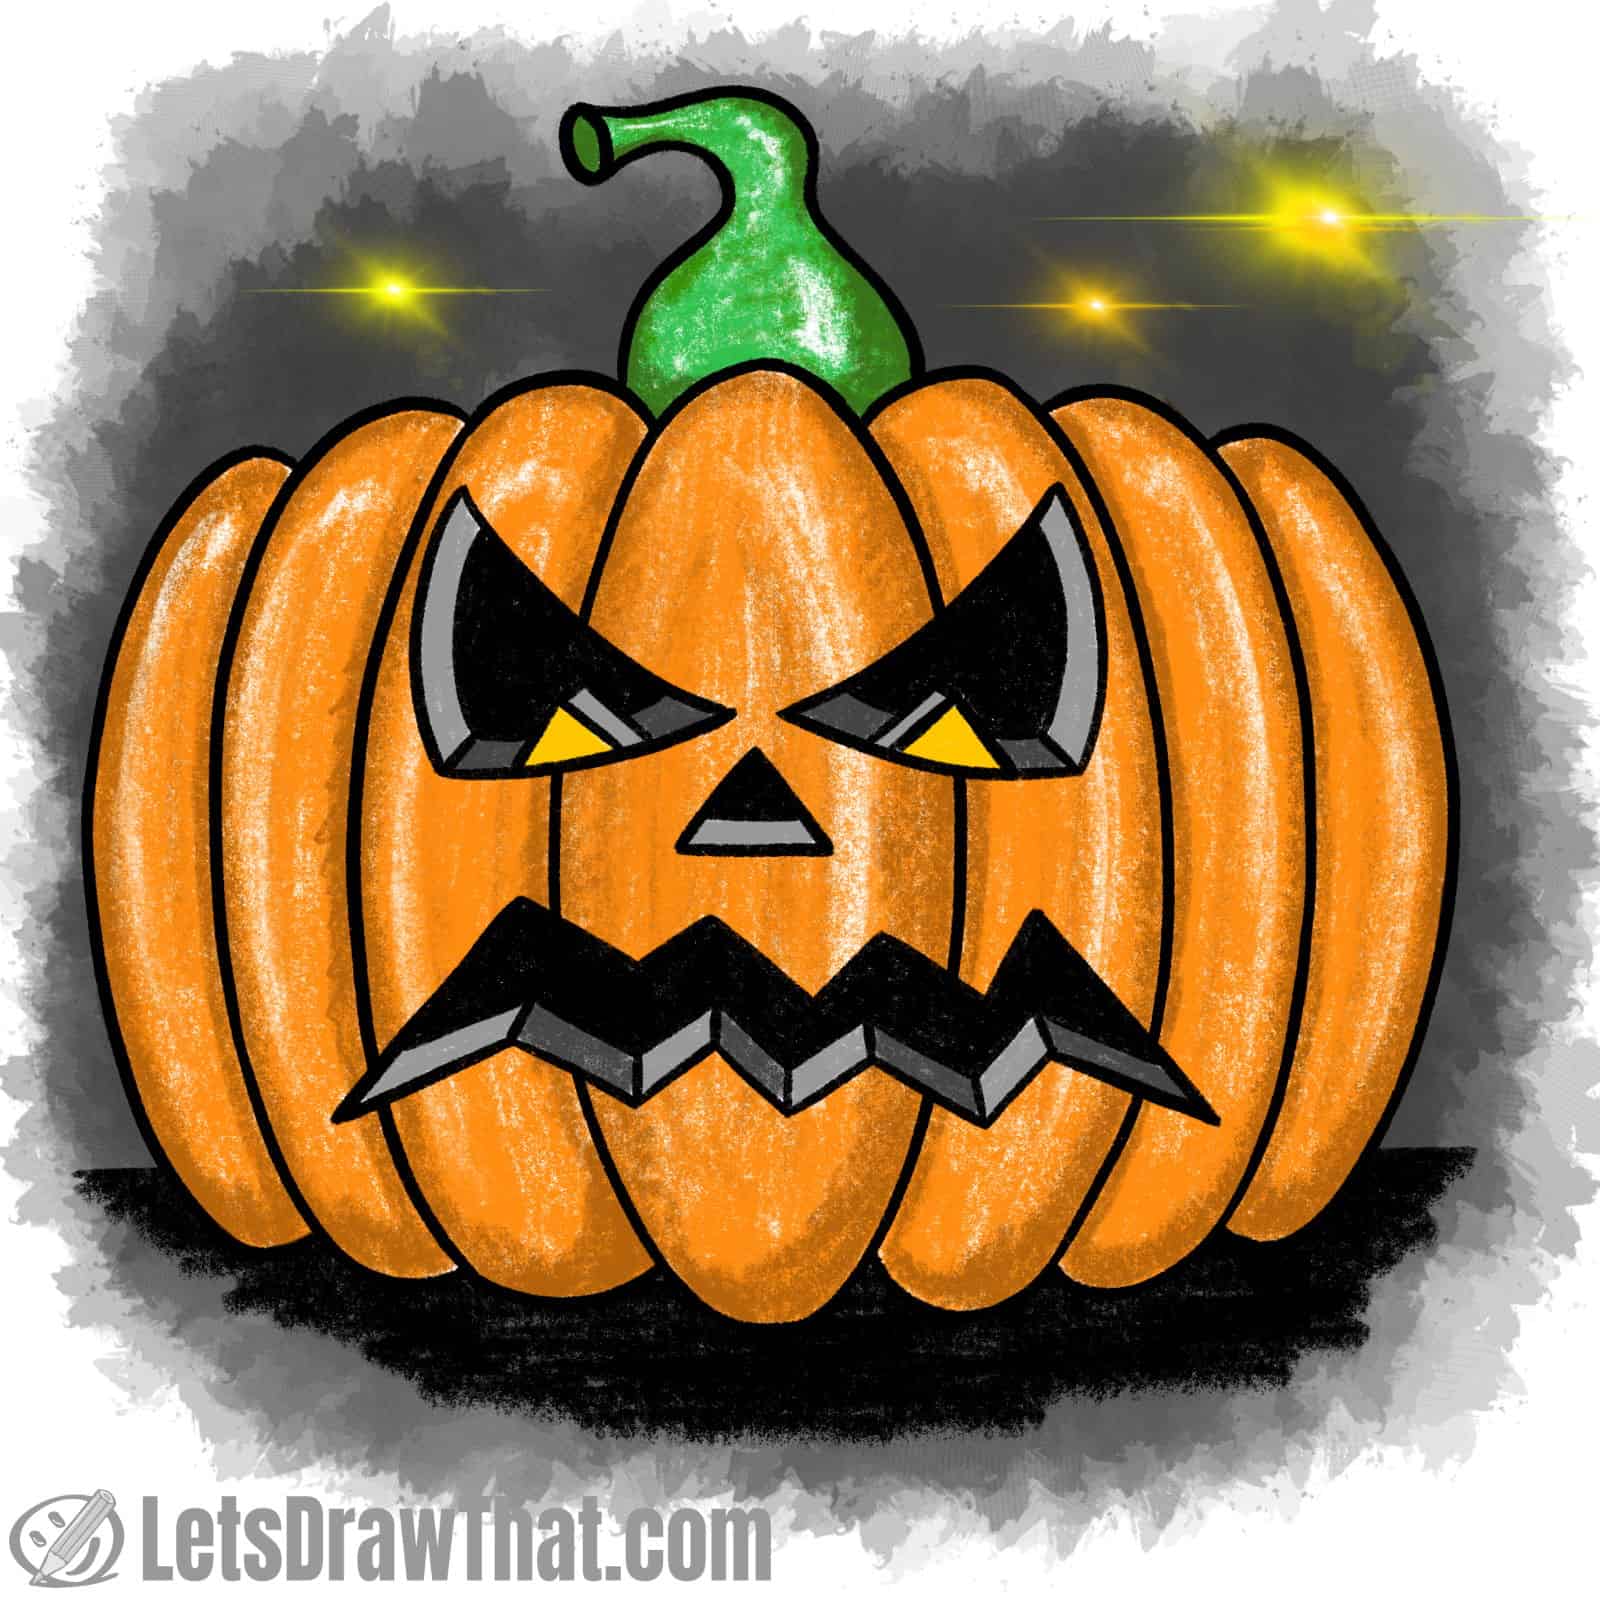
We have coloured in the angry pumpkin face the same as before – bright orange body, light grey for the sides of the skin and black for the eyes, mouth and nose.
Drawing pumpkin faces: Happy pumpkin face

Here is our final pumpkin face – a happy smiling one. While it is as easy to draw as the two faces above, it but would be pretty hard to carve out with a knife – there are even more curves than before. Again we use familiar shapes to draw eyes, nose, and mouth. But this time the eye triangles point together and the mouth is prolonged into a really wide and happy smile. So while we still get the jagged pumpkin face look, this is a one very happy pumpkin head indeed.
Drawing pumpkin faces: happy pumpkin face sketch
Step 1: Sketch the base pumpkin
We start again with the simple front view pumpkin from our how to draw a pumpkin tutorial as a base.
If you have drawn the two pumpkin faces above, you are professional drawing this pumpkin by now. If you just happened to jump straight to this pumpkin face and need step by step instructions, do a quick side trip to the tutorial.
Step 2: Draw the happy pumpkin face

Again, the same techniques and shapes are used to draw eyes, nose and mouth as on our previous faces. But this time, the eye triangles are curved and point together and the mouth is prolonged into a really wide and happy smile. We have also curved the nose triangle for a friendlier look.
So while we still get the jagged pumpkin face look, this is a one very happy pumpkin head indeed.
Step 3: Draw the inner contours
In this step, we add the thickness to our eyes and nose and mouth using the one-point perspective. Since we have explained it twice already, here is the whole face in one picture.
The quick steps are: First draw the short angled lines from outer corners of the eyes and all points on the mouth pointing to the vanishing point between the eyes. Then add all the parallel contouring lines for the eyes and mouth.
(If you have not followed this tutorial from the start, we have explained how this is done in detail on the first face we have drawn).

Drawing pumpkin faces: happy pumpkin face outline
Step 1: Outline the pumpkin face

Since you are now proficient in drawing pumpkin faces, we can fast-track the steps and outline the entire face, including the inner eye and mouth contours, in one step. Done!
Step 2: Outline the pumpkin

Finish the drawing by outlining the actual pumpkin. Surely that is also a routine by now.

Drawing pumpkin faces: finished happy pumpkin face drawing
Drawing pumpkin faces: happy pumpkin face outline drawing

Clean up the sketch lines to complete the happy pumpkin face drawing.
Drawing pumpkin faces: happy pumpkin face drawing coloured-in

And yet again we have coloured in the happy pumpkin the same. That way you have three different pumpkin faces drawn in a similar style to compare and choose from.
Well, the happy pumpkin face is our favourite. Which face do you like the most?