How to draw a ghost: base sketch step by step
Step 1: Draw a base oval and outline for the ghost's body
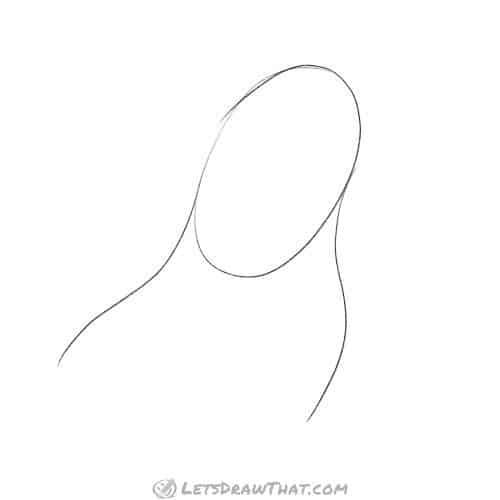
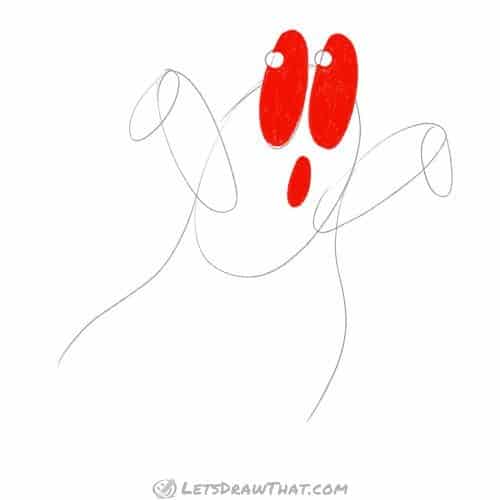
Our ghost drawing starts as usual with a simple shape. First, draw a slightly tilted oval – this will be the ghost’s base head-body shape. Then add two squiggly lines starting from each side of the oval – these will mark the outer shape of our ghost.
Step 2: Draw the ghost's face

Next, add a few more simple ovals to build the ghost’s face. Start with the two long ovals at the top – these will be the ghost’s eyes. We have drawn very big eyes, sticking half-way up over the top of the head. These are definitely exaggerated cartoon eyes.
Next, add a small oval for the mouth under the eyes. Finally, draw two small circles – these are not for the eye pupils, rather they will mark the part to leave out when colouring the eye to add a manga-style shine into the eye.
Step 3: Draw the ghost's arms

The final sketch step is to give our ghost some arms. These are again made from simple ovals. Draw two long ovals sticking from the sides of the body for the arms. Then add two small ovals folded back down – these will be the ghost’s hands.
That is it for sketching. So far, our ghost looks a bit like a Humpty Dumpty with massive arms and skinny legs. We will fix that shortly.
How to draw a ghost: outline the drawing step by step
Step 1: Fill in the ghost's eyes and mouth
Let’s outline the drawing and improve on our sketch next.
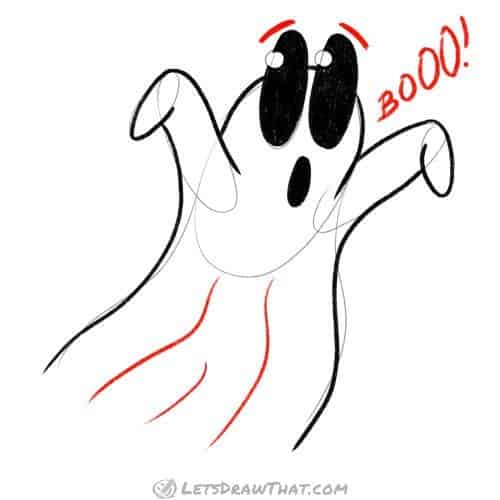
Start by simply colouring in the eyes and mouth. Remember what those two small circles in the eyes were for in the sketch? Just leave them blank!
Step 2: Draw the ghost's arms

Next outline the sketched ovals for the arms and hands. Notice the hands are drawn with a small gap left out – that way they will look folded down as if our ghost is chasing someone.
Step 3: Finish drawing the ghost's body

Now it is time to draw the outer shape of the ghost’s body. Notice we are not following the sketch perfectly, but rather we are joining the arms and body with a smooth curve. Looooong smooooooth curves – that is how to draw a ghost!
Step 4: Add final details
Our ghost drawing is done, but we can always add a few details to improve the plain look of the ghost.
Let’s draw a few squiggly lines down the ghost’s body, to suggest some folds. Next, add two eyebrows above the eyes – just two lines.
Finally – ghosts always make spooky squealing sounds. How do you draw a sound? Just write it out! Our letters are getting larger the louder the squealing gets…

How to draw a ghost: finished drawing
How to draw a ghost: finished outline drawing

Here is the completed ghost drawing, after we have cleaned the sketch lines with an eraser.
How to draw a ghost: finished drawing coloured-in

As usual, we like to finish our drawing in colour. As ghosts are pale and semi-transparent, they do not have any colour. We are using our “snowman” trick to shade the pale white body with light blue, to give the ghost some volume.
That is the end of “how to draw a ghost” tutorial. Well, almost…
How to draw a ghost: finished drawing coloured-in with a castle background
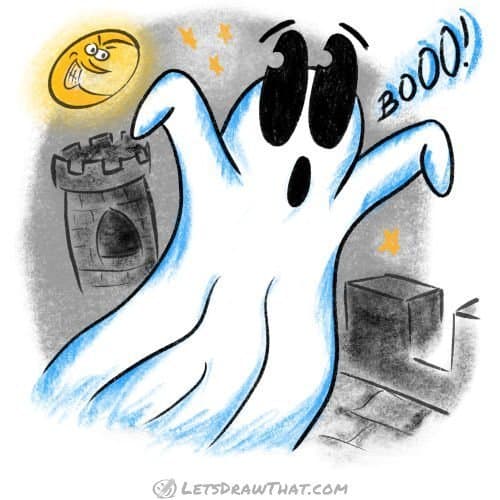
Since the completed ghost drawing was a bit bare, here we have added a spooky background. Now our ghost is spending the nights floating along the old castle walls, being watched by a sinister moon.
It must be one of those old European ghosts, I’d say. Not many castles here in down under or in the States…