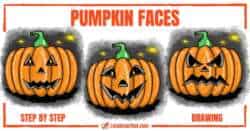
How to draw a simple pumpkin in easy front view
The first pumpkin we will draw is a simple front view. It is drawn from several similar “C” shaped ribs, with a nice thick stem on top. Let’s get into it.
How to draw a simple pumpkin : sketch step by step
Step 1: Sketch the first oval and guidelines

Let’s start our pumpkin with a simple oval. It is standing tall and rather slim. This will be the central rib of our pumpkin.
Next, we will add two curves, one at the top and one at the bottom, just touching the pumpkin rib at the centre. Draw them very lightly, as these will only be guidelines for the remaining pumpkin ribs, but they will help us maintain the overall pumpkin shape.
Step 2: Add all the pumpkin ribs

Now we add all the other pumpkin ribs, using the guidelines from the previous step. Each rib is a “C” shaped curve, similar in shape to the first oval we have drawn.
Notice that our ribs are just touching the curved guidelines, so they become slightly smaller as we draw towards the outer edges of our pumpkin. Also, the ribs become slightly narrower as we move from the centre to the sides.
You can either draw one side first, then the other, or start at the centre, and then add one rib on each side until you have three on both.
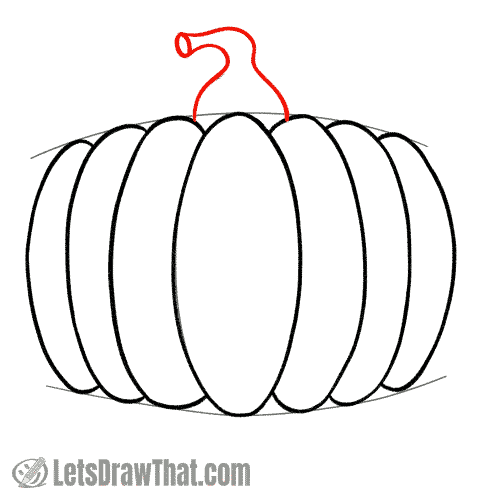
Step 3: Draw the stem
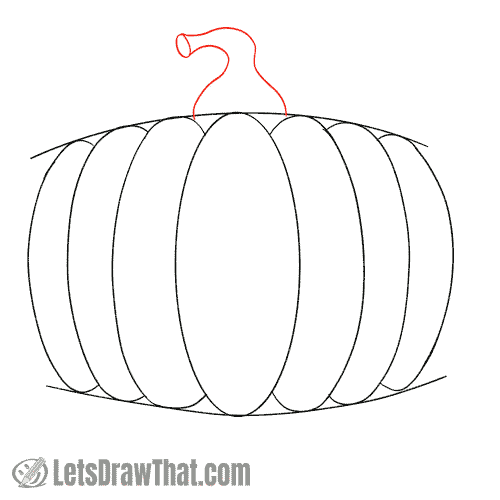
Another trademark feature of the pumpkin, apart from its ribbed body, is the stem. Let’s add it next.
The pumpkin stem starts with a funny bulky wide section on the pumpkin, and then narrows down quickly – sort of like a bottle with a bent neck.
How to draw a simple pumpkin: outline the drawing step by step
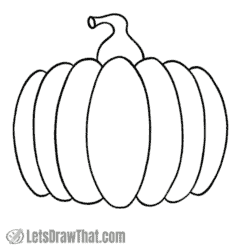
Step 1: Outline the pumpkin ribs

Here comes the simple part – outlining all of the pumpkin ribs.
Step 2: Outline the stem
Finally, outline the stem.

How to draw a simple pumpkin: finished drawing
How to draw a simple pumpkin: finished outline drawing
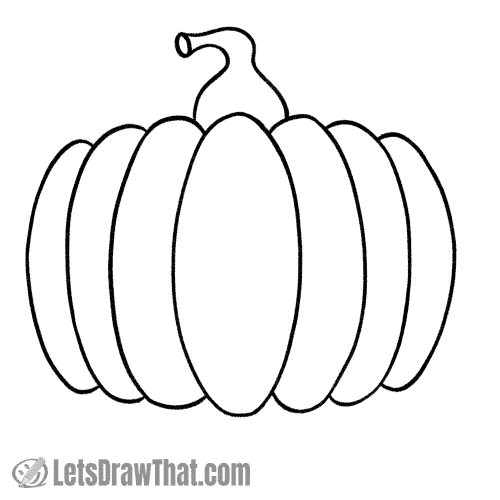
Use your eraser to clean the sketch lines, and our simple pumpkin drawing is complete.
By the way, this simple flat pumpkin view is perfect for drawing Halloween faces.
How to draw a simple pumpkin: finished drawing coloured-in

And as usual, the final step, should you feel like it, is to colour in the pumpkin.
Pumpkins are dark yellow or orange – here we liked the orange colour. Notice the darker outline on the ribs, with a lighter centre. It gives a bit of a feeling of plasticity.
Colour in a nice green stem next – again with some highlight in the middle. And finally, sit the pumpkin on a bit of a green patch.
How to draw a pumpkin in perspective

Our second pumpkin is viewed at an angle. That makes it look better and more realistic, but also slightly harder to draw. But since you have already learned how to draw pumpkin ribs, curving them into a space is not that hard.
How to draw a pumpkin: base sketch step by step
Step 1: Draw a simple oval

We start as usual with a very simple oval. It is almost a circle, just a tiny bit squashed at the top and bottom.
Draw it just lightly, as it is only a guideline for our pumpkin drawing.
Step 2: Add two more oval guidelines
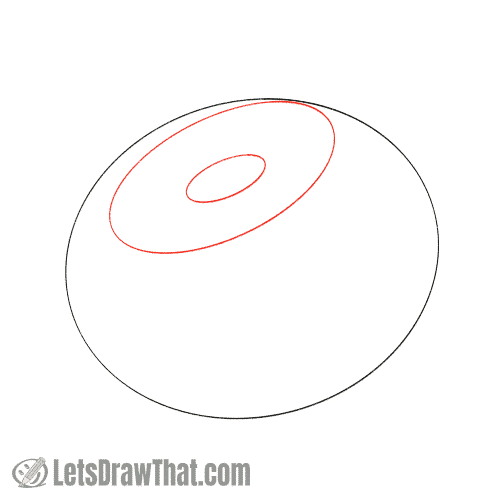
Next we add few more helping guidelines. They are ovals again, and drawn only lightly.
The larger one just touches our pumpkin outline at the top right and will define the angle at which we view the pumpkin. The small oval in the middle will be the base for the stem.
You can play with placing these two ovals. The angle you draw them at will define the angle of view for your pumpkin.
Step 3: Add the first pumpkin rib
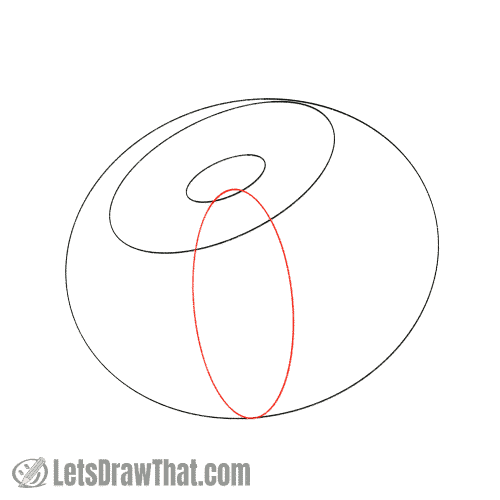
Now we are ready to build our pumpkin. Sketch the first front-facing pumpkin rib. It is the same tall and slim oval, like in our front view Halloween face above.
Depending on the angle you draw your top guiding ellipses, you might want to lean the first rib also slightly at angle.
Step 4: Add more ribs on one side
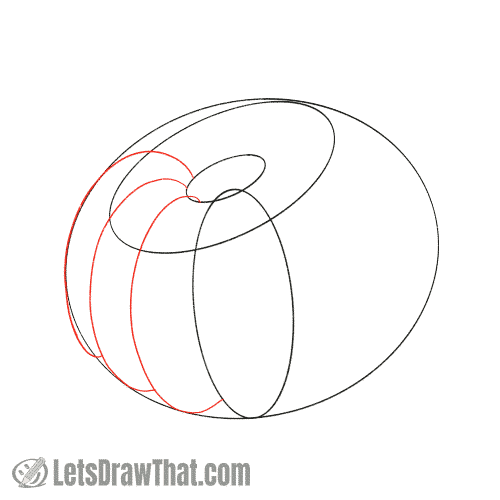
Next, add the ribs on the left. They are the already familiar “C” shaped lines. They start at our “stem base” small oval and only just touch our pumpkin body outline at the bottom. The “C” line finishes on the previous rib.
Draw three ribs, with the outer most one more or less tracing the outer outline of the pumpkin body.
Step 5: Sketch the remaining front ribs

Now repeat the technique on the right hand side: Start at our “stem base”, only just touch our pumpkin body at the bottom and finish on the previous rib.
Again, draw three ribs out to the righ outline of the pumpkin body.
Step 6: Complete the ribs in the back
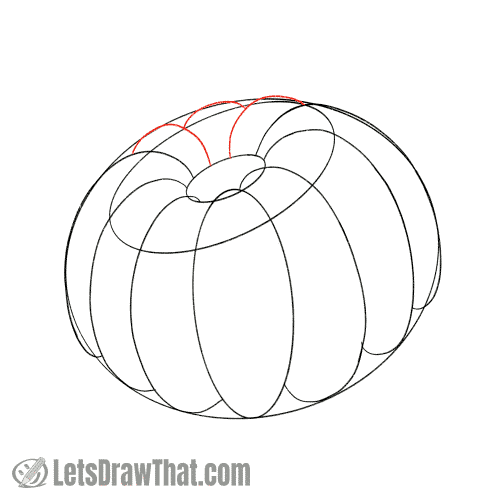
Finally, complete sketching our pumpkin body by drawing the three ribs that are mostly hidden.
They are only the top part curve from our “C” shapes. Draw the left one first, starting on the “stem base” and curving left. Then the right one – from the “stem base” to the right.
The very last rib is just a curve between the previous two – it does not go all the way to the “stem base” line.
Step 7: Add the pumpkin stem

With the pumpkin body complete, it is time to add the stem. If you have drawn our Halloween pumpkin above, it is the same kind of “bottle with a bent neck” shape.
Start on the “stem base” guideline and narrow the bulky base into a stem. This time we have bent it to the right – but feel free to draw your stem whichever way you want.
And that is our pumpkin sketch complete!
How to draw a pumpkin: outline the drawing step by step
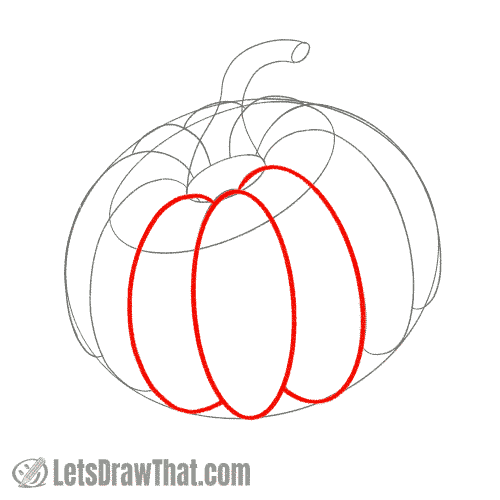
Step 1: Start outlining the front ribs
Now all we need to do is outline our pumpkin sketch.
Start again with the front three ribs – first the full oval, next the two attached ribs on the side.
Step 2: Outline the stem
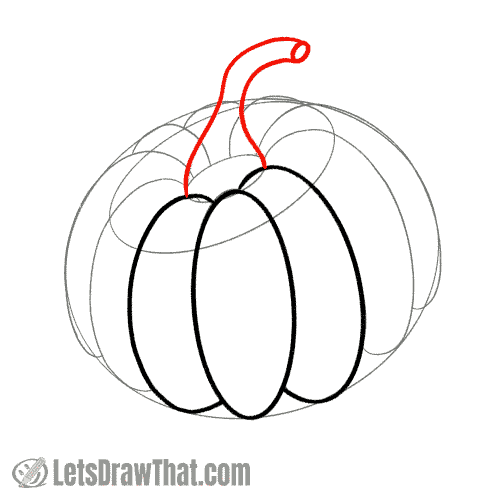
Next, outline the stem. The bottom part of the stem partially hides our ribs, which is why we want to draw it early.
Step 3: Outline the remaining front ribs

Keep outlining the front ribs on both sides.
Step 4: Complete the Pumpkin outline

Finally, finish the pumpkin drawing by tracing the three rear ribs – only outline the parts that are not hidden behind the stem.
How to draw a pumpkin: finished drawing
How to draw a pumpkin: finished outline drawing

Clean up the sketch with your eraser, and the pumpkin is complete.
How to draw a pumpkin: finished drawing coloured-in

As usual, feel free to colour the pumpkin in. We love the orange colour, but your pumpkin can be anything from dark yellow to light brown. Or a mix of colours – see the brownish and reddish strokes in our pumpkin?
Notice that the ribs have darker colour along the edges, and a bit of a highlight left in the middle, to suggest some volume.
The stem is bright green, again with a highlight in the middle. Finally, a patch of grass for our pumpkin to sit on, and now you know how to draw a pumpkin even from and angle!