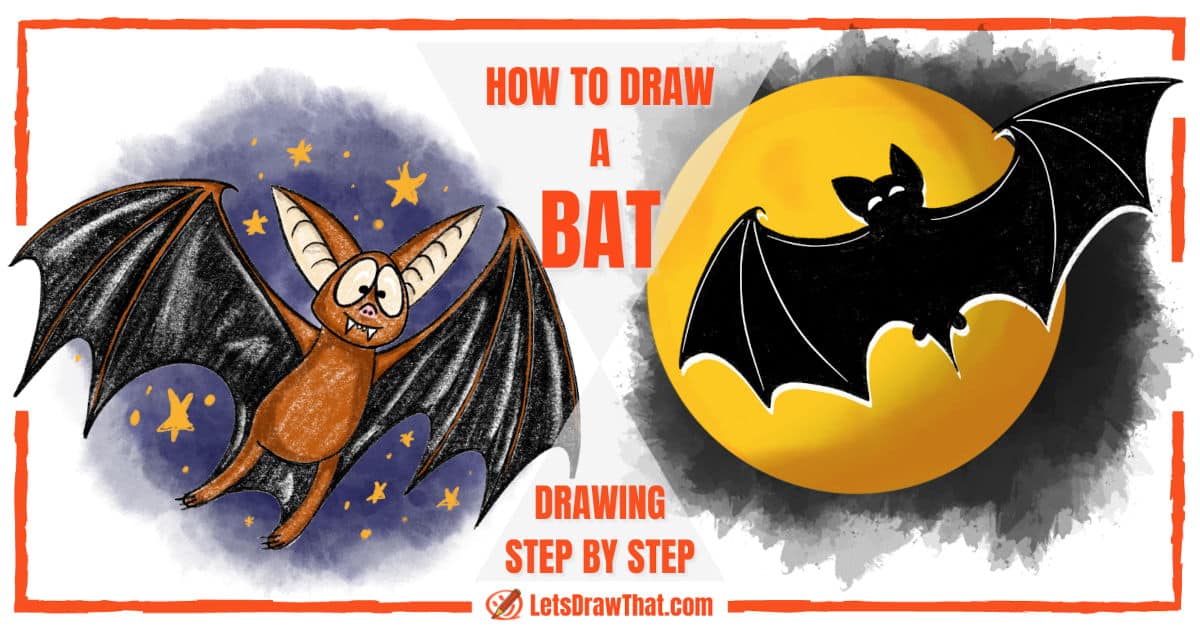
How to draw a bat: an easy cartoon bat drawing

Our first bat drawing is a simple to draw cartoon style bat. To enhance the cartoony look, we give the bat big googly eyes and really long ears.
How to draw a bat: base sketch step by step
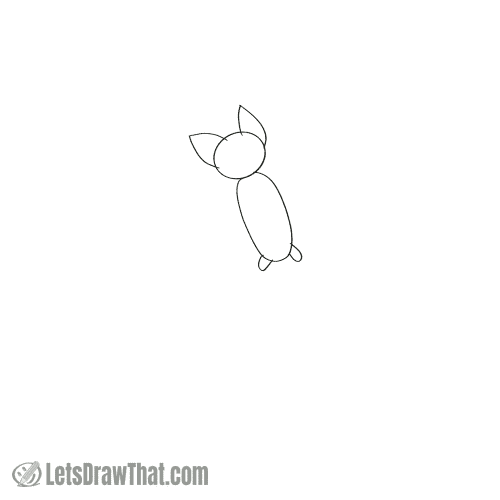
Step 1: Sketch the bat's head, body and ears

Start the bat drawing with a rounded triangle head. The top corner is rounded off just slightly, while the right cheek is much rounder. Leave the bottom left corner sharp for the time being.
Then draw a bean-shaped body under your head.
Finally, mark two large ears on the top of the head. These are made from two curves meeting at the point. Now different bat species have different sized ears, so feel free to draw your bat’s ears as long or short as you like. We are going for an exaggerated, funny, cartoon look here – hence the very long ears.
Step 2: Sketch the bat's face and legs
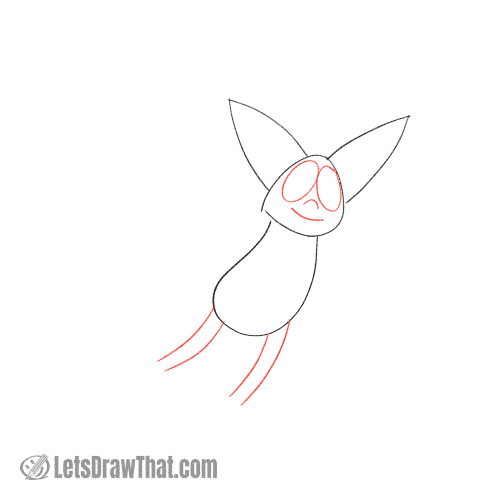
Next, draw the bat’s face. Since we are drawing a cartoon bat, we have used two large ovals for the eyes. Draw one small, upside-down arc for the nose and another one, wider and flatter, for the smiling mouth.
Then add two skinny legs, one on each side at the bottom of the body. These are again drawn very simply from two parallel curved lines.
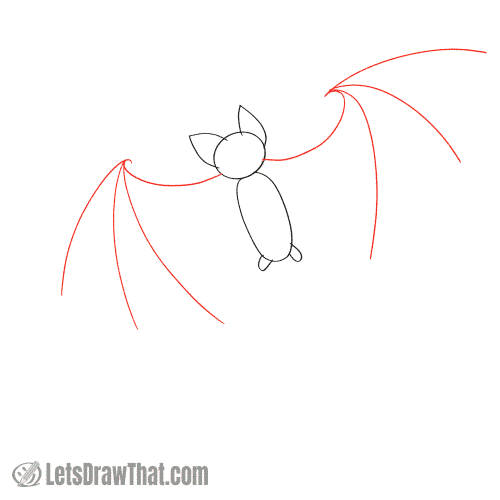
Step 3: Draw the bat wing skeleton

Woohoo, finally a step where our drawing stops looking like Piglet from Winnie the Pooh and becomes a bat.
The bat’s wing is made from a leather membrane that hangs between the bat’s arms and long fingers. Here we are drawing a simplified skeleton for the wings. Draw two arcs going up from the shoulder, one on each side of the body – these are the very simple arms. Then draw three long fingers – again just simple curves – fanned out and going down from each arm’s end.
Now a real bat would have four fingers, but the first two are so close together that in our simplified drawing, we can get away with just three.
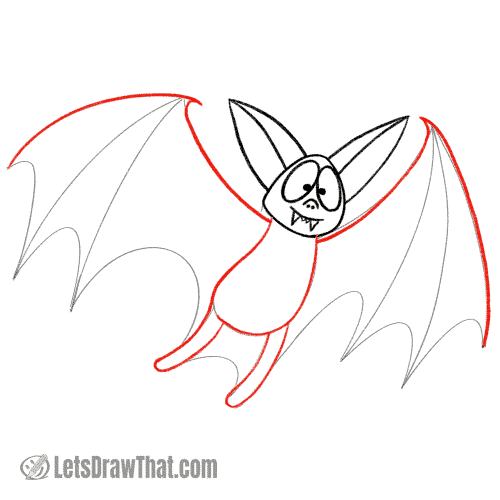
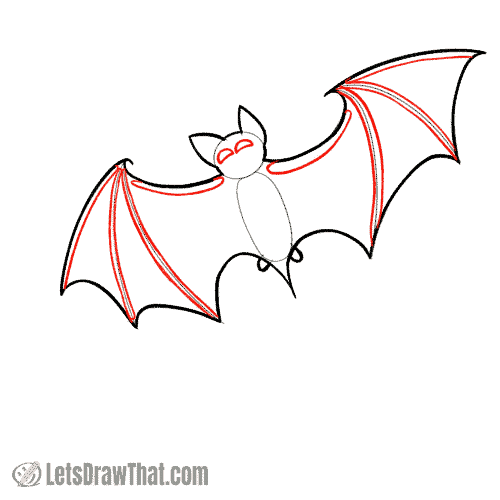
Step 4: Draw the bat wing membrane

Finish the bat’s wings by drawing a series of arcs for the lower edge of the wing. Join the fingers one to another, and also draw an arc to join the inner fingers to the bat’s legs. Finally, add a small tail wing between the legs.
And while you are all pumped up on drawing those smooth arcs, add two more curves to mark the fold in the ears as well.
That is enough for sketching, let’s outline and improve our bat next.

How to draw a bat: outline the drawing step by step
Step 1: Draw the bat's head and face

Let’s start outlining the bat from the head. The head shape remains the same as the sketch, except that we have lightly rounded off the last corner as well. The ears, eyes, nose and mouth are directly outlined from the sketch.
Then add two dots into the eyes for the pupils. Add two more small dots to the nose for the nostrils. And finally, bats have these lovely vampire teeth – so draw those as simple triangles, two longer ones for the fangs and two smaller in between.
Step 2: Outline the body and the outer wing edge
Next, outline the bat’s body and legs. Again, these are a direct copy of the sketch – just notice the small gap left out in the body line on the top of the right leg.
Then outline the outer edges of the wings. Here we are adding a small “hook” at the top wing tip – this is actually a very simplified representation of the bat’s thumb.
Step 3: Draw the bat's wing skeleton - arms and fingers

Here comes another improvement on the simple sketch: double up the lines for the bat’s fingers and arms, to give them some thickness.
Step 4: Finish drawing the bat's wings

Next, follow the sketch to finish the bat’s wing with those lovely folds.
The final touches are adding the claws on the feet – just a few short lines – and some texture lines onto the bat’s ears.
How to draw a bat: finished drawing
How to draw a bat: finished outline drawing

Here is the completed bat drawing, after we have cleaned up the sketch lines with an eraser. Now, this was a fairly simple way how to draw a bat, what do you think? And this one turned out to be quite a cute if a bit confused cartoony fellow. If you would like your bat to look less ditzy, just put those two dots in the eyes a bit further apart.
How to draw a bat: finished drawing coloured-in
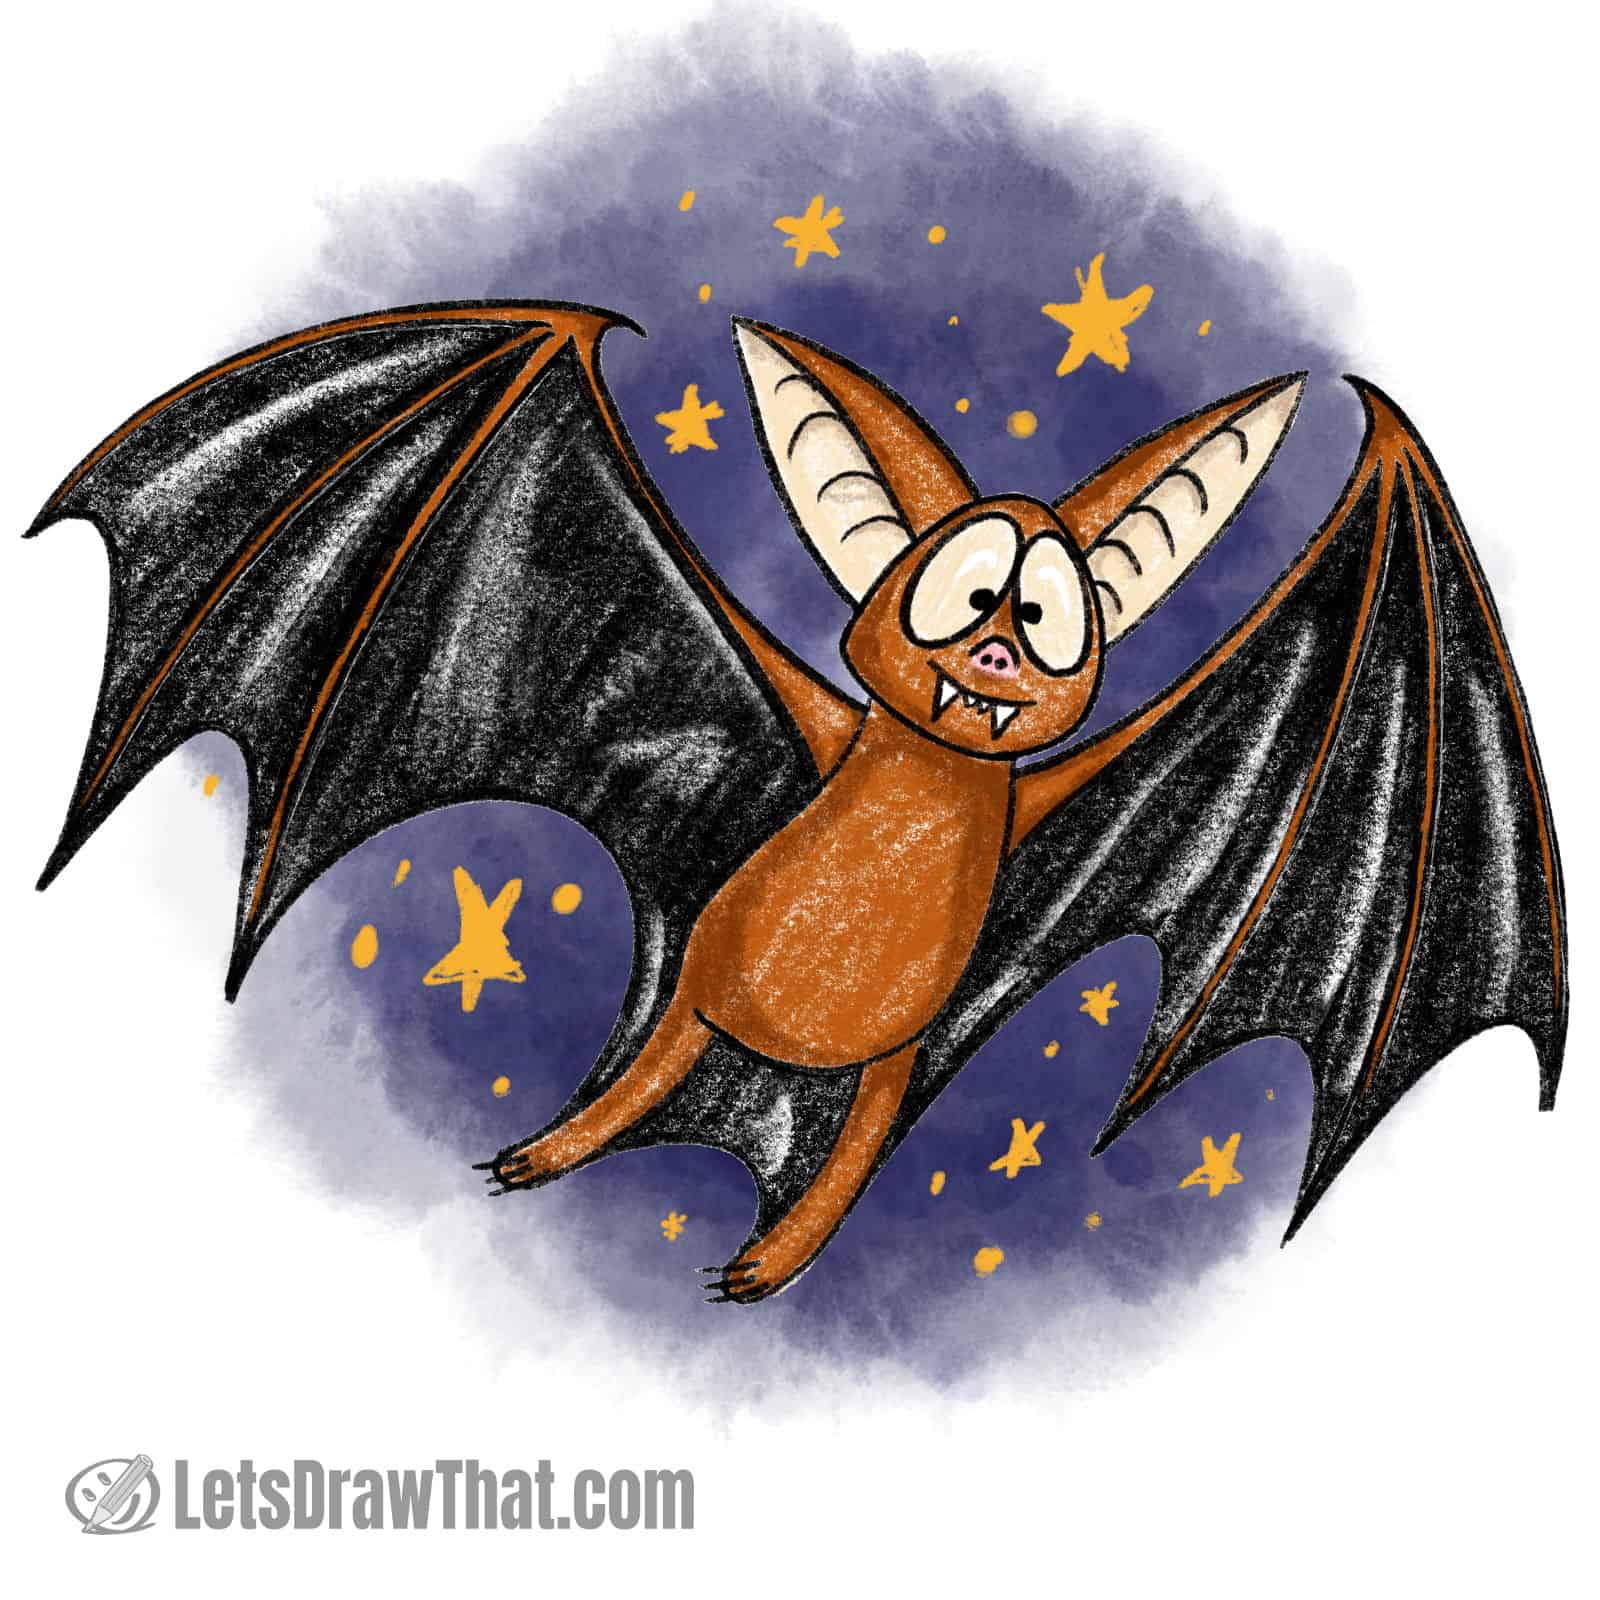
Our usual final step is to colour in the drawing. Our bat has nice brown fur and dark black wings as he soars through the dark blue night sky, full of stars. Do you remember how to draw a star and the trick we had for drawing many of them quickly?
How to draw a bat: bat silhouette drawing
The second bat drawing is just a black bat silhouette against a full moon – a perfect addition to your Halloween drawings collection. It is drawn using the same technique as the cartoon bat, just the proportions for our second bat drawing are more realistic with a smaller head, shorter ears and a larger wingspan.
How to draw a bat silhouette: base sketch step by step
Step 1: Draw the bat's body and head
Our bat silhouette drawing starts the same as the previous bat – with a simple sketch of the body. This time, the head has a bit more realistic proportions – just a simple small circle with ears, that are much shorter than on the cartoon bat.
Draw only a simple oval for the body – the shape does not matter much, as it will be hidden in the bat’s silhouette. Add two short bumps for the bat’s legs.
Step 2: Draw the bat's wing skeleton
Same as above, draw two arcs from the shoulder for the bat’s arms. Notice how we have curved the arm end to suggest the small hook thumbs. Then draw the three long fingers fanned out from each arm’s end.
Step 3: Draw the bat's wing membrane

Finish drawing the bat’s wings by adding the arcs between the fingers for the leather wing membrane. And that is pretty much all that we need to draw the bat silhouette. All that is left is to colour in the sketch.

How to draw a bat silhouette: outline step by step
Step 1: Outline the bat silhouette

Start by drawing out the outer edges of the silhouette. This is pretty much a direct copy of the sketch, with slightly improved thumbs on the bat’s wings.
Step 2: Optional: Mark out the blanks
This is really an optional step. You can simply just fill in the outline from the previous step in black to draw the bat silhouette. But the drawing looks more interesting if the bat’s boney fingers are left as white highlights on the black silhouette.
So that is what we are doing here – marking out the areas to leave white. Another option would be to fill in the silhouette completely and add the white highlights later with a white marker if you have one.
Step 3: Colour the bat silhouette in black

Fill in the silhouette outline in black, leaving out the marked areas for the fingers and eyes. Once you have filled in the main area, you can carefully edge the bone lines down, so they are just narrow lines.
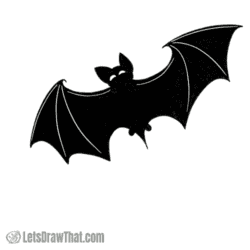
How to draw a bat silhouette: finished drawing
How to draw a bat silhouette: finished outline drawing

And here is the finished bat silhouette drawing in one colour. With the smaller head and body and a larger wingspan, the proportions on this bat look more realistic than the previous cartoon bat drawing.
How to draw a bat silhouette: finished drawing coloured-in

Since there is not much to colour in the black silhouette, let’s finish the drawing with a big yellow moon to give our bat a nice background.
Now, this is a perfect addition to your spooky Halloween drawings collection.