How to draw a strawberry: base sketch step by step
Step 1: Draw the base strawberry shape

Let’s start the strawberry drawing with the usual simple base shape sketch. Draw an oval to mark the top of the strawberry. Since our strawberry is tilted sideways, we have titled the oval as well.
Then draw the two sides of the strawberry – just simple curves. You are aiming for a nice wide barrel at the top that smoothly transitions from the oval, then narrows down. Close the shape at the base with a flat curve.
Step 2: Draw the stalk and improve the strawberry shape

Draw the stalk in the middle of the top oval. The stalk starts with a small oval at the top, with two sides slightly curved in. Finish the stalk drawing at the bottom with a wider curve line for the dip in the strawberry, similar to the one we used for the cherries drawing.
Then improve the shape of the lower part of the strawberry. Draw a flat “S” curve over the smooth line that we have sketched before on both sides.
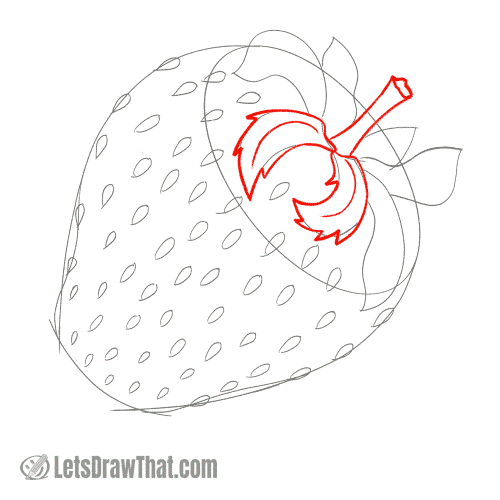
Step 3: Sketch the leaves around the stalk

In the next step, we are adding leaves around the strawberry stalk. Each leaf is made from two curves that start narrow, widen out in the middle and then curve back into a pointed leaf tip. Draw the leaves each a different shape for variety. Check out the palm tree drawing tutorial for a larger version of some very similar leaves.
Step 4: Draw the seeds on the strawberry

The last detail our strawberry needs is the seeds on the surface. These are drawn as small teardrop shapes, slightly larger at the top, getting smaller at the bottom of the strawberry.
Place a few of the seeds right on the edge line, and then cover the rest of the strawberry surface in a semi-regular pattern.
How to draw a strawberry: outline the drawing step by step
Step 1: Draw the strawberry stalk and leaves
Let’s start outlining and improving the simple sketch. Start with the leaves.
Round off the sharp corners at the top near the stalk. Some strawberries have just simple leaves, so you can outline the sketch directly. But since we like to add extra detail to the drawing where possible, we use a zig-zag line like the one from the monkey fur drawing to add some jagged edges to the leaf ends. Finally, draw the midrib line into each leaf – just a simple “C” shaped curve.
Then draw the strawberry stalk. The only change in the outline is drawing the top oval as an irregular shape. The sides of the stalk are a direct outline of the sketch.
Step 2: Draw the rest of the strawberry leaves
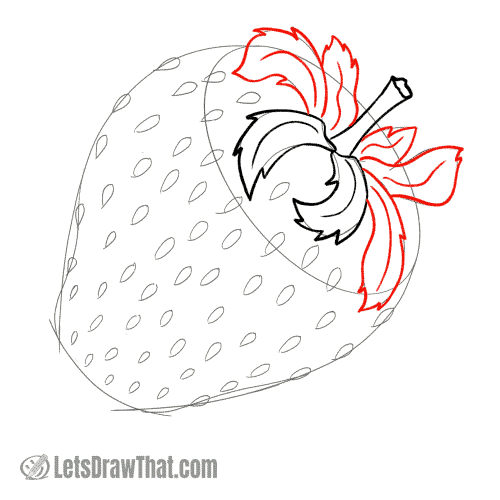
Well, after that long explanation above, all we need to say: draw the rest of the leaves the same way as the first two – adding some jagged edges at the tip of the leaves, and drawing the midrib line that follows the shape of the leaf.
Step 3: Draw the seeds on the strawberry

Now, since we have drawn some of the seeds over the strawberry edge line, we want to outline those seeds first. Just tidy up the sketched seeds into nice teardrop shapes.
Step 4: Draw the strawberry
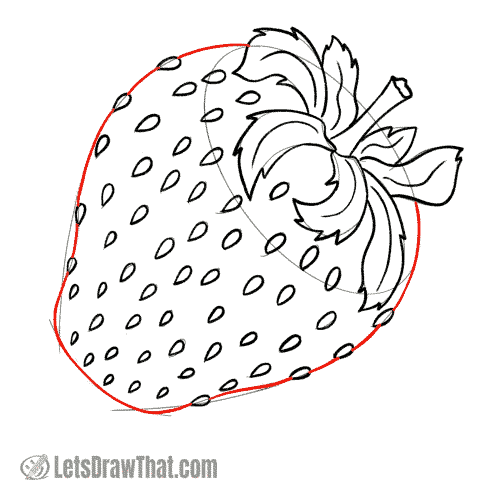
With the seeds drawn, we can finally outline the outer edge and draw the strawberry itself. Break the line where it is hidden behind the seeds. Having a few of the seed “bumps” on the outer edge makes the strawberry drawing look more interesting.
How to draw a strawberry: finished drawing
How to draw a strawberry: finished outline drawing

Here is the final result of our how to draw a strawberry tutorial after cleaning up the sketch lines – a nice, realistic strawberry drawing. See if you can decorate the cupcake drawing with it, instead of the cream dollop on top.
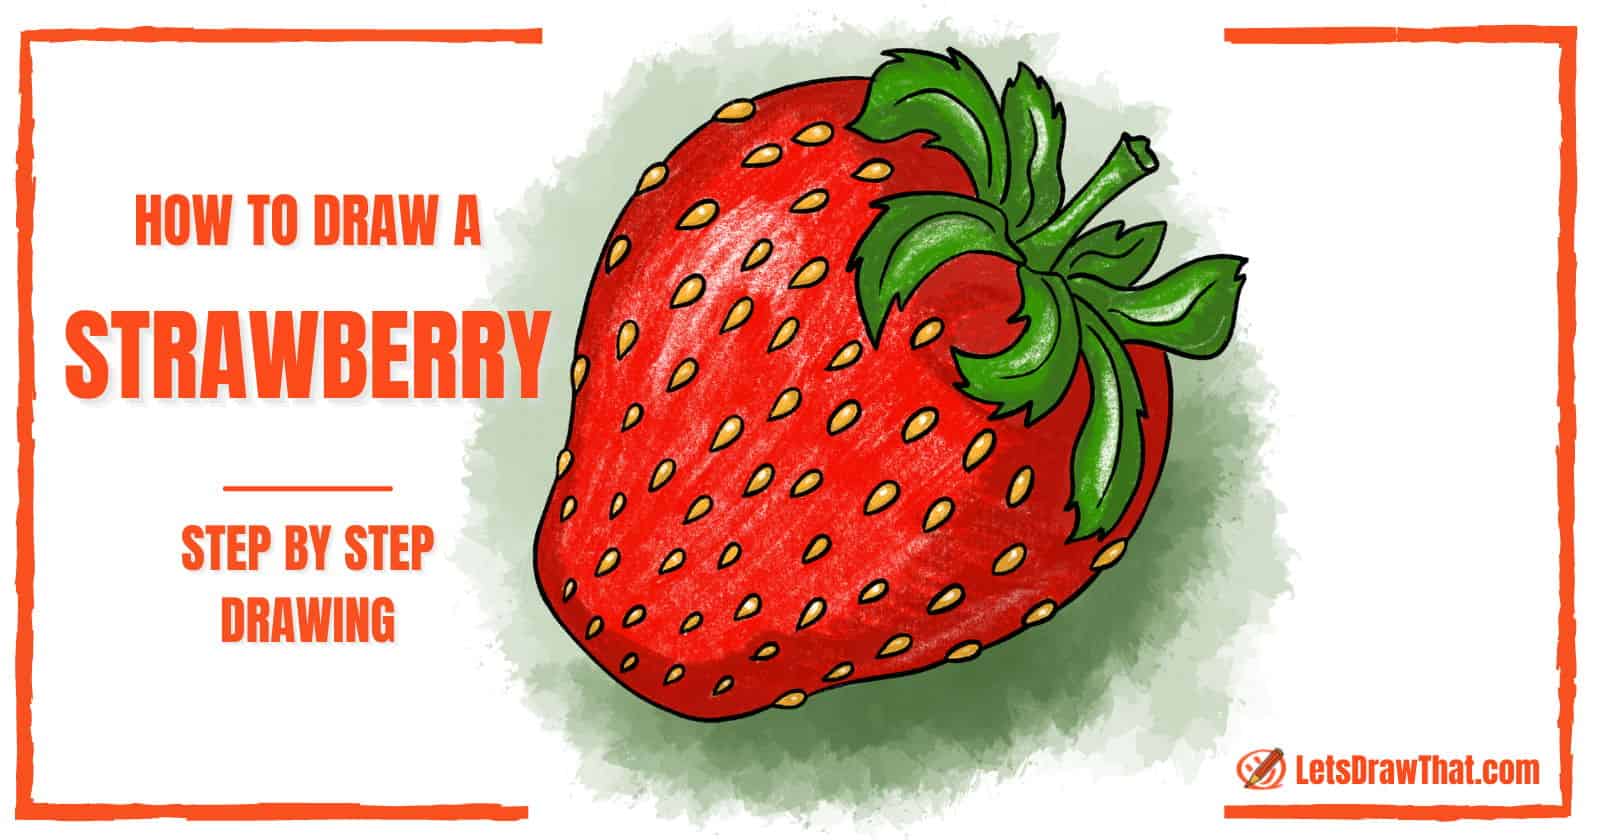
How to draw a strawberry: finished strawberry drawing coloured-in
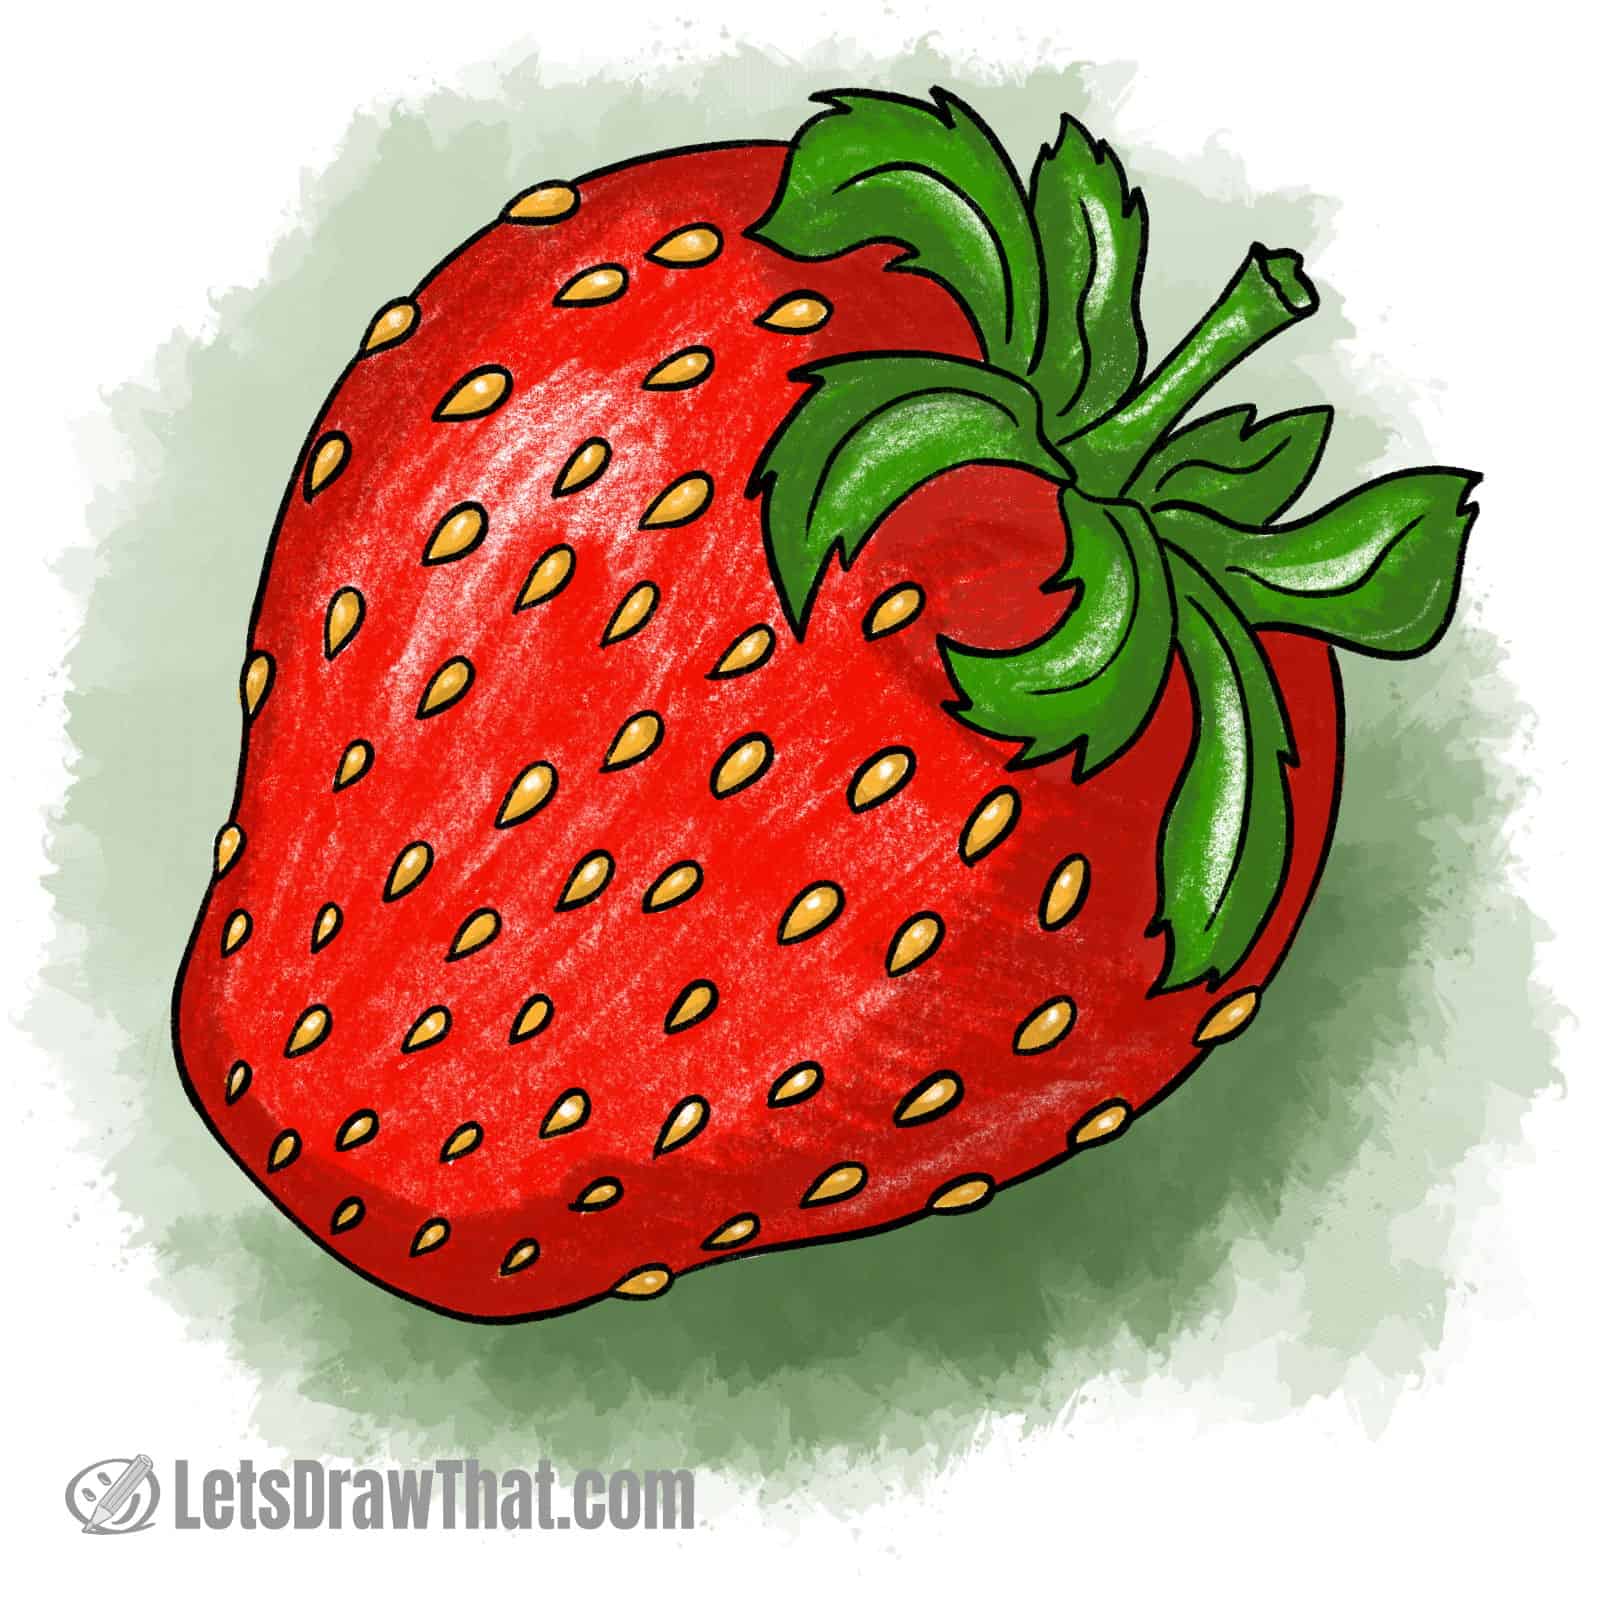
And here is the finished strawberry drawing coloured in. The strawberry is, of course, a nice bright red colour, with lush green leaves. Use darker shades of red and green to add some shading to the strawberry and half of the leaves. Finally, the seeds are dark yellow, with a small white shine each, if you really care about the details.
See, learning how to draw a strawberry is easy – and what a lovely, juicy, realistic strawberry you can draw now!