How to draw a cupcake: base sketch step by step
Step 1: Sketch the cup

Our cupcake drawing starts appropriately with sketching the base shape of the cupcake paper liner.
Draw a flat oval first. Then draw the two sides of the cup at an angle. Finish the bottom of the cup with another arc or half oval, that follows the shape of the upper edge of the cup.
Step 2: Sketch the muffin and cup folds
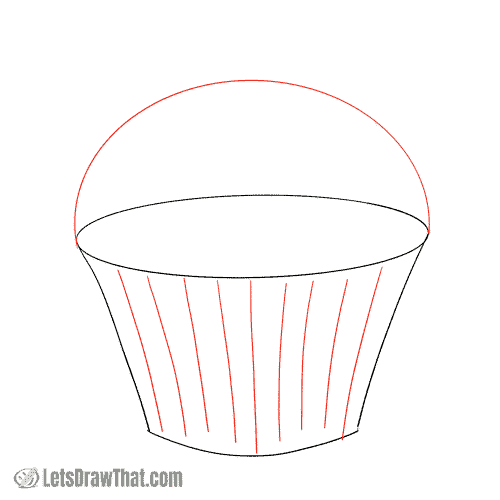
Add a simple half oval to the top of the cup – this will be the muffin inside the paper cup. Then lightly mark vertical lines over the cup to suggest the folds in the baking liner.
Step 3: Add some decoration and toppings
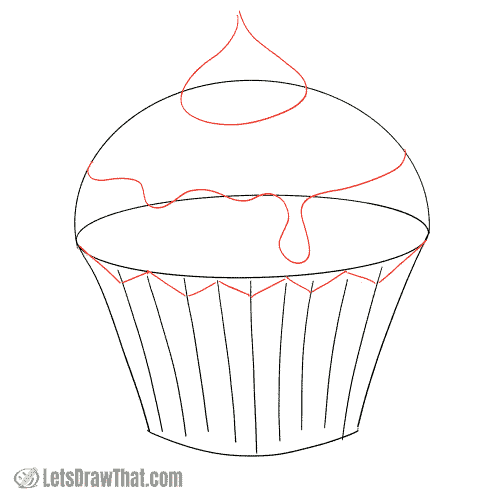
It is time to start dressing up our cupcake. First, add a dollop of cream on the top. This is drawn as a wide, flat, raindrop shape.
Then add a wiggly line for the icing edge. The baseline for the icing edge would be another smooth half-oval parallel with the edge of the cup. Draw along that line and add some drops for the dripping topping – same as we have done for the ice cream drawing.
Finally, draw the zig-zag edge of the paper cup – short up and down lines between the cup folds.
How to draw a cupcake: outline the drawing step by step
Step 1: Draw the cream dollop
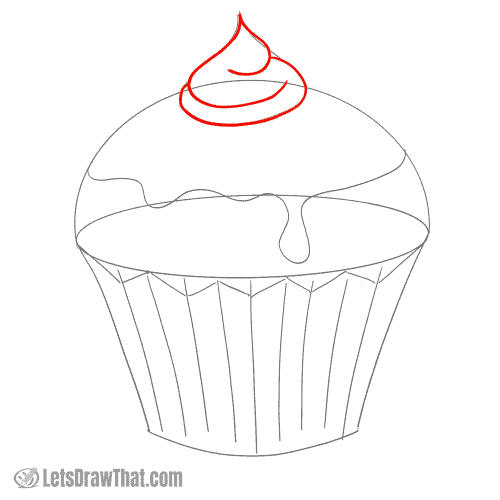
Let’s start improving on our sketch, starting with the cream dollop.
Let’s split the single drop into three separate layers. Draw these as half-drop shapes. Start with the small one to the right. Then add larger half-drop to the left. Close the shape with a half-oval that starts and ends on the widest points of the drops.
Step 2: Draw the topping and cup

Next, outline the dripping topping on the cupcake. This is a straight copy of the sketch, just with a smoother transition between the muffin top and the dripping edge.
Then outline the outer shape of the paper cup and folds.
Step 3: Draw the muffin in the cup
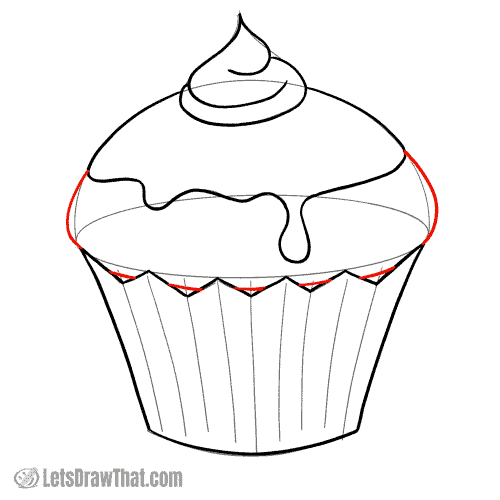
Here is a simple but important detail. When outlining the muffin, we want to draw it slightly overflowing, but still contained inside the cup. See on the picture that we are not following the smooth sketch, but rather coming out wider and then curving back towards the cup edge.
Similarly, the lower edge outline does not follow the sketched oval but rather is dropped halfway down between the zig-zag paper cup edges. That way, we get a nice 3D illusion of a puffed-up muffin slightly overflowing the cup.
Step 4: Draw some sprinkles and cup folds
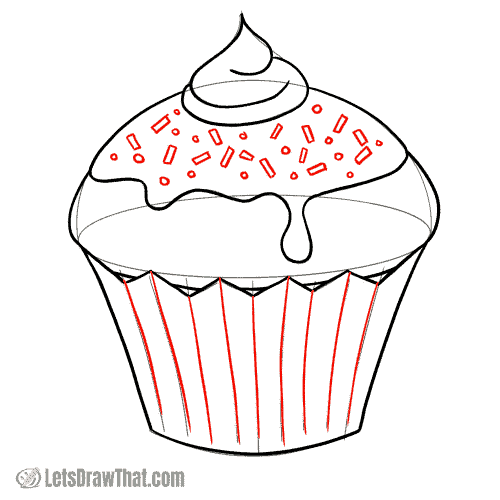
The final lines to outline are the cup folds – draw them starting flush with the top zig-zag edge, but not quite reaching the bottom of the cup.
And just for some interest and texture, let’s decorate our cupcake with some sprinkles – a bunch of random small rectangles and circles on the topping.
How to draw a cupcake: finished drawing
How to draw a cupcake: finished outline drawing

Here is the completed cupcake drawing once you erase the sketch lines. Learning how to draw a cupcake is easy – the hardest part is to come up with some awesome idea for dressing up your cupcake that looks good and is simple to draw.
How to draw a cupcake: finished drawing coloured-in

The usual final step is colouring in the cupcake. There are as many ways to colour in your cupcake as there are ways to dress up a simple cupcake – so feel free to choose your own colours.
Our cupcake is a nice brown colour – so it must be a chocolate muffin base. That colour seeps through the paper cup so that it is also brownish. Notice the darker and lighter shading on the folds to suggest some volume.
Our topping is a beautiful pink – maybe some strawberry flavour – with colourful sprinkles. Finally, the cream dollop at the top is a buttercup yellow for some colour contrast. Yum!