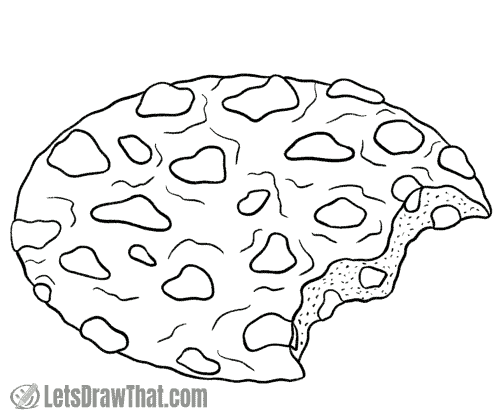
How to draw a cookie - simple top view
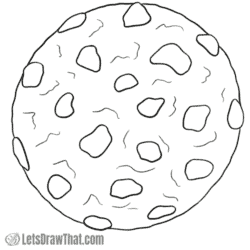
Let’s start drawing the cookie from a very simple top-down view. From the top, the shape of the cookie is a simple circle. All that turns the circle into a cookie is a sprinkling of chocolate bits.
How to draw a cookie: base sketch step by step
Step 1: Draw a circle
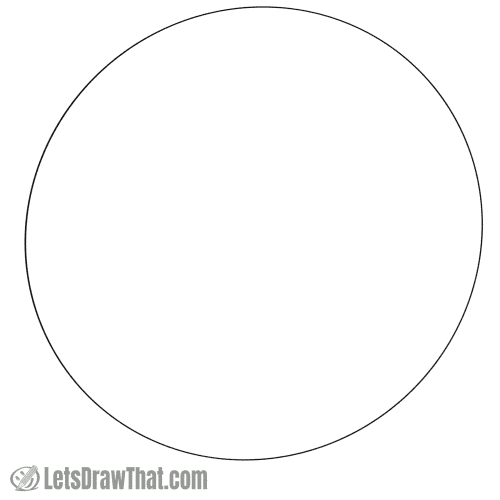
As we said, from the top, the shape of the cookie is a simple circle, so start your cookie drawing with a nice circle.
You can use a compass or trace a round lid or mug to draw a circle, but do not worry too much about the perfect shape. Homemade cookies do not need to be perfectly round. Also, we will be making the line wobbly later on, so no need to be too precise.
Step 2: Sketch the chocolate bits on the cookie
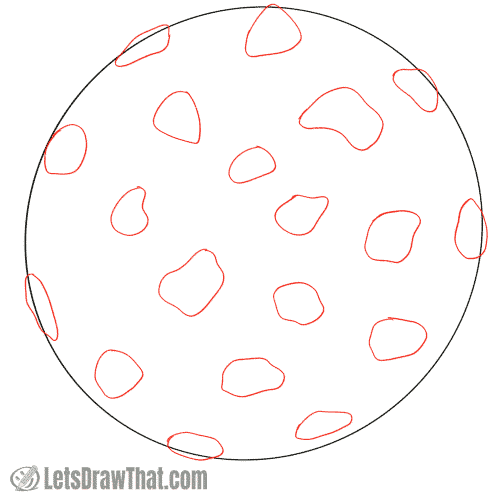
Let’s turn the circle into a cookie by drawing some chocolate chips on the top of the cookie.
Place some small irregular shapes onto your cookie. Also, notice that we have a few of the chocolate bits sticking out across the circle edges – that will make the cookie drawing look less uniform and more interesting.
How to draw a cookie: outline the drawing step by step
Step 1: Draw the chocolate bits on the cookie

Here is another easy step – just outline those chocolate chips we have sketched in the previous step.
Well, you could have drawn them out straight away. But it is a bit tricky to make those choc chips cover the cookie nicely. What you see here is the polished version, we were moving them around a fair bit. So first a sketch, then the outline seems like a better way.
Step 2: Draw the cookie edge
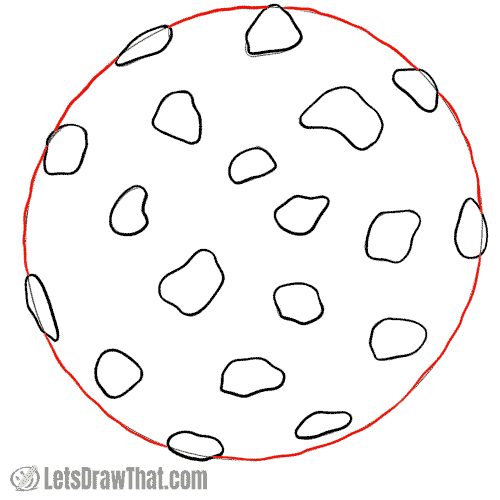
Yet another easy step: outline the edge of the cookie. Make the line slightly wobbly, to suggest the rough cookie dough edge.
Step 3: Add some cracks to your cookie

The final simple improvement is adding some crack lines – the cookie dough usually develops some small cracks as it bakes.
Just draw small squiggles between your choc chips. Make the line a touch lighter or thinner than the cookie and chip outline.
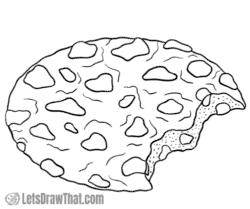
How to draw a cookie: finished drawing
How to draw a cookie: finished outline drawing
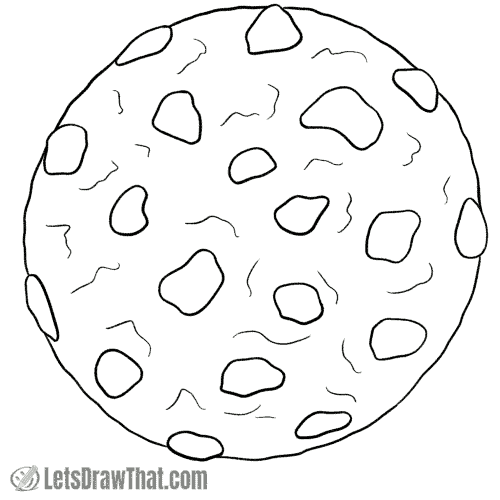
And here is the finished drawing – a nice and simple yummy choc chip cookie. Having some of the choc chips sticking out of the cookie edges adds more interest and detail to the cookie drawing, what do you say?
How to draw a cookie: finished drawing coloured-in

Now that you know how to draw a cookie, all that is left is to colour it in. Here we are going for a light beige colour for the dough and a dark brown for the choc chips.
The real trick here is adding the darker shading around the edges of the cookie, to give it a feeling of thickness. Add (or erase out) a few white highlights as well to enhance the 3D look.
How to draw a cookie from the side view
Let’s draw the second cookie in a three quarter side view. Just for some fun let’s bite out or break off a piece of the cookie to add some more interest and detail to the simple cookie drawing.
How to draw a cookie from the side view: sketch
Step 1: Draw an oval
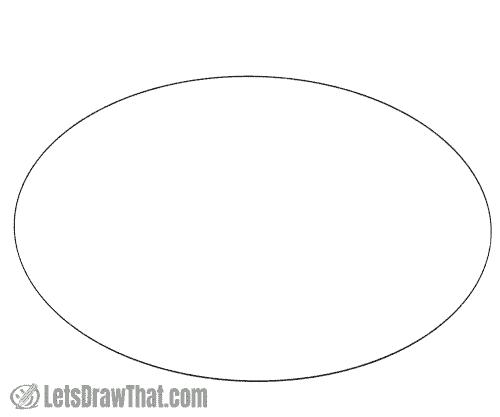
If you look at the cookie from a side view, the perfectly round cookie flattens into an oval. So draw a nice oval first.
Again, you do not need to be too precise, as we will make the lines all wobbly again later.
Step 2: Draw the cookie bite
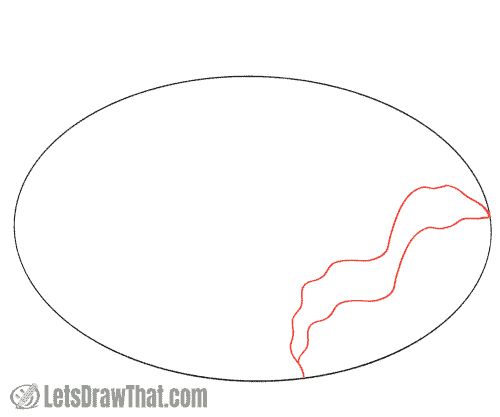
Now, let’s draw the bite out on the cookie. While the shape of the bite can be any random line, there are a few things to watch for to make it look good.
Start on the right middle with a kind of flat laying “V” shape – this is the shape of the cookie edge, where the dough thins out. After the “V”, draw the top line first – any wiggle shape you fancy. Then repeat the same wiggle for the lower line, as if you moved the top line down by the thickness of the cookie. Notice the ending – the lower line disappears behind the top line, as the bite curves back.
Well, that is a very long explanation for two random-looking lines for sure…
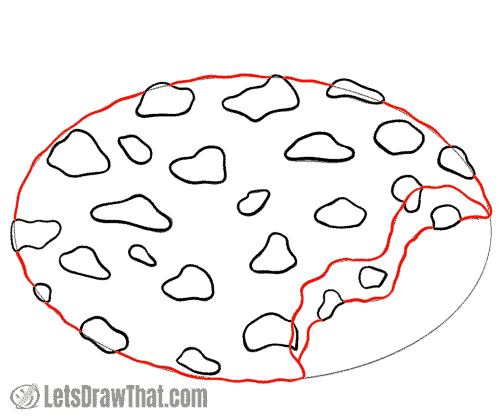
Step 3: Sketch the choc chips on the cookie

You already know how to draw the rest of the cookie – it is the same as above.
Draw some irregular choc chip shapes all over your cookie with a few of the chocolate bits sticking out across the circle edges again. Also, add some small choc pieces to the bitten out edge.
How to draw a cookie from the side view: outline
Step 1: Draw the choc chips on the cookie

Once you are happy with the sketched shapes and how they cover your cookie, outline all the choc chips.
Step 2: Draw the cookie
Now it is time to outline the cookie edges. Same as before, make the line slightly wobbly, to suggest the rough cookie dough edge.
Break out the edge line for the choc chips, as they stick out of the cookie dough. Notice, though, that the upper bite line goes through the chip shapes, to suggest the edge in the chocolates where they were bitten out.
Step 3: Add the cracks and texture to the cookie dough

Here are the final details to finish on our side view cookie drawing. Add some cracks on the top of the cookie dough as we did before – just a few squiggly lines. Then add some texture to the bitten out part – those are just small dots.
How to draw a cokie from the side view: finished drawing
How to draw a cookie from the side view: finished outline drawing
Here is the cleaned-up result of our second how to draw a cookie tutorial – with that piece bitten out, it is even more obvious that our simple drawing is a yummy cookie.
How to draw a cookie from the side view: finished drawing coloured-in

Finally, here is the cookie drawing coloured in – we have used the same colours as before, but feel free to colour the cookie as a darker brown cocoa dough with white choc chips if you feel like some change.
Also, note the change in the shading – since this is a side view, the darker edge narrows down until it disappears completely on the top left.
How to draw a pile of cookies

While we are this far, let’s put those two previous cookie drawings together and add another cookie on the top to show you how to draw a pile of cookies.
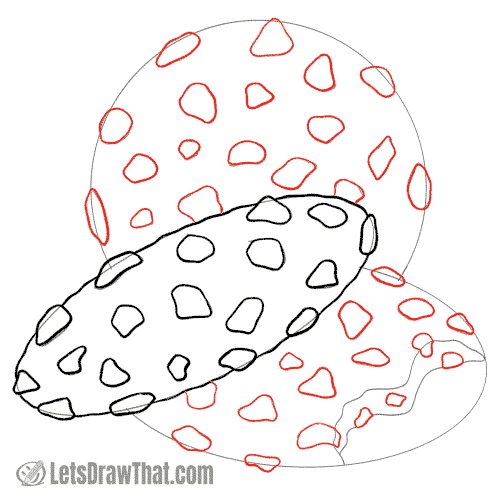
How to draw a pile of cookies: sketch
Step 1: Draw the base cookie shapes
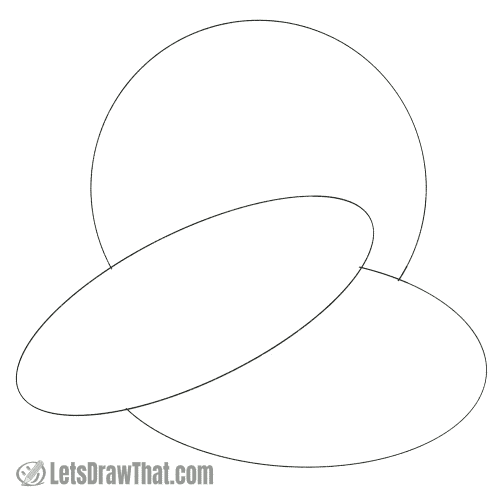
Here we go again. As you know by now, the cookie from the top looks like a circle, from the side view it becomes an ellipse. If we flatten the ellipse bit more, it will give us yet another side view.
So draw out all the ovals, and erase the parts that overlap, so we can tell which cookie is on top of which.
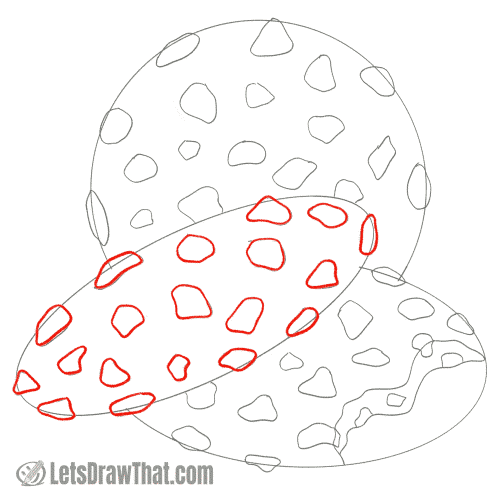
Step 2: Draw the bite and first choc chips

Now, as you have done this before, let’s go fast: draw the bite in the cookie the same as above. Cover the cookies with choc chips, starting out with the narrow oval one at the top.
Step 3: Draw the choc chips on the other the cookies

Cover the remaining two cookies with the choc chips.
If you have really keen eye for detail, you will notice that we have moved the chips around a bit to make a nice pattern across all three cookies and not to overlap along the edges.
How to draw a pile of cookies: outline
Step 1: Draw the chocolate chips on the cookie
Outline the chips on the top cookie first.
Step 2: Outline the top cookie edge

Next, we need to draw the edge line of the top cookie – again, use a bit wobbly line to make it look like a rough dough cookie edge.
Step 3: Draw the chocolate chips on the cookie
Outline the chocolate chips on the remaining two cookies next.
Step 4: Draw the remaining two cookies
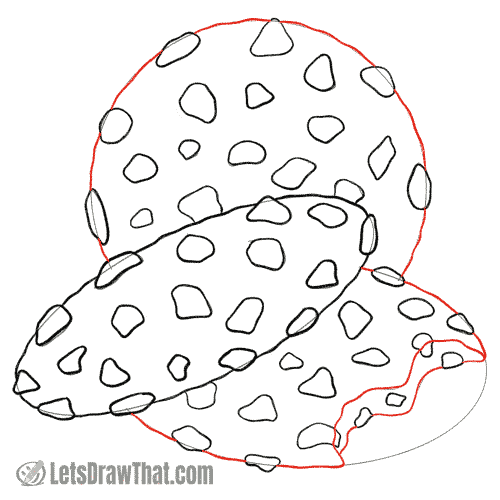
Outline the edges of the remaining two cookies. Remember the trick – the outer cookie edge lines are broken for the choc chips, while the top line of the bite continues through them.
Step 5: Add the cracks and texture to the cookie dough
Finally, draw the last details the same as before – add some cracks to the dough and some dot texture to the side that is bitten out.
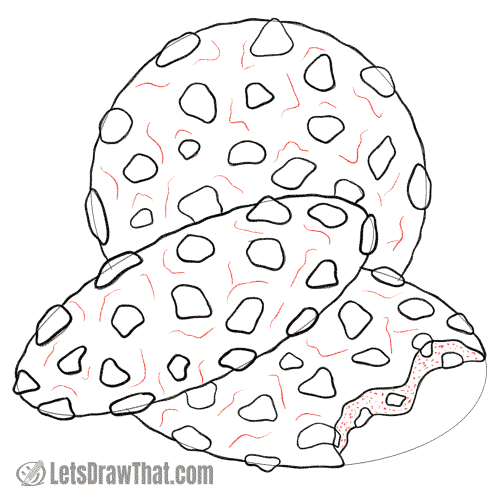
How to draw a pile of cookies: finished drawing
How to draw a pile of cookies: finished outline drawing

Ta da, here is the finished pile of cookies drawing, once the sketch lines are erased.
If you have followed the entire tutorial, you have drawn a fine total of five cookies – that is enough practice to learn how to draw a cookie from any angle.
How to draw a pile of cookies: finished drawing coloured-in

And here is the final coloured-in picture to wrap up our “How to draw a cookie” tutorial. Yep, we are going for the same light beige dough and dark brown chocolate again.