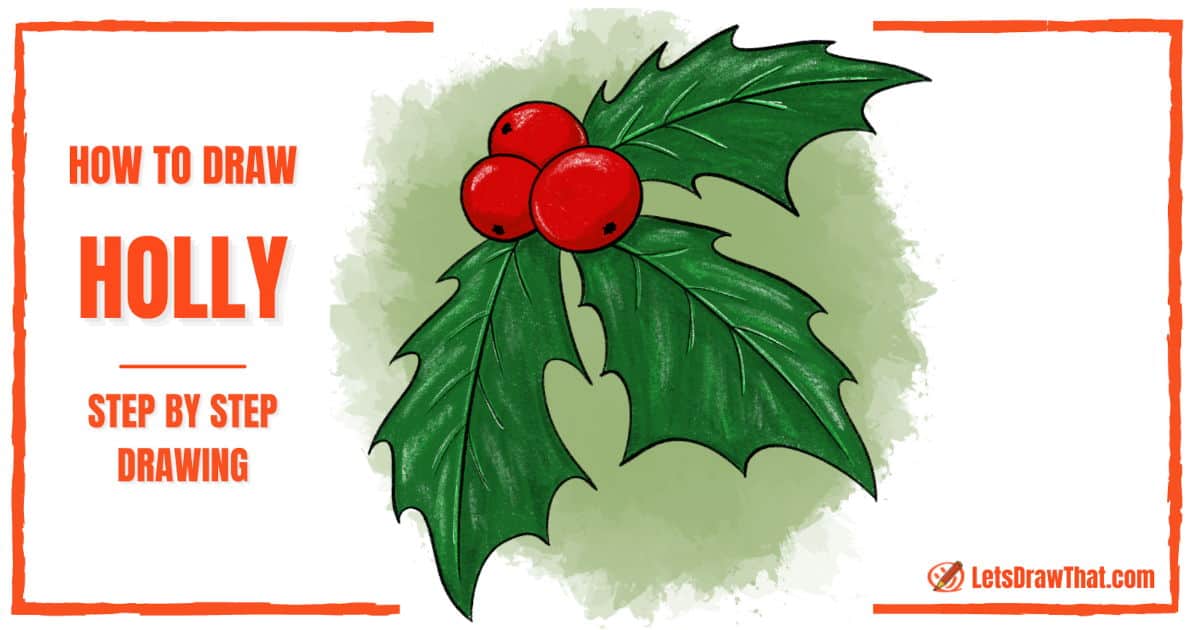
How to draw holly: base sketch
Step 1: Sketch the berries and leaf midribs
To start our drawing, let’s sketch out the berries. Draw three overlapping circles. Make one of them slightly larger than the other ones, this will be the front berry.
Then, draw three lines to mark the direction for the holly leaves – these will become the leaf midribs.
Step 2: Sketch out the leaf shapes

Here, use the lines that you drew in the last step as guides. Draw each leaf as a kite shape, with the widest point being about two-thirds away from the berries in the middle.
How to draw holly: outline the drawing step by step
Step 1: Draw the holly berries

Outline the berries, starting with the largest one that will be in the front. Then, outline the next berry to the side, leaving out the part that is now covered by the front berry. Repeat that for the last berry, only outlining the parts that aren’t covered by the other two berries.
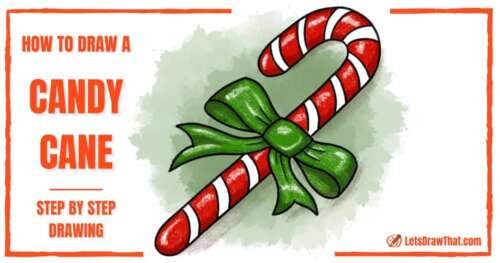
Step 2: Add prickles to the holly leaf

Holly isn’t holly without the signature prickles on the leaves themselves, so let’s add those in. Use upside-down “J” shapes to draw a jagged line with a series of spikes. Make sure to line up one spike on each side with the widest corners of the leaf.
Notice that the curves are smaller on the inner part of the leaf, closer to the berries, and larger and more spaced out on the outer, bottom half of the leaf near the tip.
Step 3: Draw the holly leaves

Well, now that you have mastered how to draw a holly leaf, repeat the last step again for the other two leaves, outlining them with the same jagged spiky “J” line.
Step 4: Add in final details.
To finish off our holly drawing, let’s add in a few more details.
First, draw out the midribs. Here we have slightly adjusted the position from the sketch to make them better follow the centerline of the finished leaves.
Then, add the smaller side veins onto the leaves, pairing them off into “V” shapes. Finally, add a small star-shaped dot for the calyx on each berry.

How to draw holly: finished drawing
How to draw holly: finished outline drawing

Here is the result of our how to draw holly tutorial, once we have erased the sketch lines.
As you can tell, drawing holly is fairly easy. That makes the holly drawing a very useful addition to your Christmas drawings – try adding it as a corner decoration to your Christmas cards, or attach it to a present or candle drawing to instantly add some Christmas atmosphere.
How to draw holly: finished drawing coloured-in
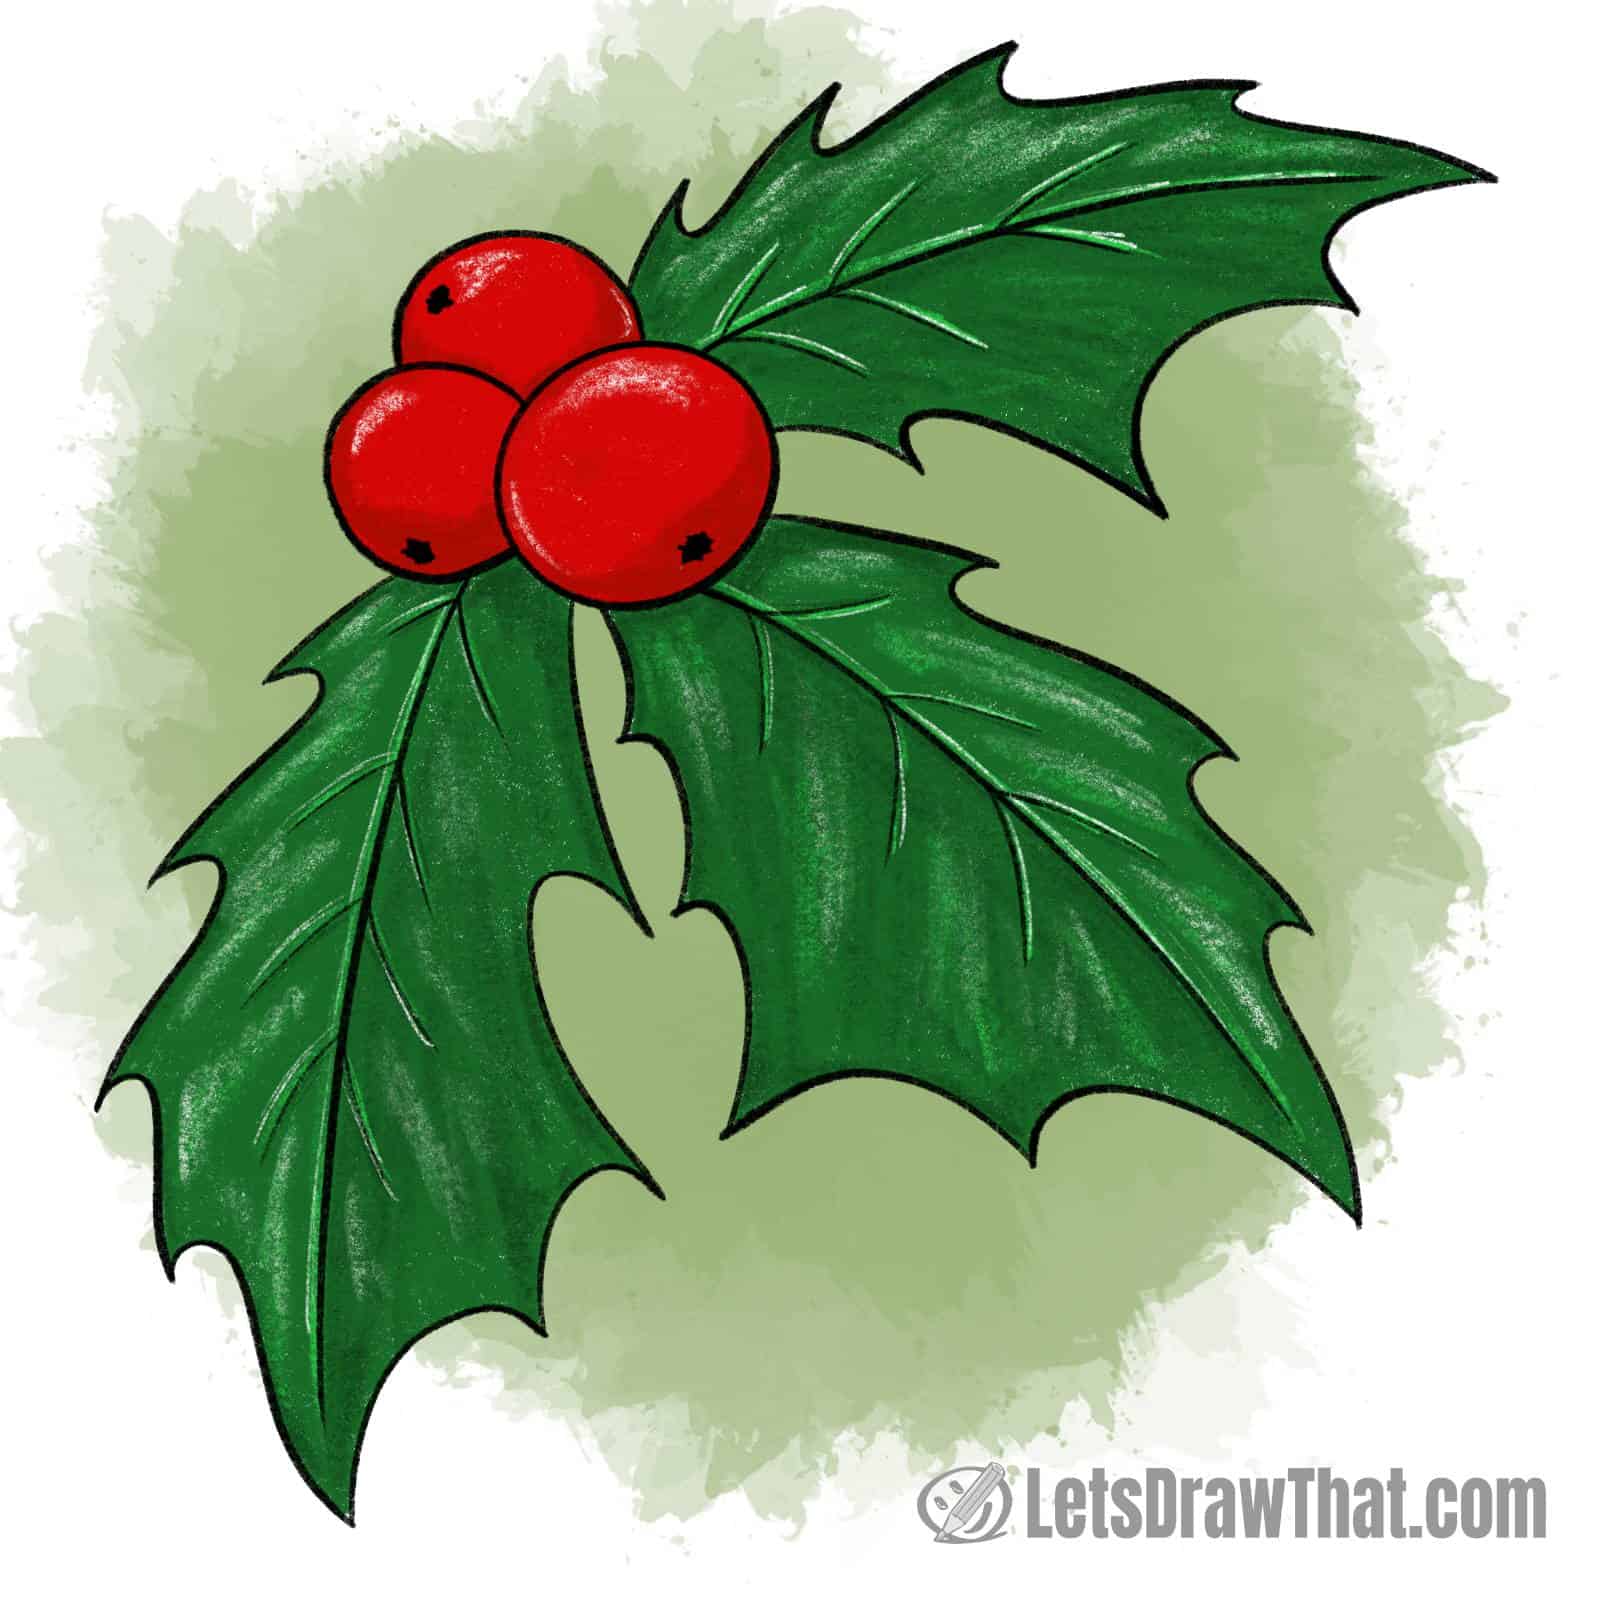
Now that you know how to draw holly, all that is left is to colour in the drawing. Well, colouring is as simple as the drawing itself – the holly berries are red, and the holly leaves are green.
If you are after a more realistic looking holly, you can shade the picture. Add some darker green shading and light green highlights to the leaves for extra texture. Similarly, use darker red shaded areas on the bottom right sides of the berries, and then only colour lightly where the highlights are.
Merry Christmas!


