How to draw a candy cane: base sketch
Step 1: Draw the cuved candy cane top
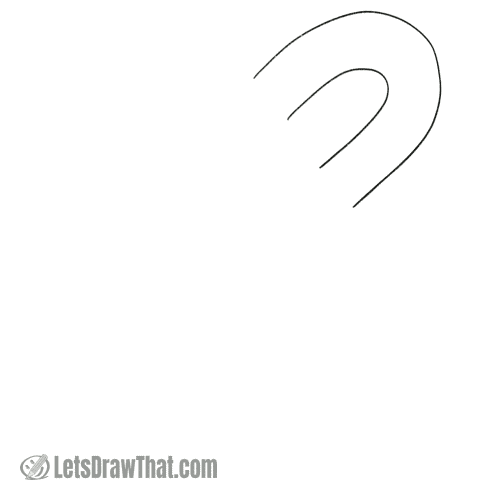
Let’s start our candy cane drawing from the curved top. Draw one small, upside-down and sideways tilted “U”. Then draw another larger one around it. The distance between the two is how thick your candy cane will be.
Step 2: Extend the candy stick side

Next, extend one side of the “U” with two straight lines – this will be the long stick of the candy cane.
Step 3: Close the candy cane shape
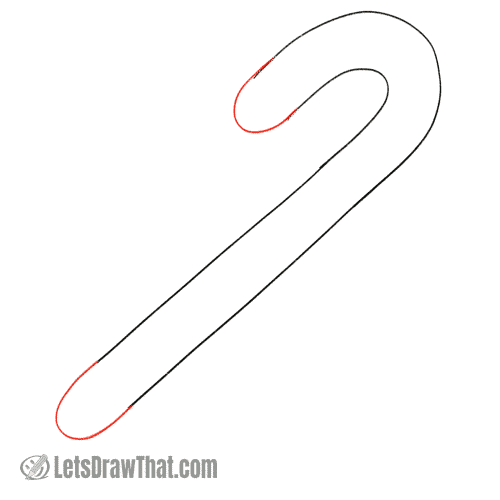
Finish drawing the base candy cane shape by closing it with two more “U” shape rounded ends.
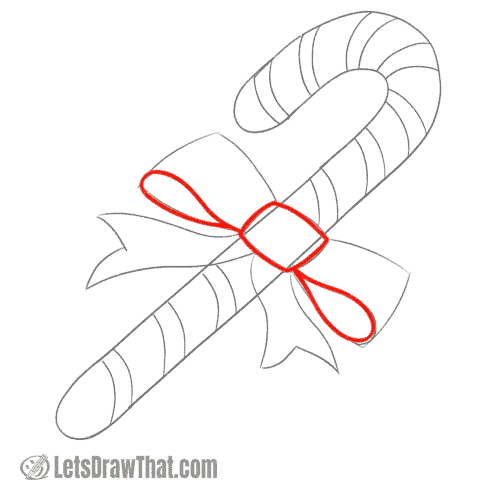
Step 4: Draw a bow tie on the candy cane
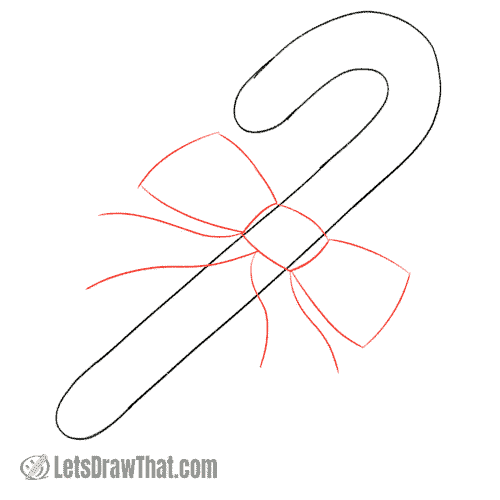
Next, let’s draw a fancy bow tie on the candy cane. Draw a rectangle with rounded sides over the middle of the cane for the centre bow tie knot. Add two longer rectangles that slightly widen out on the outside for the bow folds. Finally, draw the squiggly lines going down from the knot for the loose bow tie ends.
Step 5: Finish off the bow tie
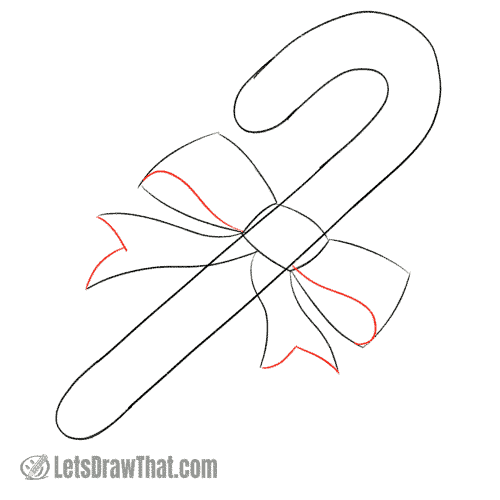
Let’s finish off the bow tie. Close the loose ends with “V” shaped cutouts. Then draw two flat “S” lines to suggest the fold over in each side wing of the bow tie.
Step 6: Draw the candy cane stripes

Finally, finish the candy cane sketch by adding cross stripes. Here we are drawing narrow white stripes with wider gaps in between them.
Notice how the cross lines start at 90 degrees to the inner edge and then bend towards the outer edge – this makes the cane look round.
How to draw a candy cane: outline the drawing
Step 1: Draw the bow tie bend
Let’s start outlining the candy cane drawing and improving on the simple sketch a bit.
Start by drawing out the bow tie knot and the lower fold. Notice how we have smoothed out the curve a bit.
Step 2: Draw the rest of the bow tie

Now, draw the upper edge of the bow tie – we have again slightly re-shaped it so it now better follows the smooth lower edge.
Leave the top outer corners sharp and close the outer edges of the bow tie with almost a straight line.
Step 3: Draw the outer candy cane shape
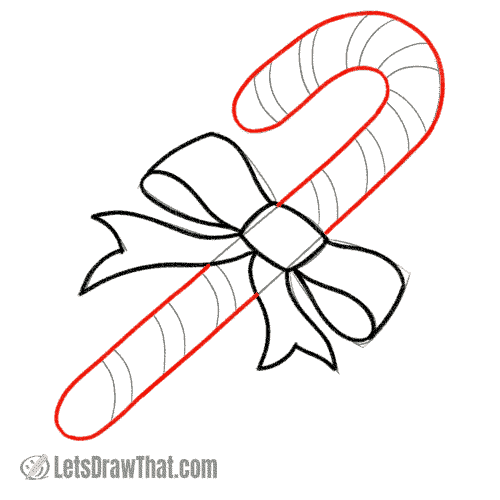
The next step is easy – just outline the outer shape of the candy cane from the sketch. Smooth out the curves and any transitions between the lines.
Step 4: Draw the candy cane stripes
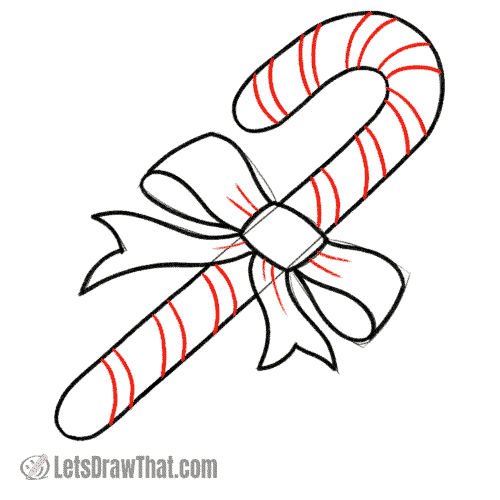
Another easy step – outline the stripes on the candy cane from the sketch.
A final small detail is to draw a few short lines to suggest the crinkles on the bow tie where it enters the knot.
How to draw a candy cane: finished drawing
How to draw a candy cane: finished outline drawing

Here is the cleaned-up result of our how to draw a candy cane tutorial – one sweet looking cane with a lovely bow tie, perfect to hang as a decoration on a Christmas tree.
Candy cane drawing coloured-in

And here is the candy cane drawing coloured in. We are definitely going for Christmas colours here: a red candy cane with the narrow stripes left white, and a nice green bow tie.
Just notice the shading on the candy cane that makes it look round- the left out highlights on the left and darker shades of red on the right edge.