How to draw a candle: base sketch step by step
Step 1: Draw a cylinder for the candle body
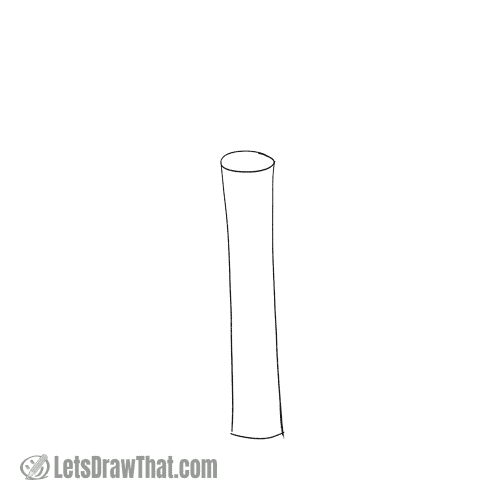
The base sketch for the candle is really easy – draw a 3D cylinder. Make it as wide and as tall as you want your candle to be – just choose one of the many candle types.
Now, how do you draw a 3D cylinder on flat paper? Draw an oval at the top first. Then draw two straight sides down. Do not worry too much if they are a bit wobbly – we will make them even wobblier very soon.
Close the cylinder shape at the bottom with a curve – this would be the same shape as the lower half of the oval at the top of the cylinder.
Step 2: Sketch the candle wick and flame

Let’s turn the cylinder into a candle drawing. Draw a short line up from the middle of the top oval – that is the candle’s wick.
Then draw the flame outline – this one is a nice teardrop shape, round and wide at the bottom, narrowing down into a pointy tip. Notice that we have drawn the sides slightly different sizes – the right side is dropping below the left – for some added interest.
How to draw a candle: outline the drawing step by step
Step 1: Draw the candle wick and flame
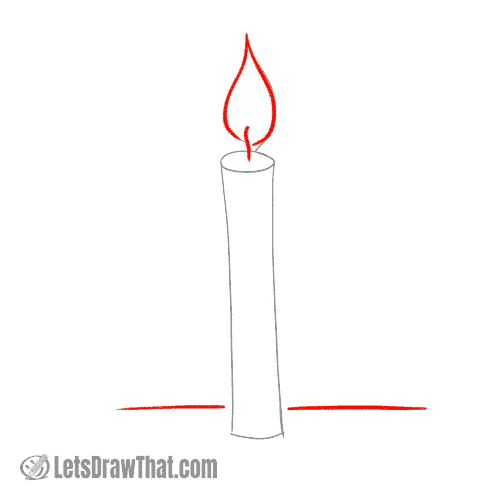
As you can see, learning how to draw a candle is super easy – the sketching is done in just two steps. Well, outlining the candle drawing is not much harder.
Start by drawing out the wick and flame. The small, barely noticeable change is that we have drawn the wick as a slight “S” curve. It looks better and more like a real wick.
Then draw a flat surface, edge of a table, if you wish, for the candle to stand on. Since we are drawing the candle in a 3D view, we have placed the line slightly above the bottom end of the candle.
Step 2: Draw the wax candle body

Finish the candle drawing by outlining out the wax candle body. Here we are just drawing a simple straight, brand new candle.
The small improvements on the sketch are drawing out the top end of the candle slightly wider before tapering down to the barrel body, as well as widening out the base, where the candle melts out to the table.
Step 3: Finished simple candle drawing

Here is the finished first variation: a very easy way how to draw a candle with just a straight wax body.
You can stop drawing here if you like the simple candle drawing.
Step 4: Draw a candle with a dripping wax

Next, let’s redraw the candle into a well used and worn candle with wax dripping down all over the candle body. Drawing dripping wax is similar to drawing dripping ice cream or the dripping icing on the cupcake that we have done before.
Widen out and extend the edges at the top of the candle. Then draw a nice long drip from in the middle of the candle, where the flame melted the edge and wax has dripped down the body.
When outlining the sides of the candle, draw again some wobbly lines to add drips to the sides of the candle. Then draw the lower straight part of the candle and the wider melted base attached to the table.
How to draw a candle: finished drawing
How to draw a candle: finished outline drawing

Here is the finished second variation on how to draw a candle: a lovely old candle covered in dripping wax, burning with a nice straight flame.
How to draw a candle: finished candle drawing coloured-in

To colour in the candle drawing we have used lots of yellow: a darker yellow for the candle body and a bright yellow for the flame. We have also added a light yellow circle around the top of the candle to suggest the light glow from the candle flame.
The real trick to a nice coloured candle though is all the extra colours used for shading. To make the flame look more real, draw a smaller orange centre of the flame and add some texture lines with the same colour. Check the flames on our rocket drawing, if you want to make the flame even more colourful.
Now, for the wax candle body, leave a small bright patch for the highlight and use some orange, beige and light brown for the shading and texture.
And that is it – now you know how to draw a candle!