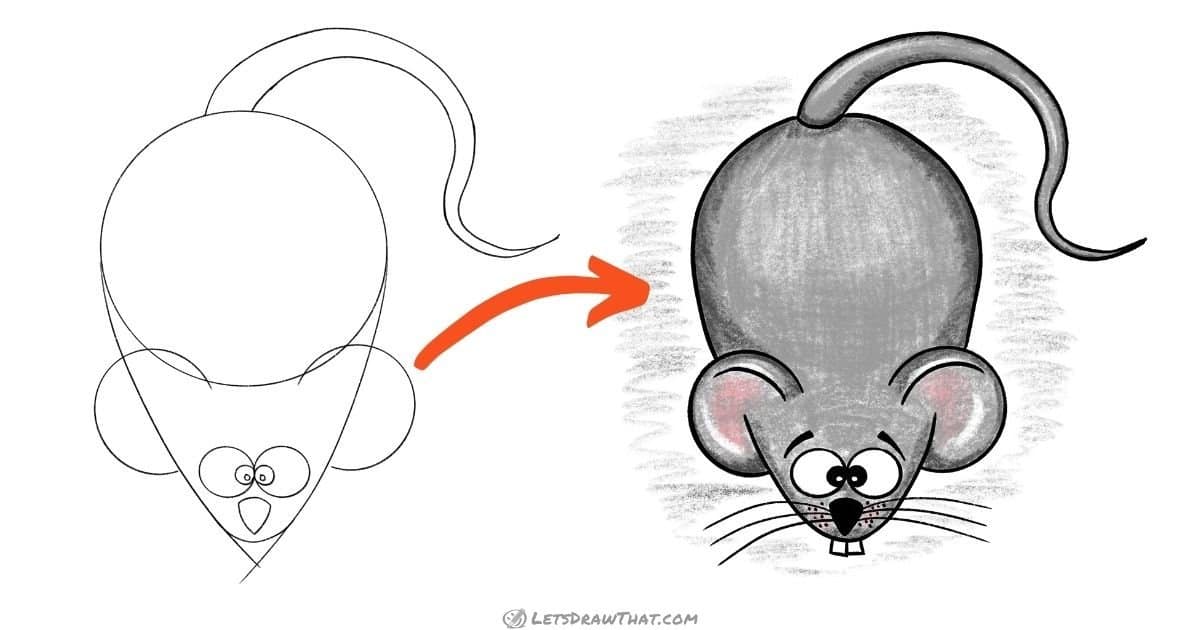
Easy mouse drawing: base sketch step by step
Step 1: Draw the base mouse body shapes

Let’s start our easy mouse drawing with a simple base shape. Draw a circle – this will be the mouse’s upper body. Then extend the lower half of the circle with two slightly curved lines to draw a “V” shaped mouse head.
Step 2: Draw the mouse's ears and nose

Next, add two semi-circles, one on each side where the head meets the body – these will be the mouse’s ears. Then round off the pointy tip of the mouse’s nose to make the body into a nice egg shape.
Step 3: Draw the mouse's face
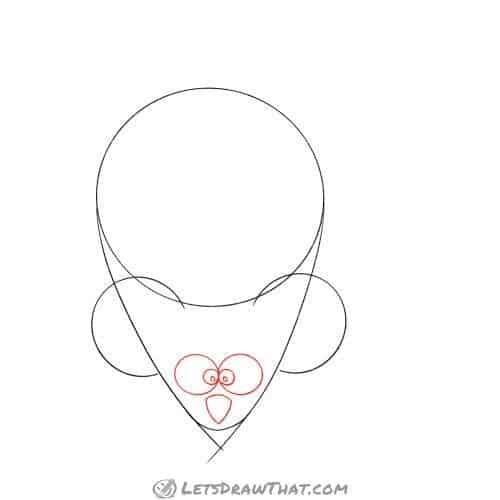
Let’s give our mouse some face. Keeping with the easy drawing theme, the eyes are just two small circles with tiny inner circles for the pupils.
Then draw the nose. The nose is made from a small triangle with curved sides – it kind of copies the shape of the initial “V” shaped pointy head sketch.
Step 4: Draw the mouse's tail

One last feature that turns our easy drawing into a mouse is a nice mouse tail. The mouse tail is drawn from two “S” curves that are wider apart where the tail is attached to the body, and narrow down to a nice pointy end at the tail tip.
Easy mouse drawing: step by step outline
Step 1: Draw the mouse's head

Let’s improve on the simple mouse sketch. Start by outlining the head. Draw the lower head arc, but only as far as the middle of each ear. i.e. leave a gap between the chin line and the top of the ear. Then draw the ear semicircles.
Step 2: Draw the mouse's body and tail

Next, outline the mouse’s body and tail. The small but important improvement here is the rounding of the tail end, so it slightly protrudes into the mouse body. The rest of the lines are a direct outline of the sketch.
Step 3: Draw the mouse's face and whiskers
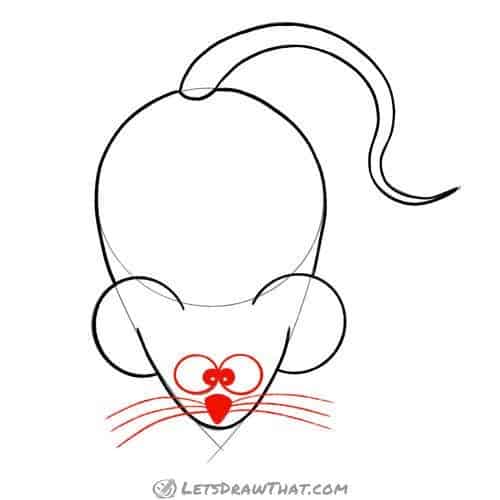
In this step, outline the eyes and nose. Colour in the nose and pupils, leaving a small white dot inside each pupil.
Next, add another mouse trademark feature – nice long whiskers. These are drawn as three slightly bent lines on each side coming out from the nose.
Step 4: Add final details

Our mouse drawing is almost done. But as usual, we can still improve it with a few extra details.
Add some dots around the mouse’s nose to suggest more short hair. Another typical mouse feature is two long square rodent teeth poking out of its mouth – so let’s draw those.
Then double up the inner part of the ears, to suggest some thickness there. Finally, add two thick lines on the sides of the eyes for the eyebrows – those just give our mouse a cute and slightly surprised expression.
Easy mouse drawing finished
Easy mouse drawing: finished outline drawing
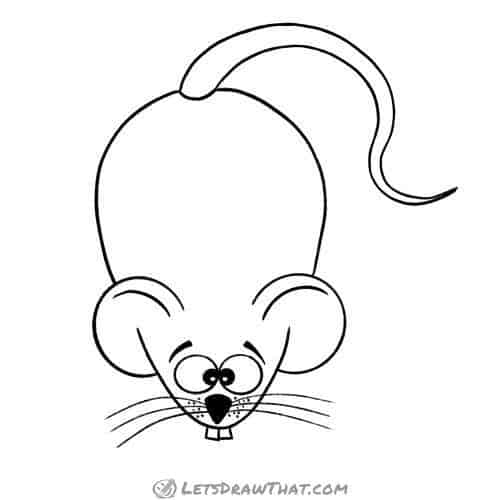
That is it – here is the complete outline for our easy mouse drawing, once we have erased the sketch lines.
Just by adding a few of the mouse “trademark” features – round ears, pointy nose, whiskers and a curved mouse tail – we have turned a simple oval into an easy to draw mouse.
Easy mouse drawing: finished drawing coloured-in

Even colouring the simple mouse is easy – just colour it in grey with a darker colour for shading. To add a touch of healthy colour, we have added a second pink layer over the inner ears. And that is our easy mouse drawing completed.
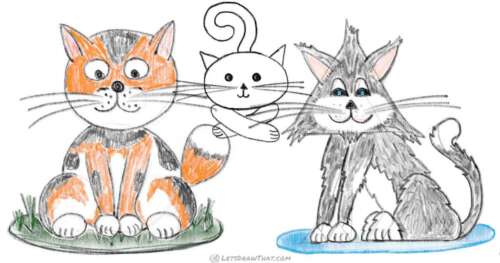
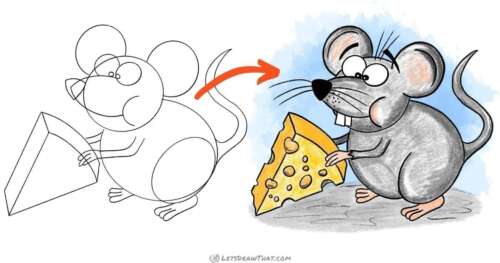
If you have enjoyed drawing the easy mouse and are looking to test your drawing skills on a more advanced version, you might want to learn how to draw a cartoon mouse next.