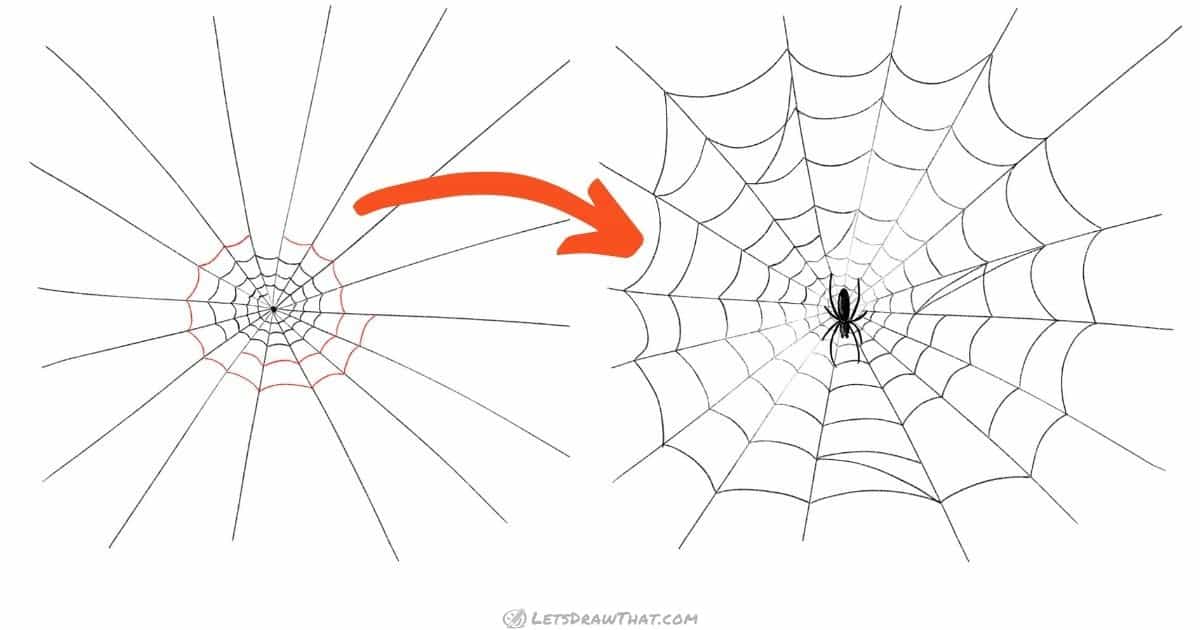
Spider web drawing - step by step
Step 1: Draw the web base frame lines
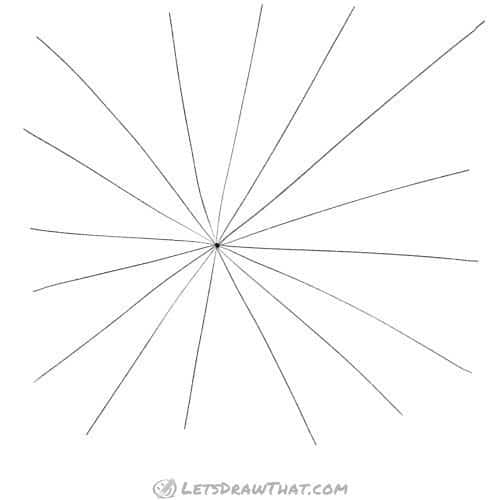
Mark a dot on your paper, which will be the centre of your spider web. Then draw straight lines from the centre to the edges of the paper. These will be the base frame threads to build the web around.
If you want to draw just a simple spider web, draw about 8 lines. For a more realistic web, that will take more patience to draw, add more threads. Here we have 16 lines in total.
Step 2: Start weaving your spider web

Pick one line, and start drawing a spiral. The spiral is made from small arcs that connect the straight frame threads – just jump from one to the next with a small curve, slowly widening out the spiral.
Again, depending on how perfect you want your spider web, draw either a tight spiral, if you are patient, or a large loose one for a much simpler and faster spider web drawing.
We want our spider web to look good, so here we are drawing a tight spiral with many layers.
Step 3: Skip a line here and there

While we are weaving out our web with small arcs, it is time to add some “broken” threads. Here and there, randomly skip a line, to make a hole in the perfect spiral pattern. Notice the two holes we have “missed”?
Again, this is not needed if you are drawing a simple spider web. It just makes the drawing look more like a real spider web.
Step 4: Build up your spider web

This step just follows what you have already learned: Build up the spider web spiral with small arcs. Slowly widen out the thread spiral. Skip the line here and there to add a hole. Keep going, until you have built up the spider web as big as you want it.
Step 5: Close the spider web and add some patch threads

Now our spider web is almost complete. Here we are adding some final cross-lines to break our perfect web and make it more realistic looking.
The first line finishes the continuous spiral thread. The other lines are random “patches” over the holes we have made in the spider web.
Step 6: Spider web drawing: completed spider web

Here is the completed spider web drawing.
You can stop here if you want, or you can follow the next steps to make the web even more realistic looking.
Spider web drawing: break the perfection
Step 1: Lightly erase part of the drawing

If you have noticed, real spider webs are often hardly visible. Here is an attempt to simulate that in our drawing. Take your eraser, and lightly brush over the area highlighted in the picture.
Step 2: "Disappearing" spider web drawing

Here is the result – the lines do not appear as uniform and are slightly broken up and “disappearing” in the light.
Spider web drawing: finished drawing
Finished spider web drawing

Here is our completed spider web drawing. We have added a small simple spider to the web – two ovals and eight legs. If you want to learn a few different ways to draw a spider, we have a step-by-step tutorial for that as well.
Spiders usually sit in the centre of the web, waiting for their prey. The vibration from the stretchy threads when a fly lands anywhere in the web notifies Mr Spider that dinner is ready to be served.