How to draw an ice cream: base sketch
Step 1: Sketch the ice cream cone

Every ice cream needs a proper waffle cone to sit in. Drawing a cone is easy – one oval for the top opening, with two straight lines down on the side that meet at a pointy end.
Step 2: Sketch two scoops of ice cream

Time to add some ice cream to the waffle cone. The bottom scoop is partially hidden inside the cone, so draw that one as a half-circle only. Then sit the other scoop on top – drawn as an overlapping circle.
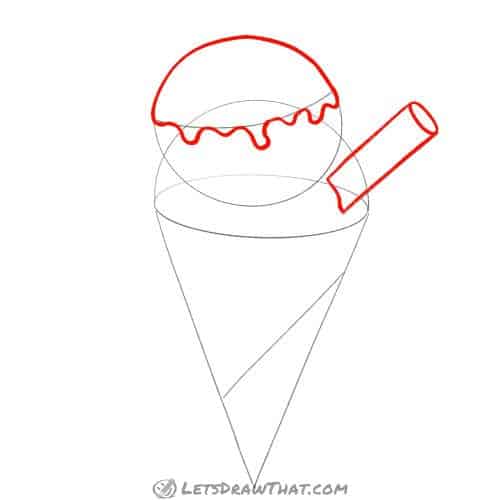
Step 3: Sketch the wafer stick and topping lines

Let’s add some details to our ice cream for some interest. Draw a curved line on the top scoop – that will be the outline for some topping.
Add a little wafer stick poked into the side of the lower scoop – a small oval and two straight lines.
Finally, add another angled line across the cone – this will be the edge of the waffle, visible when it is rolled into a cone.
How to draw an ice cream: outline the drawing
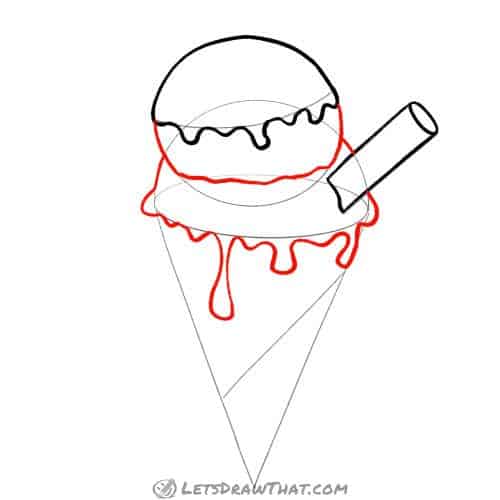
Step 1: Draw the topping and the wafer stick
Let’s start improving our simple ice cream sketch. Start by outlining the topping. Draw the top half as just a simple line along the upper circle. Then smoothly join it to the edge we marked in the sketch and draw some nice chocolate drips that dribble down from the straight line.
Then outline the wafer stick – just a direct outline of the sketch, closed with a curve matching the scoop outline.
Step 2: Draw the ice cream scoops
Next, draw the two ice cream scoops, starting with the top one. Again, the sides are a smooth outline of the circle. Then draw a wiggly flattened line across – the bottom of the scoop is buried into the other scoop.
Draw the lower scoop sitting in the cone nicely melting over the edge, similar to the topping dripping. Since a melted ice cream drips more than chocolate topping, draw some longer drips in there as well.
Step 3: Draw the waffle cone

Let’s finish the ice cream drawing by completing the waffle cone. First, draw the cross-line we marked with a slightly wobbly line and join the bottom left corner smoothly to the main cone shape. Then draw the rest of the cone, slightly rounding off the sharp tip of the cone.
By the way, do you know the difference between the waffle and the wafer?
Step 4: Add some textures

All we need to turn our drawing into a mouth-watering ice cream is to add some textures. Let’s draw some squiggly lines on the top cone that follow the bottom edge of the scoop in several layers.
For the lower scoop, do the same and add some chocolate pieces – irregular small squares and rectangles.
Next, add a spiral pattern to the wafer stick – those are just four curves across the stick.
And the final pattern is the waffle squares on the cone. Draw the lines from top left down to bottom right first, roughly at a right angle to the cross-edge of the waffle. Then add short cross-hatching in between to make the square waffle pattern.

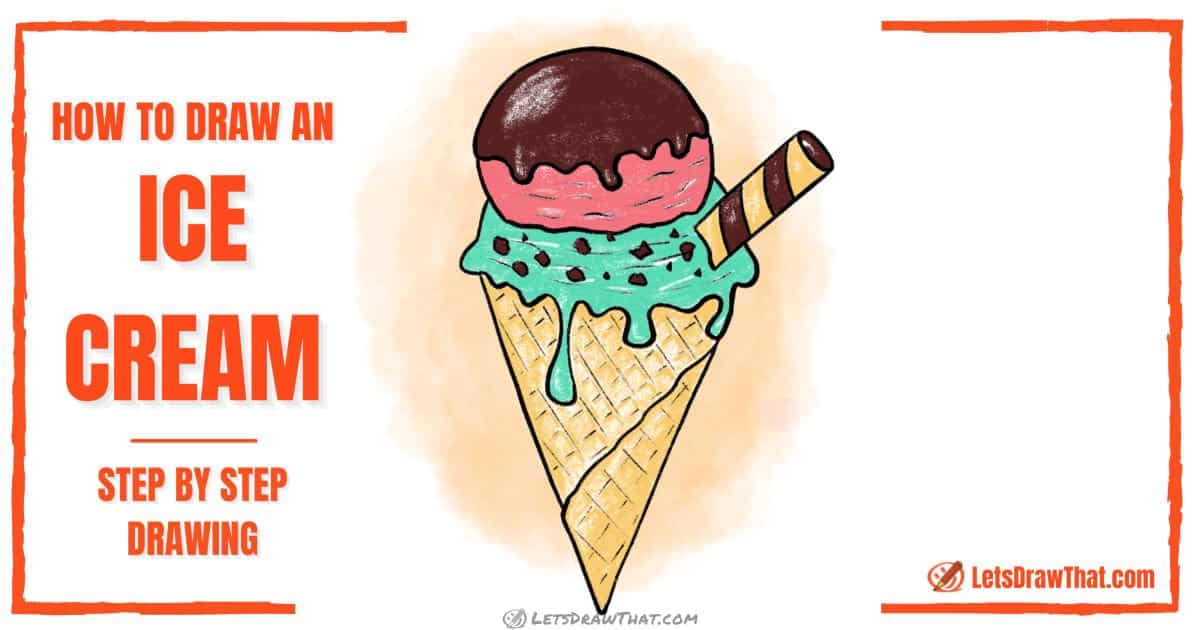
How to draw an ice cream: finished drawing
How to draw an ice cream: finished outline drawing
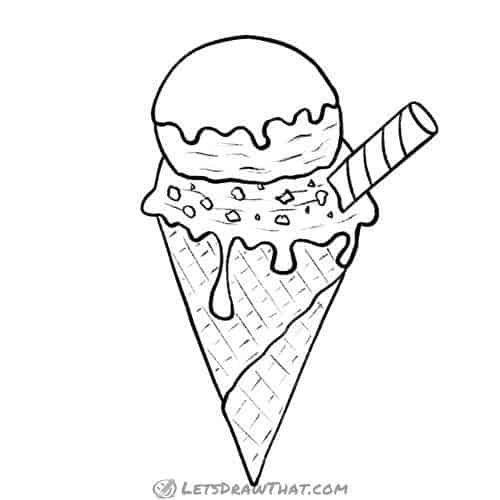
Here is the result of our how to draw an ice cream tutorial – the completed outline of the drawing, once we have erased the sketch lines.
How to draw an ice cream: finished drawing coloured-in
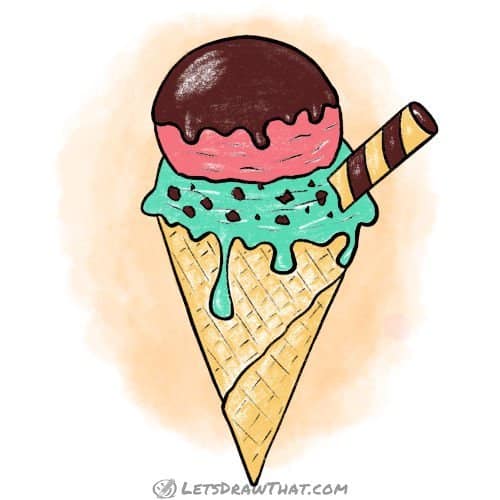
As usual, we like to colour in the drawing. The obvious colour choices are a beige for the waffle cone and wafer stick, with a nice dark brown for the chocolate topping, chocolate bits and the dark cocoa stripes on the wafer stick.
Your ice cream can have many different colours. Here we went for a pink and green colour combination – so our ice cream must be one scoop of choc-chip mint with a scoop of strawberry ice cream on top.