How to draw an elf: step by step sketching
Step 1: Sketch the head and body shapes

Start with a simple circle for the head. Then add a face cross, with a slightly longer line for the neck.
Next, sketch the elf’s body: start with a simple rectangle, with top and bottom lines curved. The whole body rectangle is leaning to the side, since our elf will be leaning against the present.
Once we have the angle of the body, let’s draw that present next. This is just the simple basic box from our how to draw a cube tutorial.
Step 2: Add chin and legs

Let’s improve our head shape and add some chin. Draw two straight sidelines from where the horizontal face line crosses the head. Then add two more lines, at a slight angle to each other, to meet at the vertical face line to form the chin.
Next the legs: the one our elf is standing on is just two arcs down to the floor. To give our elf an interesting pose, draw the other leg crossing over: an arch down from the waist to the knee, and then the crossover line to the right.
We finish both legs with a simple arc, slightly wider than the leg.
Step 3: Sketch the arms and hands

Time to give our elf some arms. We sketch them again using simple arcs – two for the upper arm, two for the lower arm. Both arms are bent – so notice how the lower arm section overlaps the upper arm. We use simple ovals for the hands at this stage.
Step 4: Sketch the face and hat
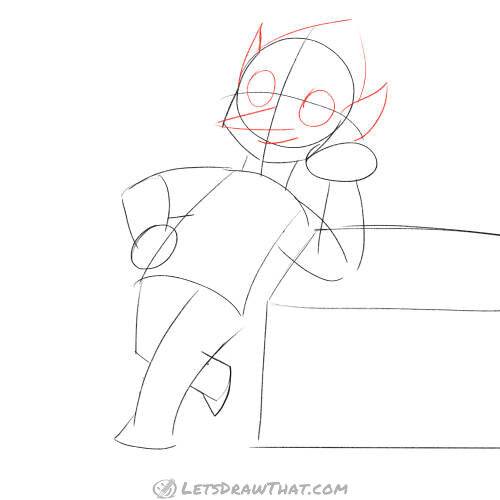
Now sketch the face. Start with two ovals for the eyes – these sit right on the face cross line. Then give your elf a nice pointy nose – a long triangle without the short side.
And finally, going with the theme, nice pointy ears. We can see the entire ear on the right, but the left one is partially hidden by the head – so only the pointy tip shows up. Ears also sit on the middle face line, at about the same height on the face as eyes.
The elf’s cap is a simple triangle but with curved sides.
Step 5: Finish the clothing details

With our elf’s body sketched, it is time to focus on some clothes. Our elf will wear a tunic, a long shirt with a belt. Draw the belt as two curves at waist level. Then draw the bottom of the tunic, which extends halfway down the thighs.
Next, add some details – the tunic will have a fancy collar and sleeve cuffs – let’s draw those out from simple curves again.
Now that the elf is dressed up, we also need to draw him some fancy shoes, with long, bent, pointy toes.
Step 6: Sketch the final details

Our sketch is almost done, all we need to add are a few final details. Start with the buckle on the belt – just a simple square.
Next, we add some hair – an arced line above the eyes for the hairline and a nice swoosh on the forehead.
Finally, our present needs a proper ribbon with a large bow.

How to draw an elf: outline the drawing step by step
Step 1: Outline the face and hands

With sketch done, it is time to start outlining and improving the drawing with extra details.
Let’s start with the eyes: draw the upper eyelids as two simple curves. Then add two ovals for pupils. Finally outline the bottom eyelid. Notice we have not drawn out the complete eye oval, rather just the top and bottom eyelid, which are not connected.
The nose, mouth, hair and ears are just a direct outline of the sketch.
For the hands, we add three small arcs to the ovals we sketched, to suggest very simple fingers.
Step 2: Draw the hems and shoes

Here is another improvement to our sketch: let’s make our elf’s tunic hemline, cuffs, and collar jagged, rather than just the straight curve we have sketched.
Then outline the shoes – those are just a clean-up of the sketch lines.
Step 3: Finish drawing the elf

We are almost done drawing the elf. Outline the sides of the body and finish drawing the legs.
All that is left now is the small final details: fill in the eye’s pupils, and add happy jingle bells to the top of the hat and the pointy ends of the shoes.
Step 4: Outline the present
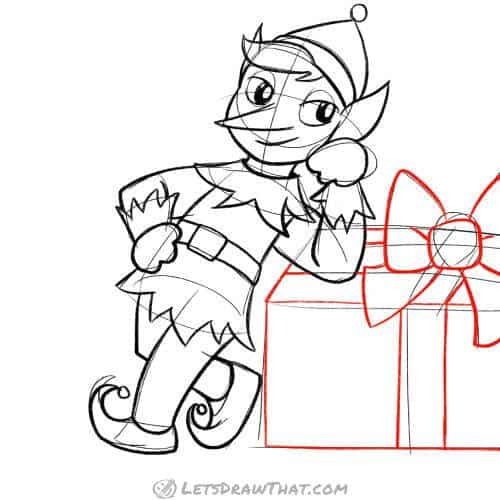
The final part of our picture is to draw out the present the elf is leaning on. Start with the bow, and then draw the ribbon lines and box edges that are not covered by the bow.

How to draw an elf: finished drawing
How to draw an elf: finished outline drawing

Here is the complete drawing of our elf, after we have cleaned up the sketch lines with an eraser.
How to draw an elf: finished drawing coloured-in

And here is the complete elf in colour. Since this is really a Christmas elf, we have coloured him in Christmas colours – green for the tunic and hat, and red for the details. Nice stripy white-and-red pants complete the outfit.
And if you are wondering where did that awesome Christmas tree in the background came from, that is copied from the Christmas tree drawing tutorial.