How to draw a simple tulip

Our first tulip drawing is really easy and completed in just a few simple steps. We will be using some very basic and easy-to-draw shapes for the tulip leaves and a flower, yet we will end up with a good-looking tulip drawing with intricately overlapping petals.
How to draw a simple tulip: base sketch
Step 1: Sketch the base tulip flower shape and the stem

Our easy tulip drawing starts with a very basic sketch. Draw a nice horseshoe-shaped “U” as a base for the tulip flower.
Then add a stem – just a slightly bent line down from the middle of the flower at the bottom.
Step 2: Sketch the tulip leaves

Next, draw some leaves for the tulip. Similar to the simple flower drawing, start at the ground level and draw one leaf on each side of the stem.
Unlike the round leaves for the simple flower though, tulip leaves are narrow and pointy – so draw each leaf with two simple curves bulging out that join at the pointy tip.
Step 3: Sketch the tulip flower petals
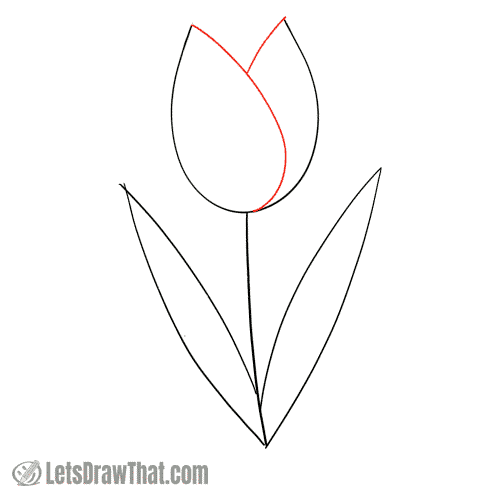
Now it is time to improve on the tulip flower. Draw the two outer petals.
The left one is a simple “J” shape, starting at the top left, and curving nicely to meet with the base of the flower.
The second petal is mostly hidden behind the one we just drew – all it needs to finish it is a simple straight line at the angle to meet with the “J”.
Step 4: Add more petals into the middle
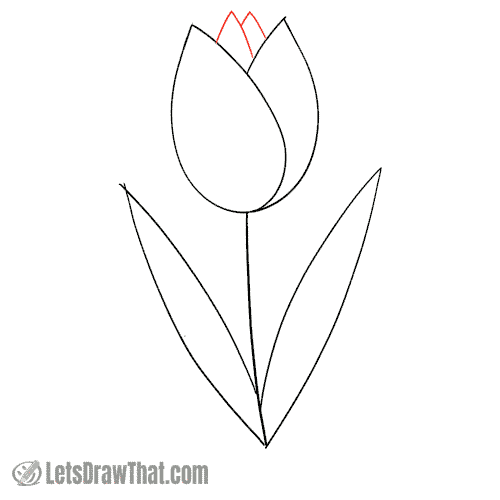
Let’s finish the flower sketch with two more petals in the middle. These are just two upside-down “V” shapes with slightly curved sides.
How to draw a simple tulip: outline the flower
Step 1: Draw the simple tulip flower

Start outlining the two large outer tulip petals.
Notice we are improving the shape of the flower compared to the sketch line a bit. To make the tulip flower more interesting, we are drawing the top slightly curved in for a nice bell-shaped flower.
Step 2: Draw the middle petals and the stem

Next, finish the tulip flower by outlining the two small pointy petals in the middle. The small improvement here is not drawing the middle line all the way to the edge.
Then outline the stem of the tulip – since we are drawing black outlines first and colouring the picture later, we have doubled up the stem, so we can colour it in later.
Step 3: Draw the tulip's leaves

Here comes a simple step – the leaves a just a straight outline of the sketch.
Step 4: Add final details to the tulip

Add some final touches to make our simple tulip flower drawing more interesting. Draw a line in the middle of each leaf to suggest the mid-rib.
Finally, plant your tulip into the ground, so it is not just floating in space. Draw a simple half ellipse around the base of the stem to suggest the loose ground where the flower is planted, and a curve for the actual ground.
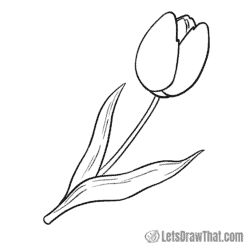
How to draw a simple tulip: finished drawing
Simple tulip drawing - outline

Here is the finished simple tulip outline drawing in one color, after we have erased the sketch lines.
Although this is a really easy and simplified way how to draw a tulip, the result is very recognizable as a tulip drawing.
If you are up for a challenge, we will show you how to make this drawing still much better and more realistic looking in the next part of this how to draw a tulip tutorial.
Simple tulip drawing - colored-in

Our usual final step is to color in the picture. There is a wide variety of tulips in many different colors to choose from. We have decided to draw a red flower with some yellow markings for contrast and interest – it could be the Calypso variety.
The stem and leaves are of course green, as well as the grassy ground. Finally, we have some nice blue sunny day sky for the background.
And that is it – the very end of our how to draw a tulip tutorial.
How to draw a tulip - improvements for a nicer and more realistic tulip drawing
For our second tulip drawing, we will use the same basic technique to draw the petals and leaves. Only this time, to make a more realistic tulip drawing, we will use some more organic shapes and curves. The result is not much harder to draw than the simple version but looks heaps better.
How to draw a tulip: base sketch step by step
Step 1: Sketch the tulip flower and stem
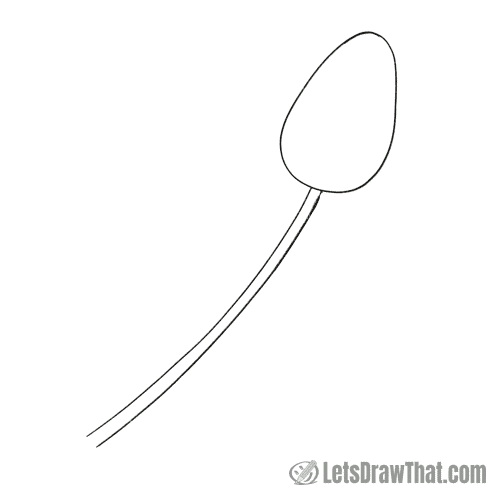
Our second realistic tulip drawing starts as the easy version above with a basic shape for the flower and a simple stem.
This time, draw the flower top as an egg-shaped oval – slightly narrower at the top, and wider at the bottom. Also, since we will draw the second tulip diagonally across the picture, the oval is slightly tilted to the side.
Then draw the tulip’s stem as two slightly curved parallel lines – we are doubling it up straight away in the sketch.
Step 2: Add two outer petals to the tulip flower
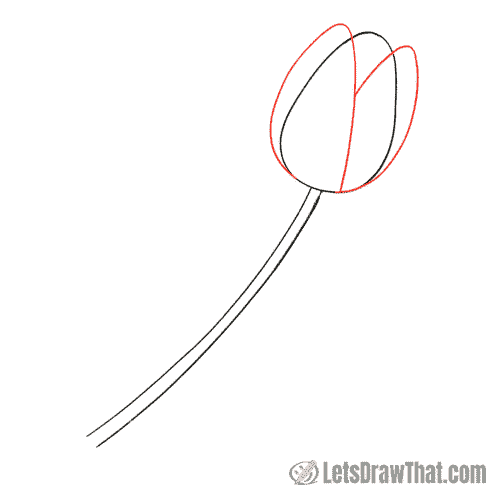
Next, draw two more petals for the tulip flower. These are very similar to the egg-shaped flower base, just a bit narrower and “sharper” at the top, since the petal is slightly turned in perspective.
Draw the first petal tilted to the left and reaching all the way to the bottom of the flower base. The second petal is then partially hidden by the other one, so the oval starts halfway up the first petal.
Step 3: Draw the tulip leaves

Again, similar to the simple tulip drawing above, we will draw two long and pointy leaves. However, to make the leaves look more realistic, this time we are drawing them with some wobbly wavy lines.
Draw the leaf on the right first. Notice how the shape starts following the stem line at the bottom, then widens out and waves out to the pointy tip.
The second leaf is partially hidden behind the first leaf, similar to the overlapping petals. You can draw it narrower and wavy only on the outer side, with a smooth inner edge. That way the leaf looks as drawn in perspective and more tilted sideways.
How to draw a tulip: outline the drawing
Step 1: Draw the tulip's outer petals

Let’s start outlining the tulip drawing, and improving on the base sketch.
Start by drawing out the outer petals. While we mostly follow the sketched oval shape, notice the small improvements: The bottoms of the petals are now nicely rounded. We have also added a small zig-zag dint into the smooth petal edges to add some interest.
Step 2: Finish drawing the tulip flower

Next, let’s complete drawing the tulip flower. Join the two outer petals at the bottom with a smooth arc – this is the bottom of another inner petal.
Then outline the peak of the middle petal that is not hidden, again adding a small wavy dint for a more realistic look. Finally, draw two more similar smaller inner petal tips into the space between to suggest more layered inner petals in the flower.
Step 3: Draw the tulip leaf

Next, outline the bottom leaf. If you have done a good job sketching it as we did, it is a simple outline of the sketch. Otherwise, this is your chance to fine-tune and correct the leaf shape.
The only small improvement here is closing the tulip stem at the bottom with a small smooth arc to suggest the rounded cut.
Step 4: Draw the tulip stem and the other leaf

Next, you can outline the other partially hidden leaf, again as a direct outline of the sketch.
The last part missing is the stem – with both leaves drawn, you know where it is hidden and can outline only the visible part.
Step 5: Add some texture to the leaves
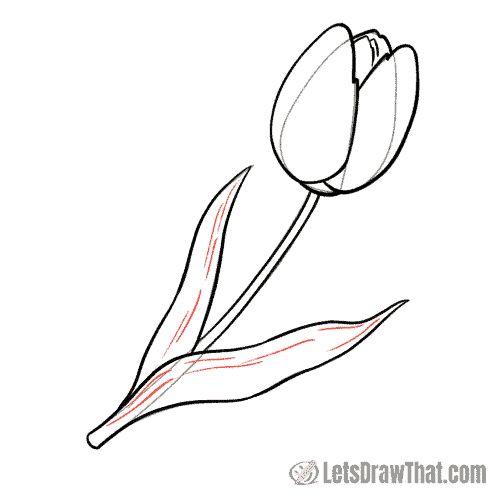
The very last step in our how to draw a tulip tutorial is to add some texture to the leaves. Draw thin lines that roughly follow the leaf shape to suggest the midrib into each leaf.
How to draw a tulip: finished drawing
Tulip drawing outline
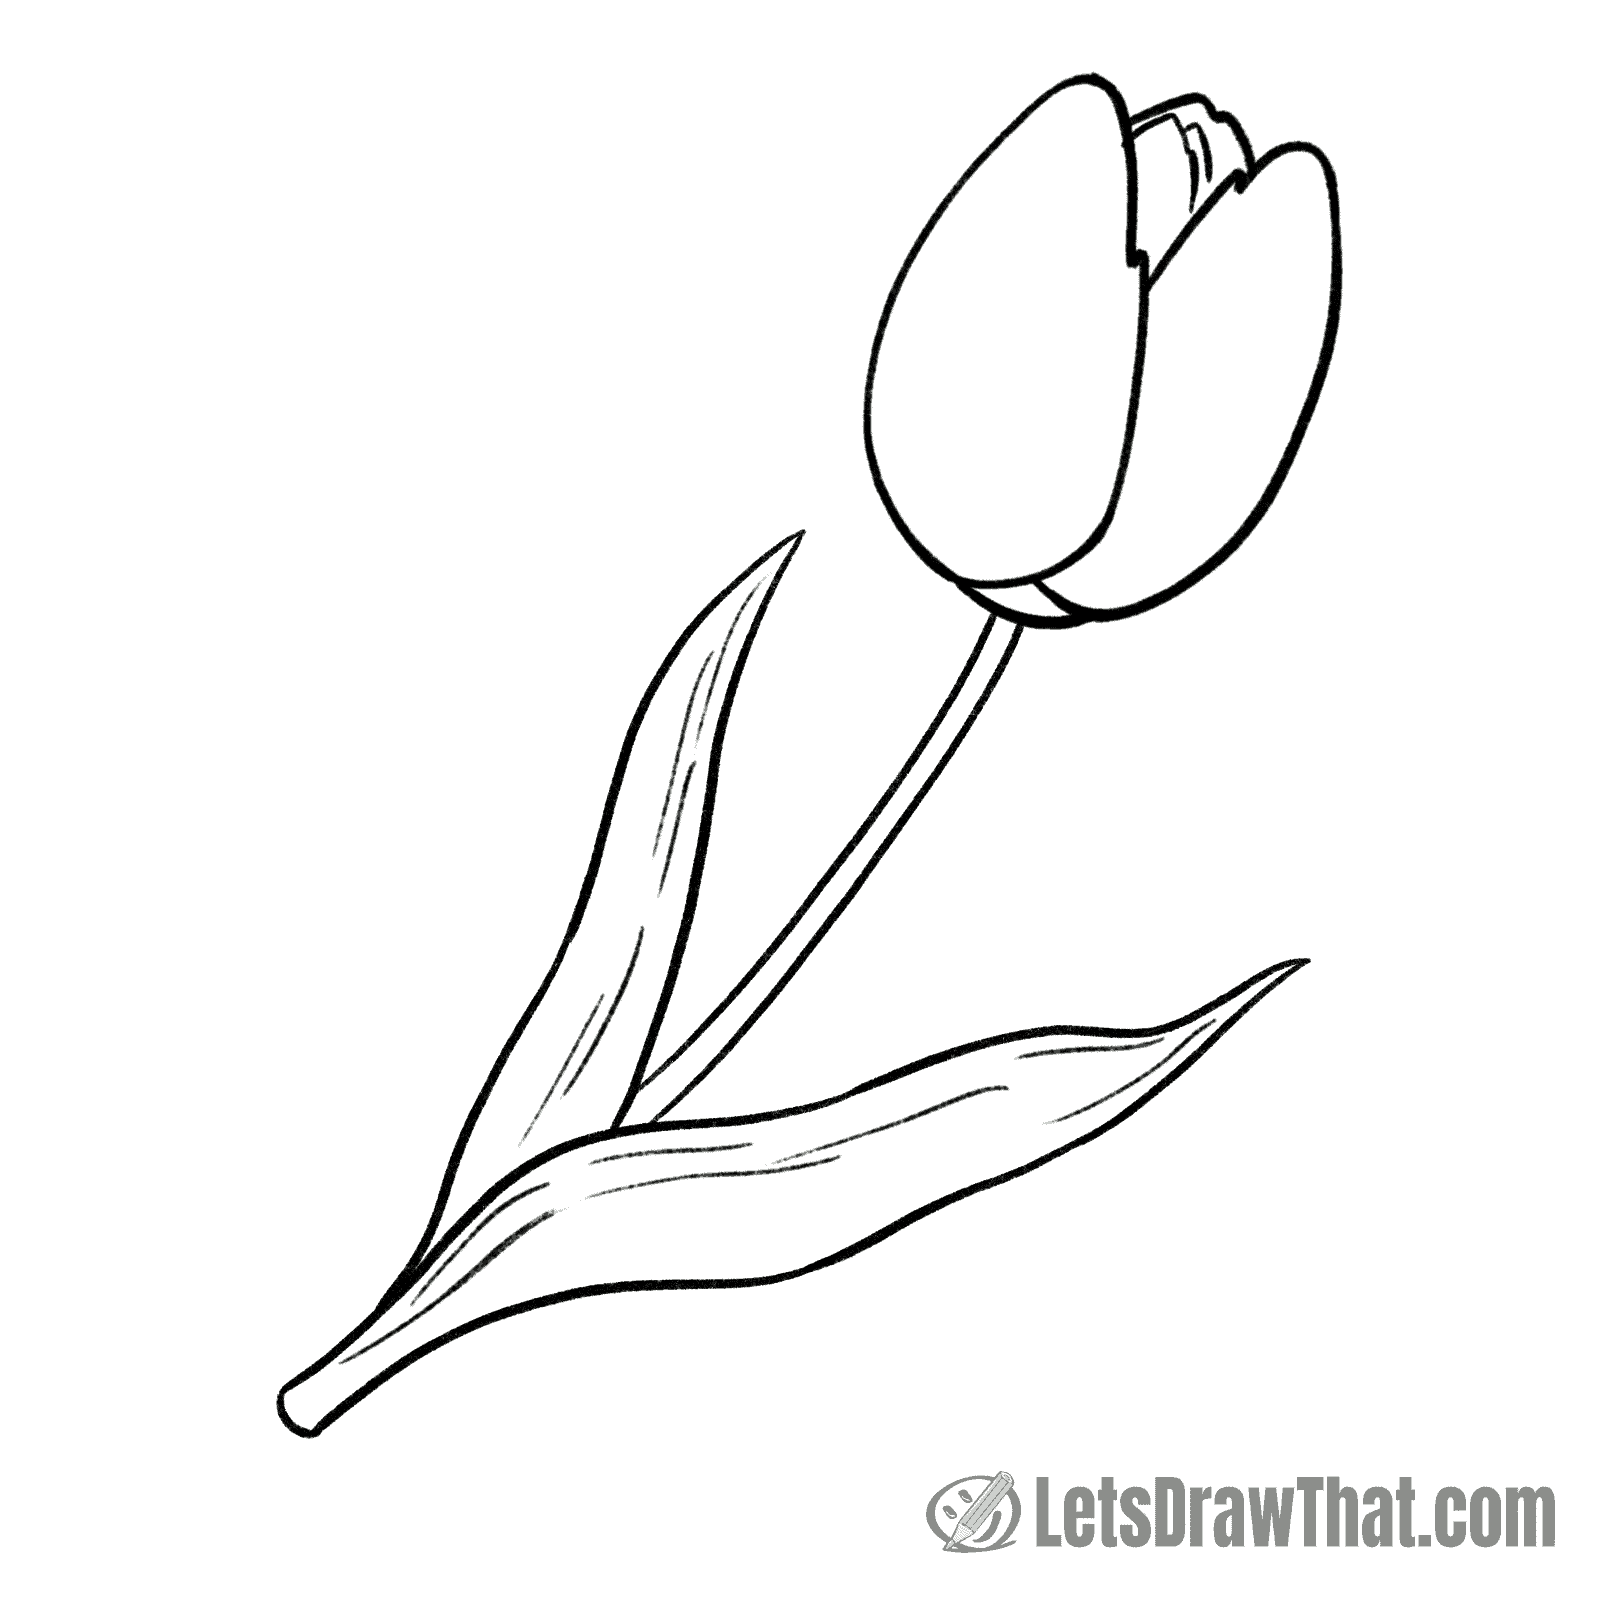
Here is the cleaned-up outline tulip drawing.
While some of the organic shapes for the second more realistic tulip drawing might have taken a few corrections to look good, overall, this is not a much harder drawing that the first simple tulip. Yet the result of our second how to draw a tulip tutorial looks heaps better, don’t you think?
Tulip drawing colored in

Here is the finished tulip drawing colored in. For our second tulip, we have chosen a hot pink color for the flower and petals, with shades of green for the leaves and stem. If you look at the pictures of real tulips, you will notice that the stem is often brighter, lighter green than the leaves – that is how we have colored it here.
But there are many other color combinations you can choose for your very own tulip drawing.
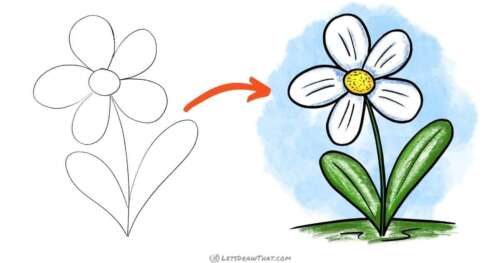
And that is all – the very end of our how to draw a tulip tutorial. If you enjoy drawing flowers, you might try your hand at drawing a sunflower next.