How to draw princess: sketch step by step
Step 1: Sketch the base body shapes

Our princess starts with the usual circle for the head. Then, draw a face cross to help place the facial features – this lady will be looking slightly to the left.
Next, add a kind of rounded rectangle for the upper part of the body. It is slightly wider at the shoulders compared to the waist.
Finally, draw the skirt outline – two curves widening out from waist and closed with an arc at the bottom.
Well, here you have another variation of the chibi style bowling pin body!
Step 2: Add the eyes, chin, ear and arms

Draw two round ovals for the eyes. Place them on the horizontal face line, one to the side, and the other one symmetrical same distance from the vertical face line.
Add an ear – a “C” shape, again sitting lined up on the vertical face line.
Next, draw the chin: these are two curves meeting at the vertical centre line. The left one first bulks out from the eye to form a nice cheek, while the other side follows the head circle outline.
Time to add some arms: these are simple chibi style macaroni tubes, rounded off at the hands.
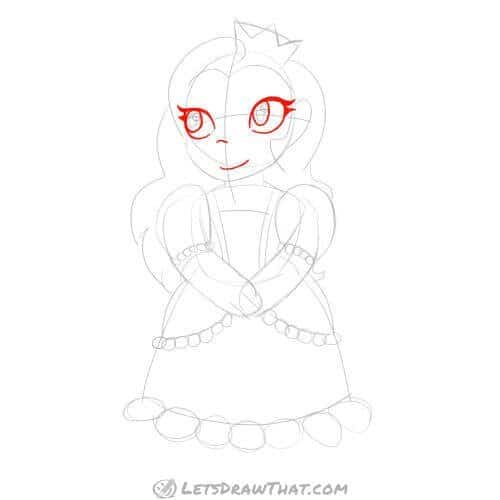
Step 3: Sketch the princesses' dress

Let’s start improving the princesses’ dress. Add two puff sleeves – widen the outlines of the shoulders. Next, add two pointy semicircles as upper flap covers on each side of the skirt. Then, add two stripes for the bodice, and mark the top with another slightly curved line.
Finally, draw a skewed rectangle, narrower at the bottom, on top of our princess’ head. We’ll refine this shape in the next step to make the princess’ crown!
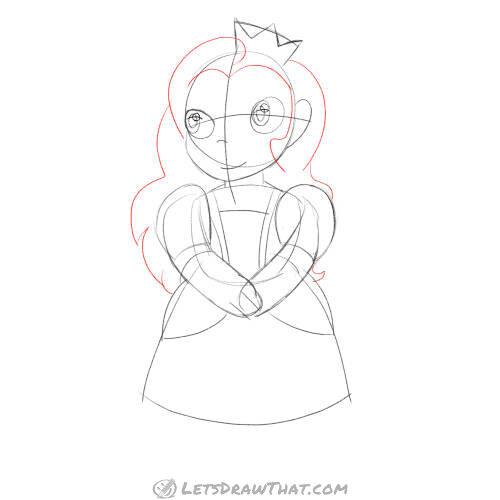
Step 4: Add details to the crown, eyes and hands

Draw a “w” at the top of our simplified crown shape to make the the spikes of the crown.
Next, add pupils to the eyes. They’re made from a large oval for the iris and a smaller circle in the right hand corner for a shine.
Continuing with our face, add a small curve for the nose, and a bigger curve for the mouth.
Finally, mark the fingers on the hands – add two lines to our hand-curves to resemble fingers, which we will refine later on when outlining the sketch.
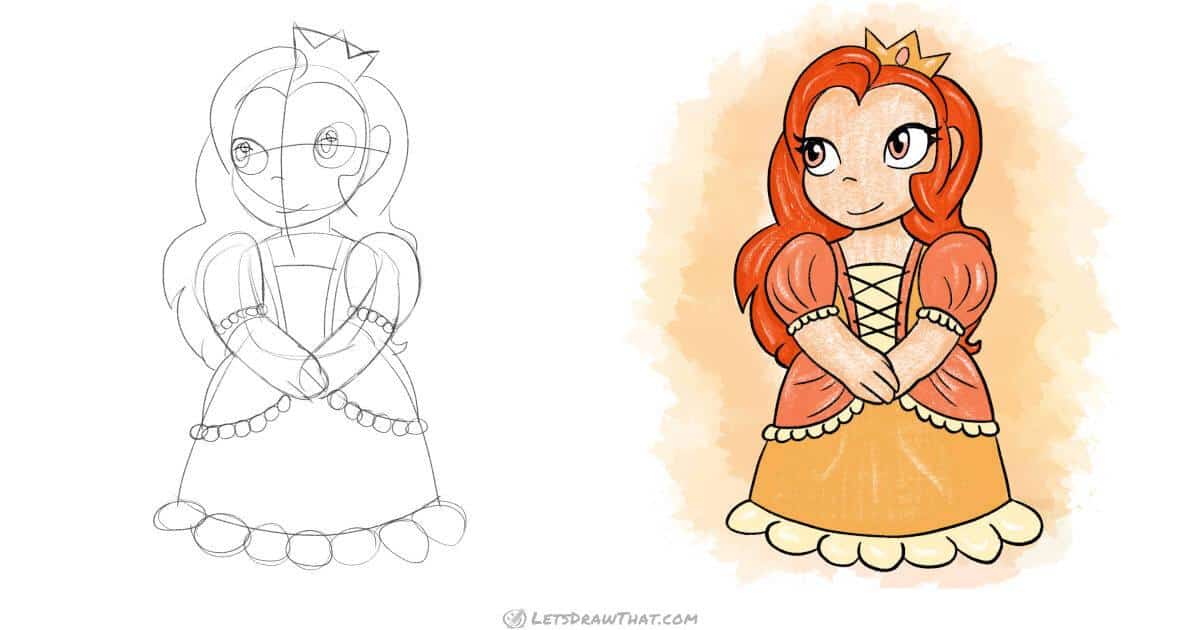
Step 5: Draw princesses' long flowing hair
Our next step is to add hair. Start with two half-circles on the forehead – our princess’ face is now heart-shaped!
Continue adding to the hair on the sides with a bunch of sharp curves and squiggles – draw the hair as long, or as short, and any shape you like! We think fluffy waist length hair is what an elegant princess needs.
Step 6: Finish the dress with lace edges

The final step to our sketch is to add a little bit of decoration. We do this by drawing lots of tiny little circles along the sleeves, the skirt flaps, and the bottom of the skirt to represent simple dress lace.

How to draw princess: outline the drawing step by step
Step 1: Outline the face - eyes, nose and mouth
We start our outline by drawing the face. Make the eyes a bit more almond-shaped – pointed at the corners, leaving a small gap on the inner corners. Then, add eyelashes to them.
The nose and mouth are a straight trace of the simple sketch lines.
Step 2: Outline the head and crown

Now, outline the head. We trace outer face shape and chin. Notice we have added a few extra lines to the hair around the face and improved some of the locks.
Now draw the ear and outline the crown. Have you noticed another improvement? We have added an oval-shaped jewel to our crown!
Step 3: Outline the neck and arms
Moving down, outline the neck and shoulders. Draw out the the puffed sleeves, and decorate them by tracing the lacing – a row of small half-waves. We have added some folds to the sleeves for more interest and detail, that were not in sketch.
Finally, outline the hands – and notice that this time we have rounded off and drawn out individual fingers from our basic sketch.
Step 4: Draw princesses' dress

This is an easy step, since we’re just tracing from our sketch! Outline the bodice and the upper skirt flaps.
Step 5: Add more details to the dress
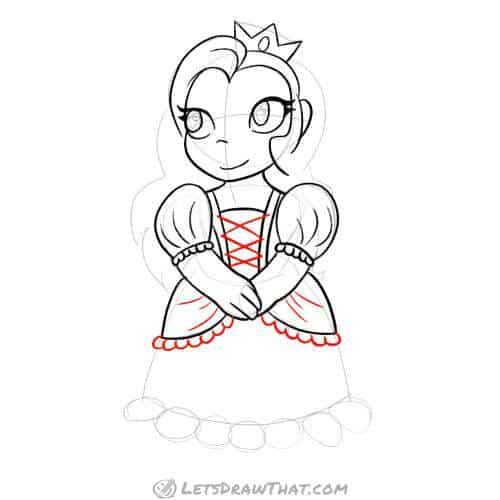
Let’s start by tracing the little lace circles along the skirt flaps.
Then, add few details that weren’t in the sketch: Add some cross lacing on the bodice for decoration, and draw few fold lines on the skirt flaps.
Step 6: Finish drawing princesses hair and eyes
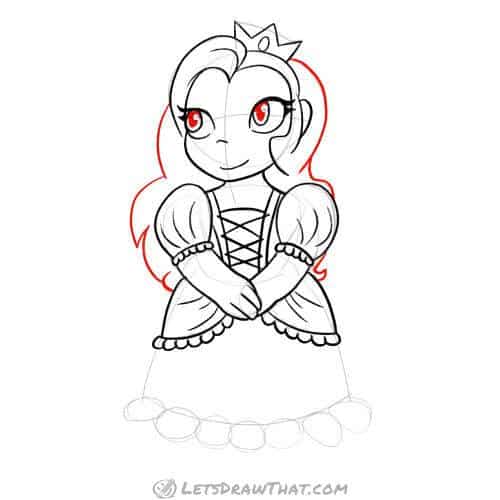
Trace the outer hair lines from your sketch to complete the princesses’ hair.
Next, finish the eyes by colouring the inner ovals, leaving out the small shine patch we drew in the sketch.
Step 7: Draw princesses' skirt

Our final step in outlining our princess is to trace the skirt and the lacing at the bottom edge. Again, we are drawing the lace more as a series of wavy half circles, rather that the full circles. But if your princess prefers wearing pom-pom lacing, feel free to go full circle!
How to draw princess: finished drawing
How to draw princess: finished outline drawing

That’s it! You know how to draw a princess now!
Here is our completed princess drawing, after we have erased the sketch lines lightly with an eraser.
How to draw princess: finished drawing coloured-in

And as usual, we like our drawings finished in colour. Rather than the traditional pink dress, we have gone for a peach-orange combo: Our princess has lovely orange hair, her top is a matching lighter peach colour, and the skirt is dark yellow, with lighter yellow or beige lacing. Her eyes are the same colour as the top, and the crown is the same gold – dark yellow as the skirt.
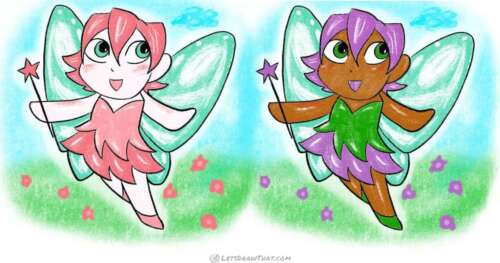
If you want inspiration for some other colour combinations, check out the How to draw a fairy tutorial – there are two more dress combinations that would suit the princess beautifully as well.