How to draw a fairy: base sketch step by step
Step 1: Sketch the base head and body shapes

Our base body shape sketch is simple as usual.
Draw a circle for the head. Add a face cross – this will guide us when placing the facial features.
Then add a bowling pin body – narrower at the top, widening at the bottom. Also, the whole body is just slightly bent – a longer line on the right, and a shorter one on the left.
Step 2: Sketch the face – jaw, eyes and ear

Now add two circles for the large eyes, sitting on the horizontal face cross line.
Next draw the jaw in the same way as explained in our base “How to draw chibi” tutorial: Two sidelines from the middle of the head and an angled bottom line.
Finally, add the ear – a simple C shape that starts on the cross-line in the middle of the head and goes down.
Step 3: Sketch arms and legs

Let’s give our fairy some arms: the top line of the arms is just a simple, very slight curve, almost a straight line. The bottom line curves out at the end of the arms to suggest a wider hand and then comes back, narrowing into the arm.
The legs are also simple: Draw a curved rectangle for the right leg – notice the leg follows and extends the curve of the body. The left leg is just a simple curve to suggest the other leg hiding behind the first one.
Oh, and our fairy needs a magic wand – let’s add the stick for it to her hand.
Step 4: Sketch the wings
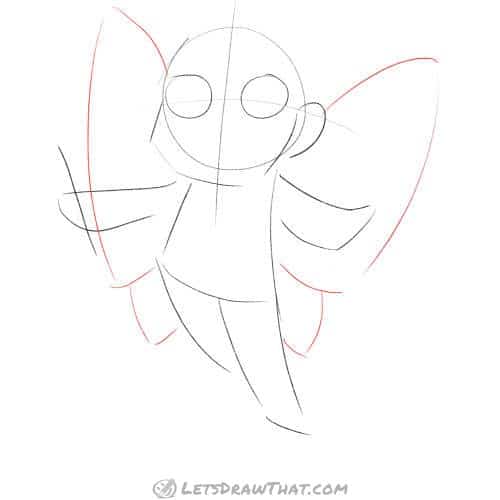
Next let’s sketch the wings. These are actually simple butterfly wings from our “How to draw a butterfly” tutorial.
Start with the two side lines for the large upper wing. Then finish the large wings with arcs down to shoulders and back up to the waist.
Then add the smaller lower wings – these are just two curved “V” shapes at the bottom of the large wing.
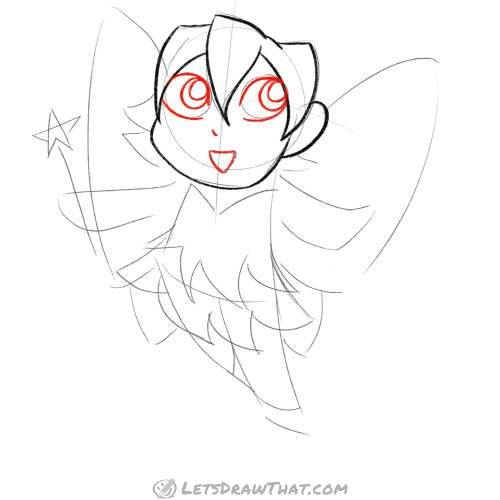
Step 5: Draw the face details

Here we are improving our fairy’s face: draw the inner eye circles – the small ones are for the pupils (the black dot in your eye) and larger ones for irises (that is the colour part of your eye).
The mouth is a simple triangle, with all sides slightly curved. And we add just a very short line to mark the nose – that is a chibi style simplification.
Finally, while we are adding the small details, draw the star at the end of the magic wand. If you need help, we have a “How to draw a star” tutorial for that.
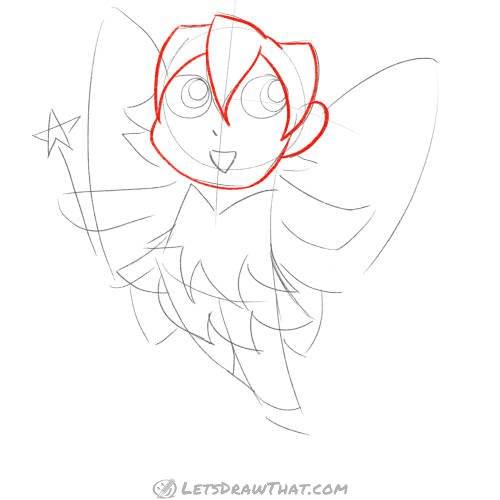
Step 6: Sketch the hair

Now it is time to give our fairy some funky hair. You can choose any hair you like. Our fairy has some spiky triangle hair to contrast with the cute face.
First, draw the middle forehead triangle, then add the two on the sides. Then add a few spikes sticking out under the ears – here we have two on the left and just a single one under the ear on the right.
Step 7: Sketch the Fairy’s dress
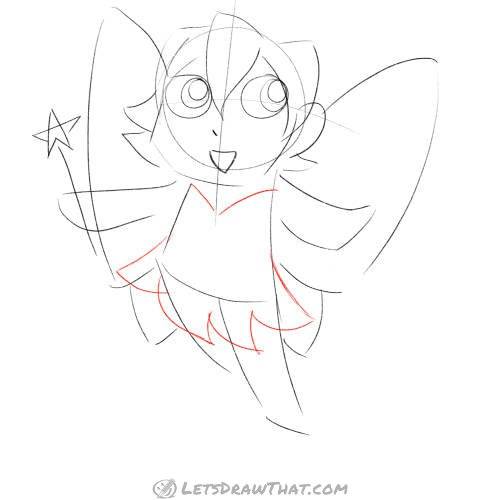
Let’s dress up our fairy – by adding a few lines to the base body we create a nice dress.
Add a wide “V” shape neckline at the top – those two lines are again slightly curved up.
Then draw some pointy cut-outs for the lower rim of the skirt – these match the pointy hair and make the dress look like it is made of flower petals.
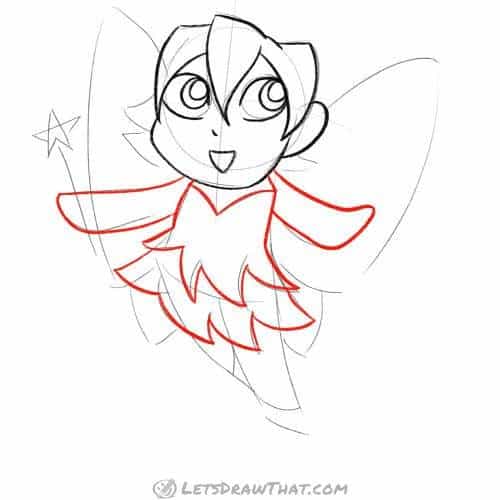
Step 8: Finish the fairy’s dress

Since the dress looked bit plain, here we are adding a second layer of the pointy rim.
Also, add two simple lines to mark out the shoes on the legs and our fairy sketch is complete.
We will outline the drawing next.

How to draw a fairy: outline the drawing step by step
Step 1: Outline the hair
We start outlining our fairy by drawing out the hair on the forehead. Notice we have left out the lower hair – we will come back to that after we have drawn the shoulders properly.
Then draw the face and the ear outline.
Step 3: Outline the arms and dress
Next, draw out the fairy’s upper body and dress. No big changes there – we have only rounded up the arms a bit. The dress is drawn exactly as sketched.
Step 4: Draw the legs and complete the hair

With the arms complete, you can outline the lower hair locks – make them fall nicely onto the shoulders.
Then draw out the legs – make the visible shoe a bit pointy.
Step 5: Outline the wings and wand

Lastly, we complete the fairy drawing by outlining the wings. Similar to our butterfly drawing, we have rounded off the wing-tips.
Finally, finish drawing the magic wand.
How to draw a fairy: finished drawing
How to draw a fairy: finished outline drawing

Here is the final completed fairy drawing, after we have erased the sketch lines – a cute fairy in a nice, dynamic pose, just rushing off to sprinkle some fairy dust with her wand.
How to draw a fairy: finished drawing coloured-in purple and turquoise

Now that you know how to draw a fairy, we might as well finish our drawing by colouring it in. Here we really liked the turquoise colour for the wings and ended up with two colour variations.
Our first fairy matches the turquoise wings to purple hair. We have reused the same purple on part of the skirt and wand and matched it with a dark green for the upper part of the dress and shoes. All those bold colours go nicely with the darker skin tone.
How to draw a fairy: finished drawing coloured-in pink and turquoise
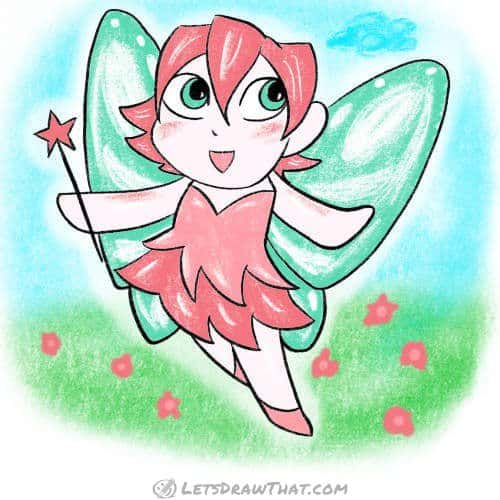
The second colour variation is more traditional – definitely for the lovers of the nice pink dresses. Here the turquoise wings are matched by two shades of pink for the hair and dress. And our fairy ended up being a very white-skinned, with just a touch of pink shading on cheeks and arms.
How did you colour in your fairy?