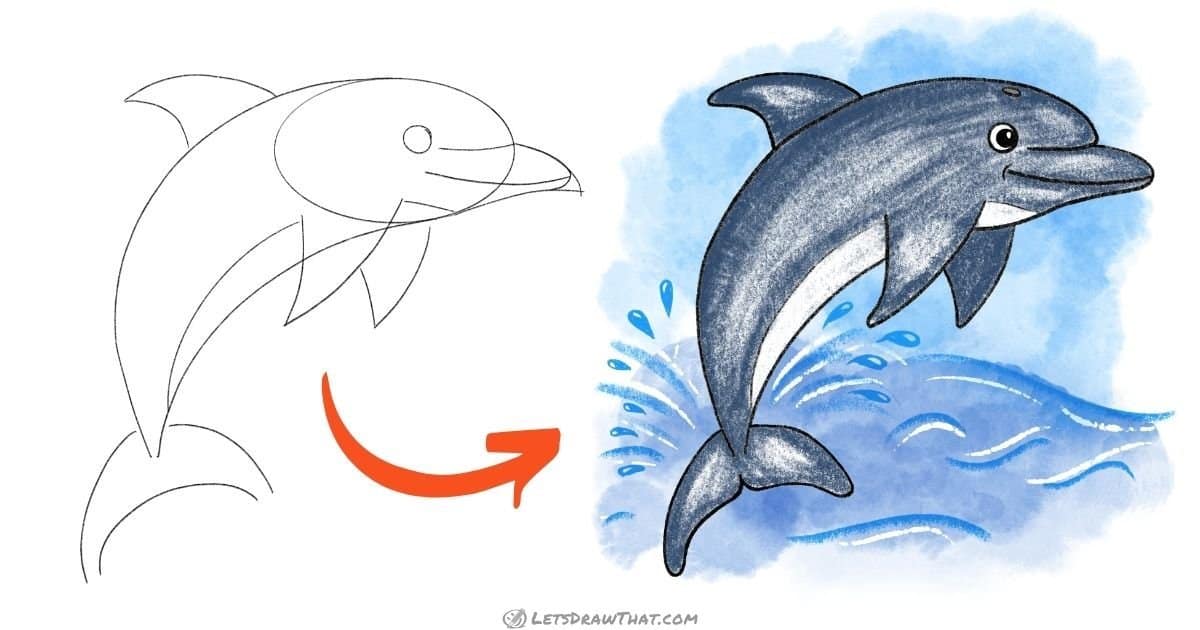
How to draw a dolphin: base sketch step by step
Step 1: Sketch the dolphin's base body shape

Our dolphin drawing starts as usual with simple shapes. Draw a slightly flattened oval for the dolphin’s head. Then attach a banana-shaped body – two curves, one starting at the top and the other one at the bottom of the head, that meet at the dolphin’s tail.
Step 2: Sketch the dolphin's tail and nose
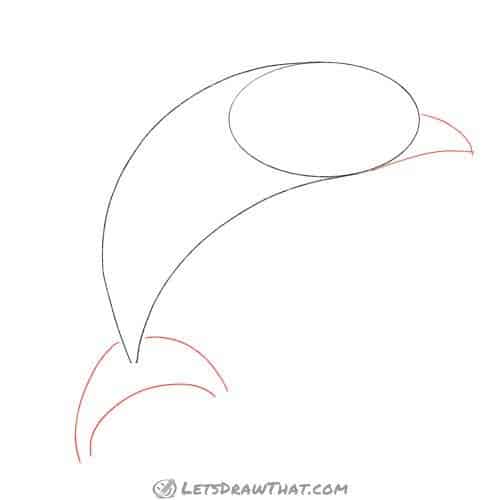
Next, let’s sketch the dolphin’s protruding nose. For the time being, we will draw it as a bird’s beak – one curve at the top, and an almost flat curve at the bottom. We will turn this into a dolphin nose shape in the next step.
Then draw the dolphin’s tail fin. This one is made from two nice curves starting just above the end of the body, one on each side of the body. Then add the bottom line of the tail – just a wide arc positioned a bit under the pointy end of the body. Leave a bit of a gap between the pointed tail-ends – we will again join those later.
Step 3: Draw the dolphin's fins
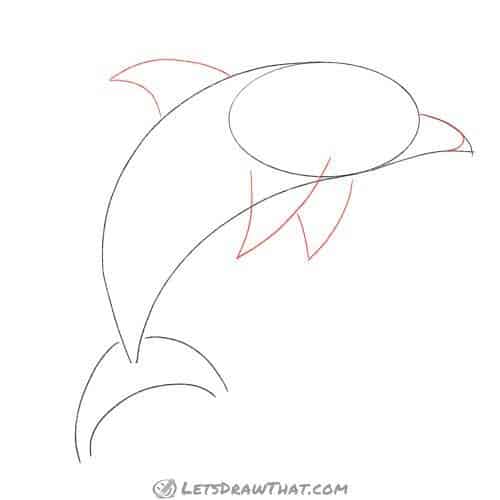
Let’s give our dolphin some fins. Start with the dorsal fin – that is the one on the dolphin’s back. Draw it from two curves and make it nice and pointy – very similar to the shark’s fin. Then draw the two pectoral fins – the bottom ones – in the same way. Place the front one just where the head oval meets the body. The other fin is partially hidden behind the front one.
Finally, it is time to round off the bird’s beak into a dolphin nose.
Step 4: Sketch the final details

With the dolphin’s body sketch done, it is time for a few final details. Draw the dolphin’s eye as a simple small circle. Then draw two curved lines to mark the dolphin’s face – one from the top of the nose towards the eye, and one from the tip of the nose, under the eye – that will be the mouth.
Finally, mark off the dolphin’s belly with a simple arc, interrupted by the pectoral fin.

How to draw a dolphin: outline the drawing step by step
Step 1: Draw the dolphin's body

Start outlining the dolphin’s body: draw the top body curve and smoothly join it to the upper line above the nose. Then outline the dolphin’s nose, smoothly joining the lower “beak” line to the head oval with a very flat “S” curve.
Step 2: Draw the fins

Outline the fins next, and then finish outlining the lower part of the body.
Step 3: Draw the dolphin's tail
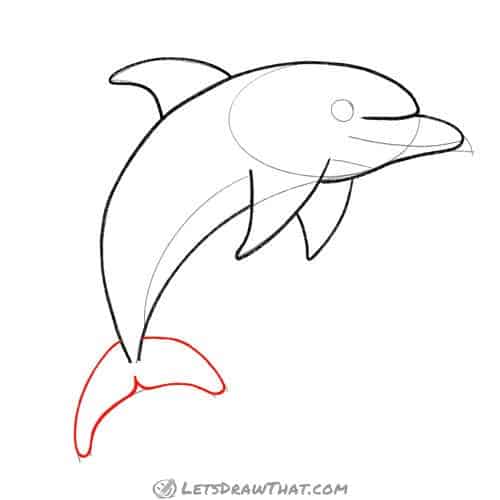
Next, outline the dolphin’s tail. Join the gaps at the tail ends with small half circles. Then add a small inward split in the middle of the tail – made of two opposing quarter-circles.
Step 4: Draw the dolphin's face

Let’s finish the dolphin drawing by improving on the face. Outline the eye circle. Then add a smaller inner circle for the pupil and fill it in, leaving a small white patch for a little eye-shine.
Draw the mouth, and add a small fold at the end to give our dolphin a friendly smirk.
Finally, draw a small oval near the top of the head – that is the blowhole. Similar to a whale, dolphins are mammals and need to breathe air.
How to draw a dolphin: finished drawing
How to draw a dolphin: finished outline drawing

Here is the completed outline of the drawing once we have cleaned up the sketch lines. As you see, learning how to draw a dolphin is surprisingly easy – in only eight steps we have drawn a great looking, semi-realistic dolphin.
How to draw a dolphin: finished drawing coloured-in

Of course, our usual last step is colouring the drawing. Dolphins are steel grey, with a touch of blue reflected from the water they swim in. Leave the marked out belly white, or colour it in with just a very light grey. See, even colouring the dolphin is easy.