Angel Drawing: A Graceful Female Angel in a Few Lines

Step by step tutorial to create a minimalistic yet powerful angel drawing. Use a few well placed lines to draw a beautiful, graceful, female angel.

Angel Drawing: A Graceful Female Angel in a Few Lines - step-by-step-drawing tutorial featured image

This is a very different angel drawing to our cheeky little angel from the How to draw an angel tutorial. It was inspired by a ceramic angel statue we saw in one European art shop before Christmas.

The beauty of this drawing is in its simplicity. The graceful female figure is defined with just a few lines. The tall and thin body and full length wings, powerful hand posture and almost no face make this a mysterious and peaceful angel. Hope you will enjoy this tutorial.

This tutorial is part of our “Christmas drawings” collection.

min

You will need: pencil, fineliner pen, colored pencils, eraser and drawing paper or sketchbook

These are the favorites we use for drawings on Let's Draw That that we love and recommend:

Staedtler Mars Lumograph Pencil Set With Eraser and Sharpener
Staedtler Mars Lumograph Pencil & Fineliner Set With Eraser and Sharpener
Derwent Inktense Watercolor Pencils 
Moleskine Sketchbook

Disclaimer: LetsDrawThat.com participates in the Amazon Associates Program. If you purchase a product using a link on our website, we earn a small commission, at no extra cost to you. This is one way how you can support this website.

Love drawing? Never miss a tutorial!

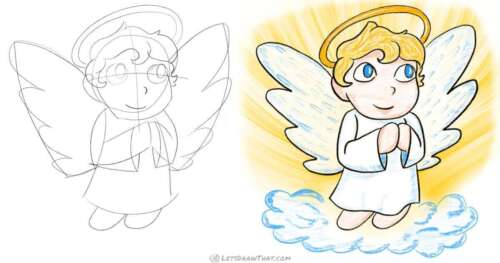
Angel drawing: step by step sketch

Step 1: Sketch the base head and body shapes

Drawing step: Sketch the base head and body shapes

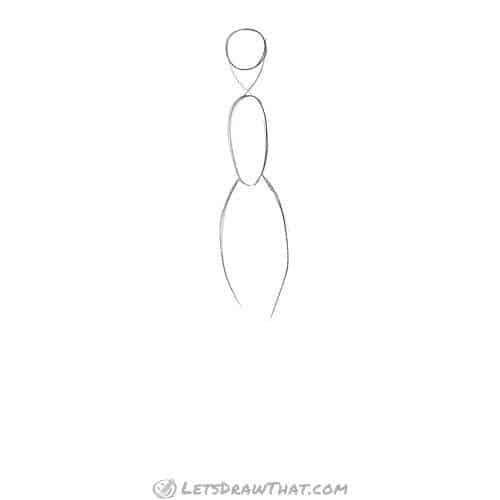
Let’s start our drawing by sketching the simple shapes that will make the angels body.

Start with a circle for the head. Next, draw the upper body as a slim oval some distance apart from the head. Then add two more curves. These will mark the hips and thighs and would almost make a third larger, slightly wider oval.

Join the head to shoulders with two curves crossing over from left to right – these will mark out the chin.

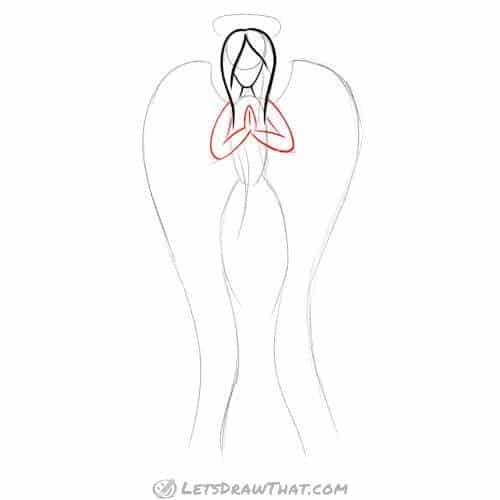
Step 2: Sketch the neck, arms and hands

Drawing step: Sketch the neck, arms and hands

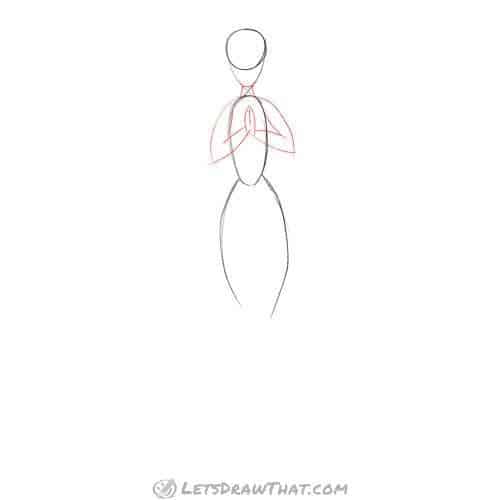
Now round off the chin, and add two lines for the neck.

Next, let’s draw the arms. Start with the outer line, a curve from the shoulder to the elbow. Then bring the lower arms back together. Next add the inner arm outlines.

Finally, draw the simplified hands pressed together in a prayer or gratitude – a narrow oval, or two short curves meeting in a point, separated by a straight line.

Step 3: Sketch the hair and skirt

Drawing step: Sketch the hair and skirt

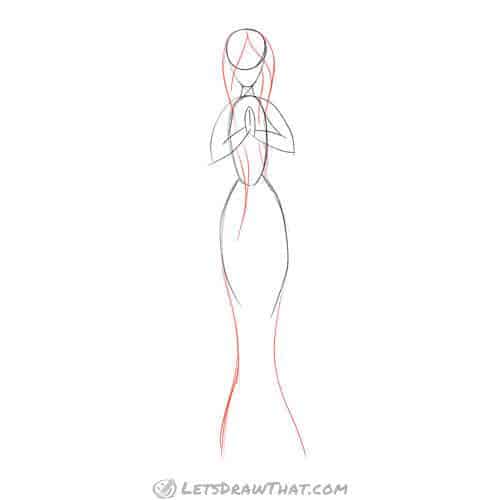
Let’s sketch the outline of angel’s hair next. Here we are adding long flowing hair down to the waist. Draw the outer shape first, then add the inner hair lines split over the forehead.

Next, extend the hip lines further down with wide “S”curves to draw a narrow skirt widening out at the bottom.

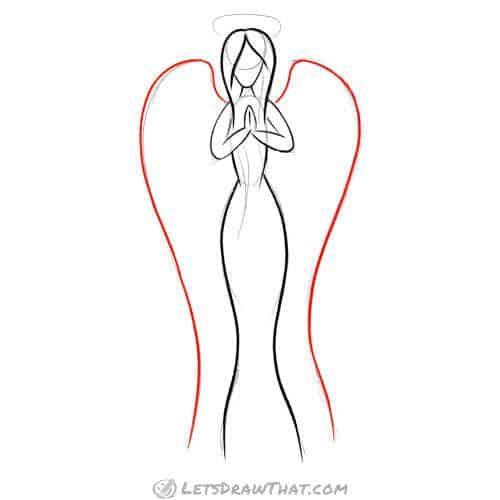
Step 4: Sketch the halo and wings

Drawing step: Sketch the halo and wings

Time to turn our graceful lady sketch into an angel. Add the wing outlines. These are drawn as a “C” curve up from the shoulders, and then an “S” curve all the way down to ground. Notice how the lower part of wing outline follows the skirt curve.

The final small detail is the halo ring around the head.

Do you want to draw a simple cute angle next? Here is a very different tutorial:

How to Draw an Angel in a Simple Chibi Style - step-by-step-drawing tutorial featured image

How to Draw an Angel in a Simple Chibi Style

Learn how to draw an angel. Turn a simple chibi boy into a cute angel by dressing him in long shirt and adding the wings and a halo around his head.

Angel drawing: step by step outline

Step 1: Outline the hair and face

Drawing step: Outline the hair and face

With the angel sketch complete, it is time to outline the drawing and smooth out the lines.

Starting from the head, outline the outer hair shape with bold, smooth strokes. Then, use a thinner line to draw the chin and neck.

Step 2: Outline the arms and hands

Drawing step: Outline the arms and hands

Next, we are using again the lighter line strokes to outline the arms and hands. Notice the rounded elbows on the outer line.

Step 3: Draw the body and skirt

Drawing step: Draw the body and skirt

Back to using our thicker bold lines, outline the upper body. Then start again at the hip line, and draw the smooth “S” curves for the long skirt.

Step 4: Draw the outline of the angel’s wings

Drawing step: Draw the outline of the angel’s wings

Time for two more long and smooth bold strokes, outlining the wings. Notice we have rounded off the sharp points at the top of the wings, which gives them a more friendly shape.

Step 5: Add details to angel drawing

Drawing step: Add details to angel drawing

We are almost done with our angel drawing, all that’s left is to add some small details. First draw a few extra strains to better define the angel’s long hair.

Next, add a few random lines at the bottom of the skirt to suggest the folds on the skirt and the body shape mysteriously dissolving into the space.

Finally, add few lines to the bottom edges of the wings to suggest the soft feathered wing tips – these are staggered upwards at an angle.

Step 6: Draw the angel’s inner wings and halo

Drawing step: Draw the angel’s inner wings and halo

The very final improvement is to add two inner lines at the top of the angel’s wings – these suggest the stronger muscle attaching the wings to the body.

And last but not least, outline the angel’s halo.

Another intriguing line drawing:

How to draw a diamond - easy steps to the complex shape - step-by-step-drawing tutorial featured image

How to Draw a Diamond – Easy Steps to the Complex Shape

Learn how to draw a diamond. A simple, step-by-step tutorial to draw a reasonably complex and great looking diamond without getting lost in the maze of polished diamond faces.

Finished angel drawing

Angel drawing: finished outline

Angel drawing: finished outline

And here is the complete angel drawing – the clean outline after erasing the sketch lines.

Angel drawing coloured-in

Angel drawing coloured-in

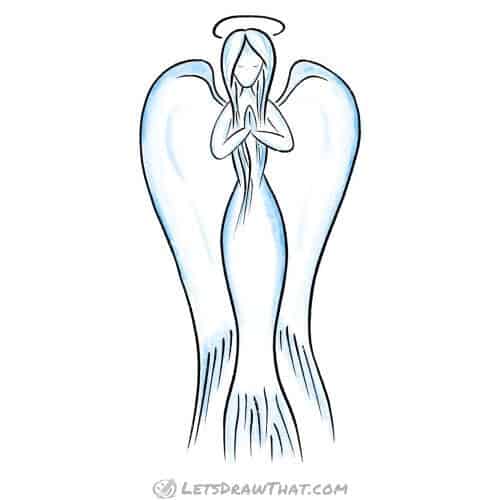
As usual, we like our drawings completed in colour. But this time, staying with the simple style of the entire angel drawing, we are only using a single colour, a light blue, to gently shade parts of the angel’s white body.

Like this tutorial? Share the fun with others:

Love drawing? Never miss a tutorial!

Get notified when there is a new tutorial published on Let's Draw That! (2-4 times a month)

Like this tutorial? Share the fun with friends:

Check out the latest tutorials: