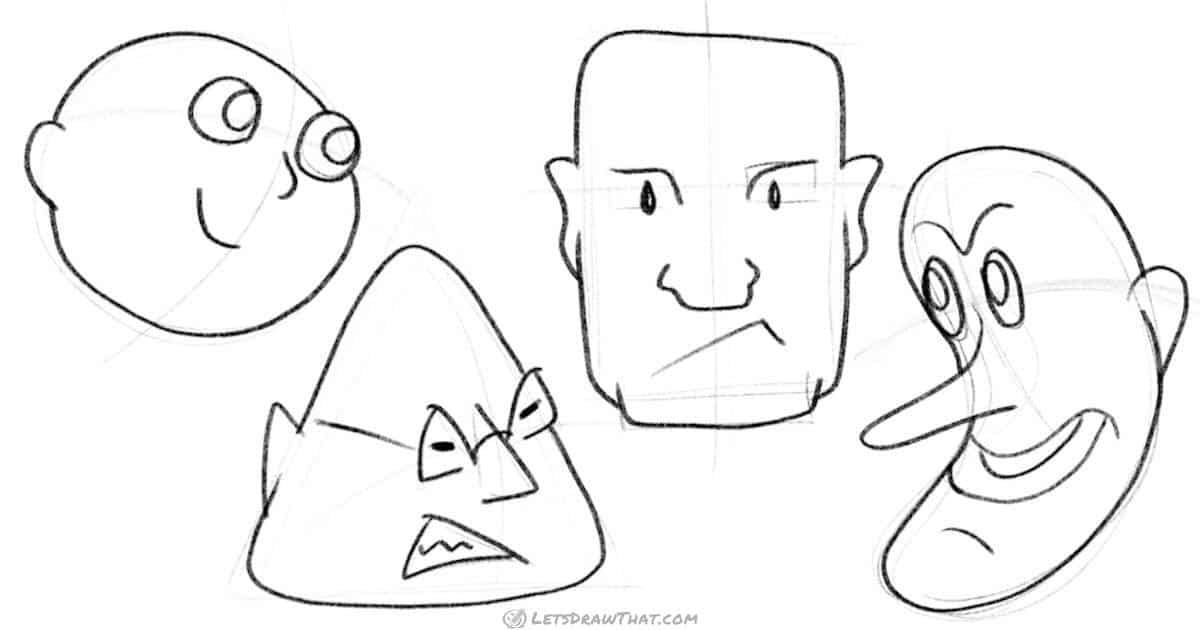
How to draw round and friendly head

We start with a simple and common head shape – a circle. Round heads look soft, friendly and harmless – great for drawing kid faces or friendly characters.
While here we show a regular round circle, you can experiment and squash the circle into an oval. A tall or flat oval will give you a very different character, while still keeping the friendly feel.
But enough talking – let’s draw a round and friendly head!
Drawing the round head
Step 1: Sketch the circle and face cross

We start our drawing with a simple circle.
Then we add the face cross – this will help us place the face – the eyes, mouth and nose – onto our head.
You can play with the positioning of the face cross, depending on which direction you want your character to look. Here our head is looking up and to the right – this will be the three-quarter view.
If you want to see some sample variations of the pose drawn here, check out the how to draw a face tutorial.
Step 2: Place the face features – eyes, nose and mouth

Next we sketch the main features of our head’s face – eyes, nose and mouth.
Place the eyes on the horizontal face line. Play with the distance between the eyes, until they are just right.
The top of the nose is roughly where the two lines cross. Keeping with the friendly circle theme, we add a nice round nose.
The mouth sits on the vertical face line, below the nose. In the real world, the mouth would be symmetric on the line. By moving it bit sideways here, we gave our head a nice friendly smirk.
Step 3: Finish drawing the head

We complete the head drawing by adding the ear, drawing the eyes properly and completing the head outline.
As you can tell, we are using very simple and basic eyes, nose, mouth and ears here. After all, this tutorial is about drawing heads and exploring the various head shapes. But again, feel free to play with different shapes, sizes and forms for any off the facial features.
Even with the simple face, we have some happy smiling baby head drawn right here!
Even with such simple shapes, we have managed to draw a friendly round head!
How to draw a head from a triangle

Our second head is a bit if an experiment – can you draw a head from a triangle? Of course you can! We are definitely getting into a bit of comic style exaggeration here, but look how well the head worked out. Just to keep with the triangle theme, we are going to make the eyes, nose and mouth out of triangles as well. Let’s get drawing!
Drawing the triangle head
Step 1: Sketch the triangle and the face cross

I am sure you know by now, that we start with sketching the head outline – this time it’s a triangle.
Then we add a face cross to help us with placing the face features. Here we go for a side view, with a relatively low vertical line, at about one third of the triangle height.
Step 2: Place the eyes, nose and mouth
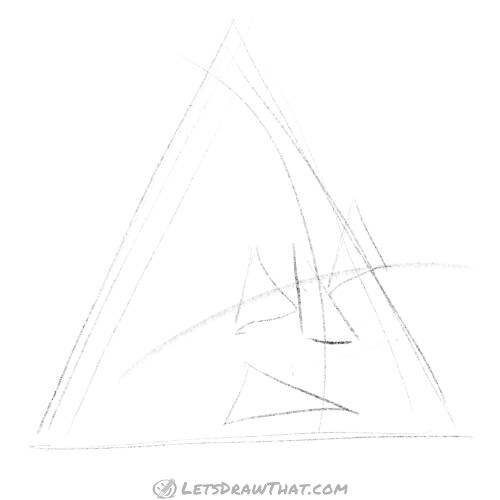
Now we sketch the placement of the facial features. Let’s see if our triangle head can also have triangular features!
The triangle nose, as usual, sits around where the two face lines cross.
Next, let’s add triangle eyes – these sit on the vertical face line.
Finally a triangle mouth – this one is a bit off the centre line, as it is not a particularly symmetrical smirk.
Step 3: Finish drawing the head
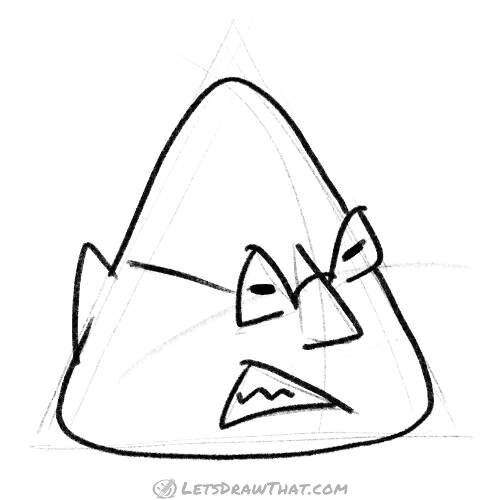
Time to draw our triangle head properly.
Let’s start with the nose – we just outline two sides of the sketched triangle for a simple nose.
Next, we draw eyes – let’s do them just simple squeezed flat lines. Since the triangles for eyes look more like glasses – let’s add a line over the bridge of the nose and a line on the side.
We will finish the face with a triangular mouth – let’s add a little zigzag to show the angry mouth squeeze.
Finally, draw an ear and complete the head outline. We want a comic man, not a robot, so we round the sharp corners on the head a bit. Also, the bottom chin line is not completely straight but arched out a bit.
And we are done – this is a one angry marshmallow head man!
How to draw a square head for a strong man

For our third head, we will go with a rectangular shape. A square is a perfect shape for strong male heads.
We also change the position of our head – this one is a simple front head-on view.
As you can see, we use the same simple technique to draw the head, but just by choosing a different base head shape, we end up with a very different character.
Drawing the square head
Step 1: Sketch the rectangle and face cross

Same as before, let’s start with the base head shape – a rectangle this time.
Again we add the face cross to help us place the face features. This time we are drawing two straight lines.
The vertical one splits the head shape perfectly in half – that will give us the straight on, front head view.
You can play with the position of the horizontal line – placing it up will give your head a bigger chin, placing it down a bigger brain!
Here we go for about the normal split, slightly above half way up.
Step 2: Place the face features – eyes, nose and mouth

Time to sketch a face for our head and improve on the simple square.
First we sketch and place our eyes. Going with our square theme here, lets make them a rectangles as well.
Now a trick! Let’s add a square chin at the bottom of our square head. Every strong man needs a strong square chin!
Next, let’s add ears – they sit roughly at the eye level – on our vertical face line.
The nose and mouth sit symmetrically on the vertical face line. Let’s go for something simple, but in line with the strong male character we are building here. A nice wide nose and a simple tough man smirk line for a mouth.
Step 3: Complete the head drawing

Time to finish our head drawing.
Let’s draw the eyes properly first – squarish eyebrows and a simple dot for an eye.
Outline the chin next, then the head. We need to round the corners a bit to get a human head. (On the other hand, who is to say that you can’t have sharp corners? If you are after a tough robot head, they would be perfect.)
Our guy is a bit bald – but drawing hair is another tutorial. So we will say that the toughest of guys always shave their hair. It gives them an advantage in a fight – no one can grab them by the hair!
How to draw a head from a bean shape

For our last experiment today, we will draw a head from a bean shape. As with all the other shapes, you can play with how wide, tall and bent your bean is, and you will get very different results for different proportions.
Our head is a narrow tall bean, and we ended up with a cheeky looking character. Let’s learn how to draw him!
Drawing the bean head
Step 1: Sketch the head shape and a face cross
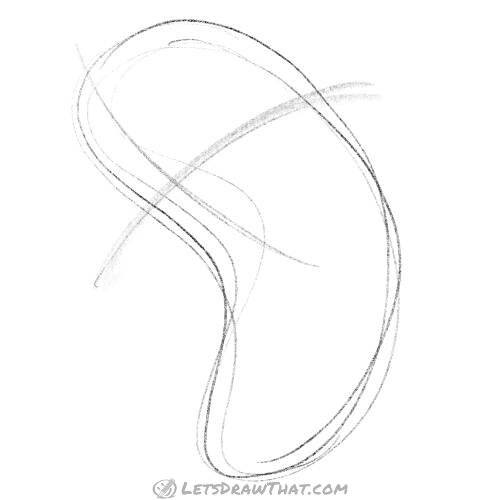
As usual, we start with the shape for the head – a narrow tall bean. As mentioned, you can play with how wide, tall and bent is your bean, as well as trying different angles, to get some very different results.
Similarly, you can experiment with the placement of the face cross. Here we are placing it on the upper half and drawing a downward looking face.
Step 2: Sketch the eyes, nose, mouth and ear

After we have the basic shape of the head sketched, we start adding facial features.
A funny looking bean head begs for a funny nose – let us make it long and pointy. As usual, we start drawing the nose where the two face lines cross.
Add two simple eyes on the horizontal line and an ear on the same level.
Our big nose will go well with a big, exaggerated mouth.
Step 3: Complete drawing the bean head

We add few more details to make our head more interesting – a wrinkle line over the eyes, a tooth line in the mouth and a little chin mark.
Then it’s time to complete the head outline and our bean head is done!
This one has turned out to be a bit of a cheeky looking character.