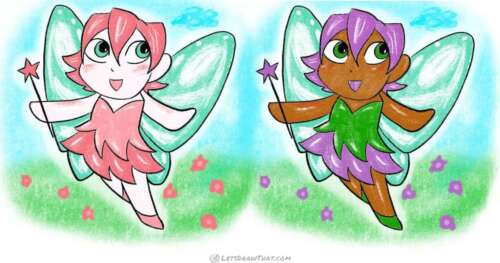
Learning how to draw chibi is the simplest way to start drawing people. We start with a generic chibi body and use it to draw a chibi boy and a girl!

Our first drawing is a basic body shape. We will use it as a base to add details, and make it many different people!
Our second drawing uses the base that we drew and makes it into a boy character
The third drawing is a girl – drawn using the same chibi body base, of course.
min
You will need: pencil, fineliner pen, colored pencils, eraser and drawing paper or sketchbook
These are the favorites we use for drawings on Let's Draw That that we love and recommend:


Disclaimer: LetsDrawThat.com participates in the Amazon Associates Program. If you purchase a product using a link on our website, we earn a small commission, at no extra cost to you. This is one way how you can support this website.
Love drawing? Never miss a tutorial!

How to draw chibi - base figure

Our first drawing looks very basic but that’s because it’s not meant to be the final result! This is a base figure that we’ll use for both our boy and girl chibis later.
You can mix and match any features you want to make very different characters, all using the same chibi body we draw here.
How to draw chibi base figure: sketching step by step
Step 1: Sketch the basic body proportions
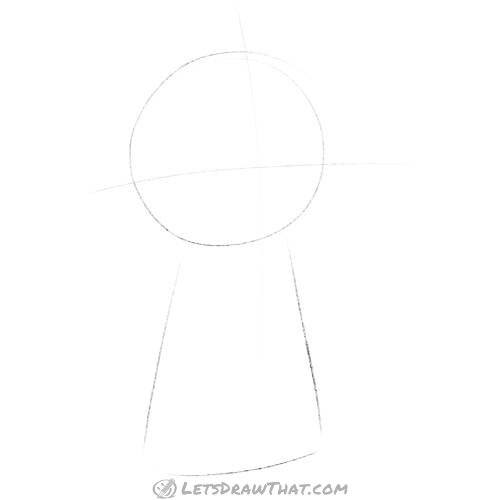
We start out chibi drawing with a circle for the head. We add a cross, with the vertical line about two-thirds of the way, and the horizontal line cutting the circle in half. This is to help us place the face. The face will be at a three-quarter angle.
We don’t draw much of a body at this stage. Here it’s just a block that’s wider at the bottom, and a line to help us place the feet.
One of the chibi specifics is that the head is about one-third of the entire character height, and the rest of the body makes about two thirds.
Our chibi looks like a bowling pin, don’t you think?
Step 2: Add a chin and legs

Next, we add a chin and legs. The chin looks like a very rounded rectangle. Notice how the line on the right starts where the horizontal line crosses the circle. The bottom line is placed a little under where the bottom of the circle is. The left line cuts into the circle and doesn’t quite reach the horizontal line.
The legs are two angled lines that start in the same place as the sides of our “bowing pin” body. Look at how they form a triangle with the bottom line of the body.
Step 3: Add an ear and arms
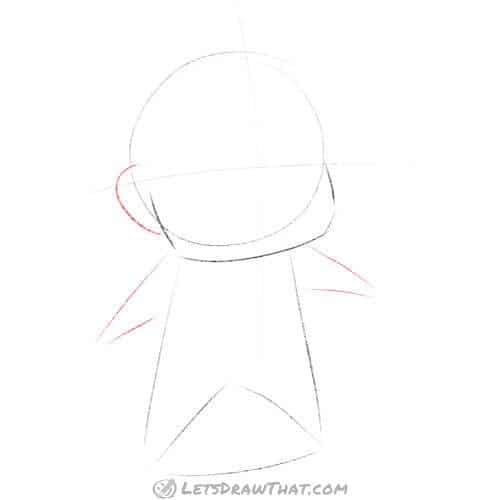
Here we add the final parts of our guidelines – the ear and arms.
Because we are using the three-quarter angle, only one ear is visible. It looks like a bit of a wonky semicircle that’s widest at the point where it crosses the horizontal line again.
The arms are very simple – two triangles coming right from the top of our body shape – from the shoulder line.
How to draw chibi base figure: outline the drawing
Step 1: Add the face and outline the head

Our face is very simple – the eyes are simple ovals. We place them one on each side of the vertical face line and sitting on the horizontal face line. The smiling mouth is simple curve and almost touches the bottom of our original circle. Chibis have no nose!
Next, outline the ear. Finally, you can outline the rest of the head. Make sure to round any sharp edges on the head – chin line and the transition between the head and chin. Chibis are very squishy, soft – and round!
Step 2: Outline the chibi body

Now we are ready to outline the chibi body. This step is very simple – use the guidelines you have drawn, and remember the soft and round rule from above!
As you outline the arms and legs, make the sharp ends of the triangles nice and round. You will end up with slightly wider arms and feet.
How to draw chibi: finished chibi base drawing
Chibi base outline drawing

Use an eraser to erase the guidelines. You now have the basic chibi body shape!
Usually, we would have a colouring step next, but because this is just the basic body shape, we will instead add extra features and only then will we add colour.
Will you make yours into our boy or girl? Or will you choose your own features and draw a very different chibi character?
How to draw chibi boy

Now that we know how to draw a chibi base body, we can use it to draw a chibi boy.
We add some very simple hair and clothes – pants, shirt and tie, which will turn our generic figure into a boy. This one turned out to be a decently dressed schoolboy, ready to start his day.
Continue drawing a boy from the chibi body base
Step 1: Add the details

Here, we add simple details for the hair and clothes.
The top of the hair is quite smooth but still sticks out above the head to show that it has volume. The lower half of the hair is very spiky, but still clumps at the ear, middle of the face, and side of the head.
The clothes are mostly curves lines and triangles – curved lines are used to indicate the shirt cuffs, vest, and shoes. Simple rounded triangles are used for the collar and tie.
Step 2: Colour in the chibi boy

Colouring is optional but makes the drawing look very nice and finished.
Notice how we leave a white patch on the eyes, which makes them look much cuter.
It is better to erase any parts of the base that will be “hidden” by the details – in this case, the top of the head and ear, hidden by the hair. Otherwise, you will need to use thick dark colours to hide those unnecessary lines.
Here is a very different chibi boy drawing:
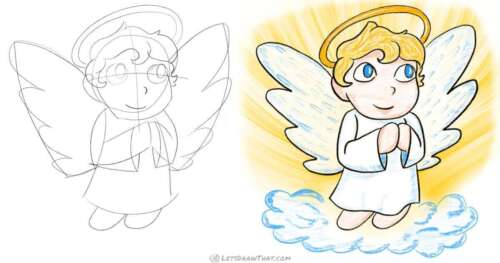
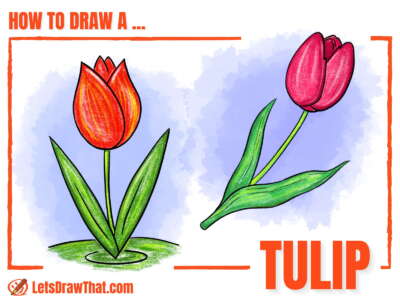
How to Draw an Angel in a Simple Chibi Style
Learn how to draw an angel. Turn a simple chibi boy into a cute angel by dressing him in long shirt and adding the wings and a halo around his head.How to draw chibi girl

Just like before, we will add details onto our base chibi drawing, but this time, we will make the final drawing a chibi girl!
What is the difference between our boy and girl chibis? Longer, girly hair, a skirt instead of pants and blouse rather than a tie is all the makes the same chibi drawing into a girl.
Continue drawing a girl from the chibi body base
Step 1: Add the details

The details are a bit more complicated than the boy’s ones, because the hair is longer and the skirt doesn’t follow the exact shape of the legs we drew.
This time the hair follows the line we drew for the head much closer in some places – this is because the hair is longer and heavier, so the volume gathers more at the bottom. However, our girl has a sort of fringe, and as such, the hair gets poofier closer to her face. It is a combination of sharp and soft lines.
The base clothing is similar to the boy’s – same simple lines to suggest shoes and cuffed blouse sleeves.
But instead of pants, the girls wear a skirt. It starts at her waist and gets wider as it goes on – just like our body base in the first step! The extra lines on the skirt add interest and show this is a pleated skirt.
Step 2: Colour in the chibi girl

Finally, colour in your chibi girl. This is optional but makes your drawing more interesting.
Notice how a circle of the eyes has been left white.
Again, erase the baselines that intersect your details, or cover them with a layer of paint.
Chibi characters can often have crazy hair colours, so why not give our pink hair?
Now try your hand at not-so-basic chibi girl: