How to draw a lion: base sketch step by step
Step 1: Start from the triangle cat sketch
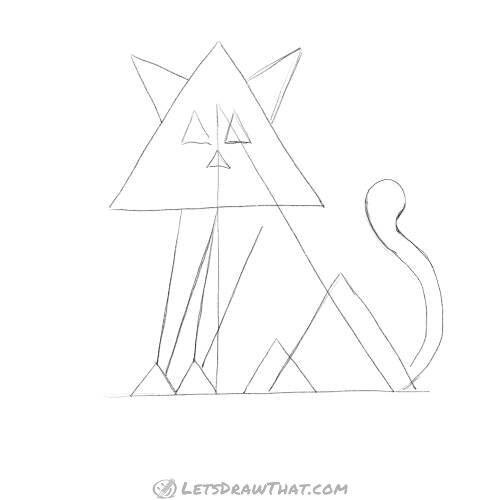
We will start drawing a lion from the exact same sketch we have used for our triangle Scruffy cat in the How to draw a cat tutorial.
Here it is. If you want to see step by step how we got here, do a little side trip to our How to draw a cat from triangles tutorial.
Step 2: Sketch the shape of the lion’s mane
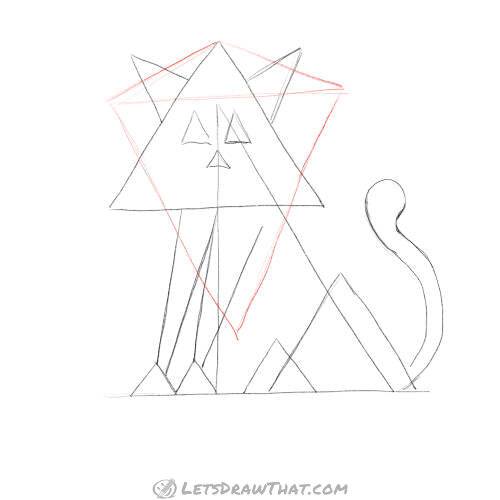
Keeping up with the triangle theme, we will add two more triangles, which will be a simple outline of the lion’s mane. The lion’s mane covers his head and rthe top part of his body.
First draw a horizontal line over the lion’s forehead, about as long as the bottom line of the head triangle.
Join the ends of the line with the top of the head – that is the top flat triangle.
At the bottom, the lion’s mane goes all the way to his tummy. So draw a large triangle all the way down to where the belly button would be – as on the picture.
How to draw a lion: outline the drawing step by step
Step 1: Draw the lion’s face

With the guideline sketching complete, let’s start drawing the lion’s face.
For the eyes, trace the flat bottom side of the eye triangle sketches. Then draw the upper part as a nice rounded half circle. Add another half circle at the bottom for the eye pupil.
For the nose, just round up the triangle a bit. The mouth and cheeks are two half circles, with a few dots.
If this looks very much like the cat face from our How to draw a cat tutorial, that is because it is. After all, a lion, particularly in a comics drawing, is just a grown-up cat.
Step 2: How to draw a lion’s mane - guideline

What makes a lion a lion is his mane. Let’s get into drawing it.
We already have all the triangular guidelines in place.
You don’t need to draw this, it’s just shown here to better understand what outline we use as a guide for our scruffy mane line in the next picture.
On this picture, we have highlighted which parts of the overlapping triangles we will use to draw the lion’s mane.
Step 3: How to draw a lion’s mane - draw the mane

OK, let’s draw the lion’s mane. Start at the top, with some scruffy hair pointing up. Then, loosely follow the outline from the picture above wit a zig-zag line.
The scruffy hair at the top of the head sticks out to the sides. Once we get to the lower parts of the mane, the scruffs point more downwards.
Once we have the outer outline, let’s add a similar outline for the face. It’s basically an oval around the face but again drawn with a zig-zag scruffy-hair line.
Finally, add short whiskers. We have now drawn a complete lion’s head.
Step 4: Add the legs and paws

Next, draw the lion’s paws. Here we make them nice, round half-circles at the top, with stacked fingers at the bottom.
Notice that the two paws which are closer to us are drawn completely. The other two, both front and rear, are partially hidden behind the closer ones – so the top half circles are not complete.
Once you have drawn all four paws, add the rear leg. Roughly trace the triangle sketch with nice, rounded corners and sides. Follow the flat line at the bottom, so our lion sits nicely flat on the ground.
Step 5: Complete the body and add the tail
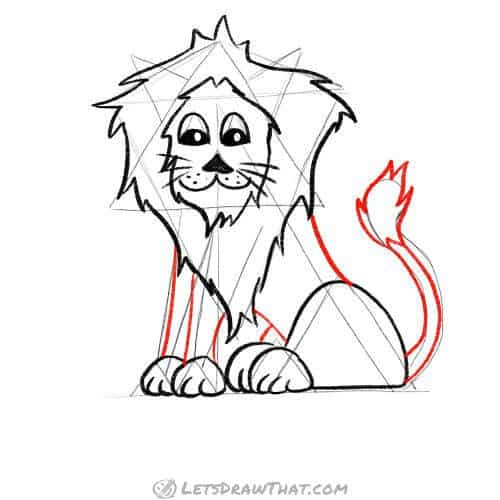
Complete the lion by drawing the front legs and body.
Three slightly bent lines are all that is needed for the front legs. Two more lines complete the lion’s body. The back is slightly bent inwards. The belly bottom line bends the other way to give us a slim lion body. One more short line to suggest the second hidden rear leg.
Finally, our lion needs a tail. That is another lion trademark – a thin tail, with some hair at the end. Draw two parallel bent lines. Then trace the thicker end of the tail using our familiar zig-zag scruffy-hair line. The hair on the tail sticks out upwards.

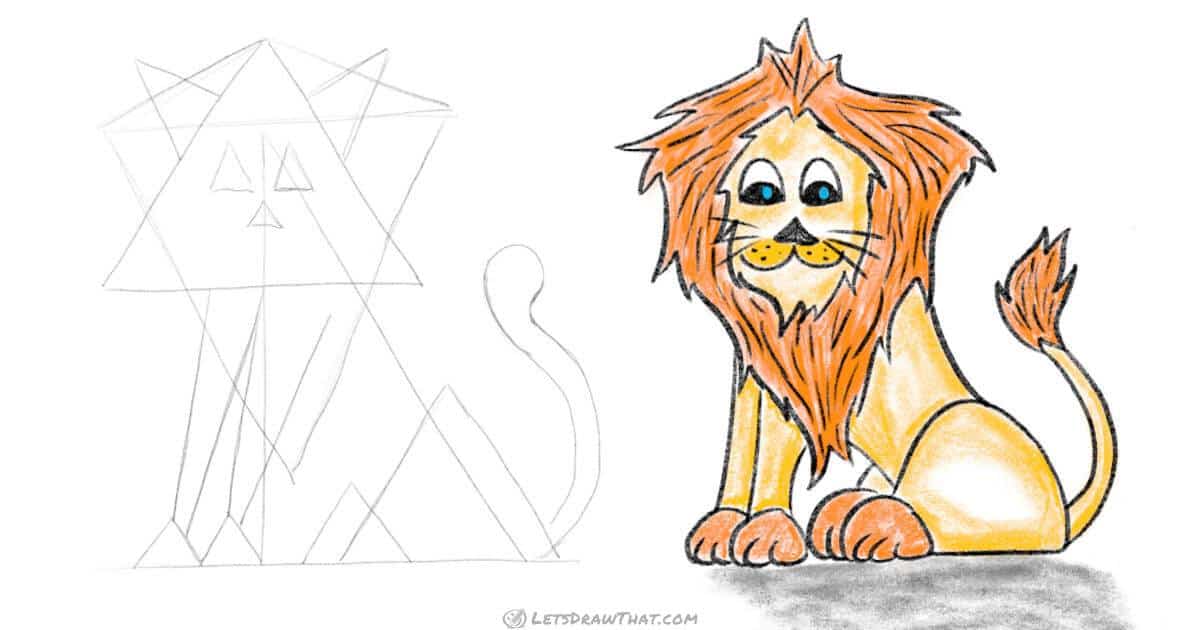
How to draw a lion: finished drawing
How to draw a lion: finished outline drawing
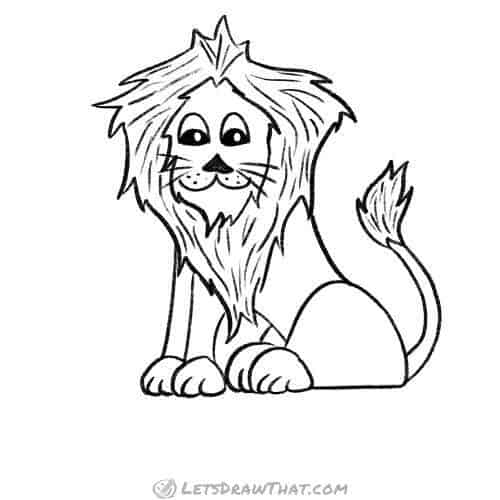
Now that you know how to draw a lion, let’s clean up and finish the drawing.
Use a soft eraser to clean up the sketch lines.
Once you have the lion drawing, add some fur lines onto the mane and tail – that makes our lion look much nicer.
How to draw a lion: finished drawing coloured-in

As usual, colouring in your drawing is optional.
The real lion is a kind of sandy beige colour, with a darker golden mane.
Here we have coloured our lion a dark yellow for the body, with orange as a darker shade for the mane, fur on the tail and paws.
Notice the white patch left out on the rear leg to suggest a bit of a highlight and thigh shape.
Finally, we have drawn a light grey shade to place our lion on the ground, rather than just have him floating in the space.
That is it – now you know how to draw a lion!