How to draw a king: base sketch step by step
Step 1: Sketch the king's head

The first step in our “how to draw a king” tutorial is to sketch out a simple circle for the king’s head. Then mark a face cross to help us place the facial features in the next step. Split the circle down the middle with a vertical line. Then draw a horizontal line about two-thirds down from the top of the circle.
Step 2: Add the beard and face

Next, add a nose made from a soft v-shape centred on the vertical line, a little below where the face-cross lines meet.
Then, draw two simple dots for the eyes. They are placed on the horizontal line approximately one and a half nose widths apart.
Add the ears onto the king’s head. These are just simple “C” shapes, ending a little below the horizontal face line.
Finally, draw the king’s beard. Extend both sides of the face circle down with a wide “U”, that has a sharp point in the middle on the vertical face line.
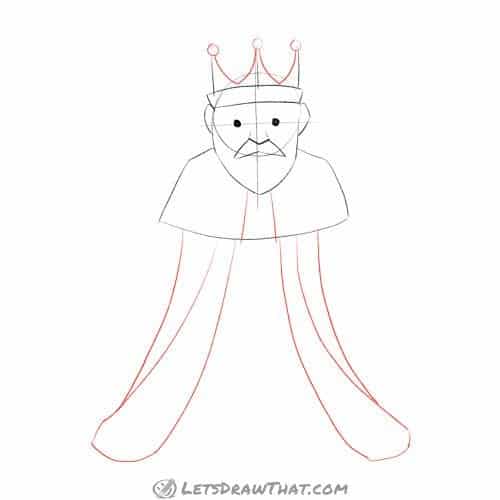
Step 3: Sketch the king's crown, cape, and moustache

As a final detail to the face, let’s sketch in the king’s moustache. Extend two angled lines from the nose to create the sides of the moustache. Then, sketch the bottom of the moustache as a wide upside-down “V”.
Next, let’s start on the king’s crown: Add a narrow rectangle to the top of the king’s head for the head-band. Make it slightly curved, and bit wider at the top than the bottom. Then draw three straight lines up from the headband – one on each side and one in the middle.
The last part of this step is to draw a curved trapezoid starting from the sides of the king’s head to form the shoulders and the top of the king’s cape.
Step 4: Add detail to the king's crown and draw the cape
Let’s keep building the crown first: Draw two curved “V” shapes between the crown guidelines. Add a circle to the top of each point for decoration.
Next, let’s add onto the cape. Split the shoulder cover with two lines to make an opening.
Then, draw the long cape sides going down to the floor: two lines on either side of the shoulder cover split, close together at the top, widening out as they go down to the floor – this will be the ermine lining. Close the sides together at the bottom with a curved line.
Finally, add another outer line on each side to finish the shape of the cape.
Step 5: Sketch in the king's arms, add legs, and finish the crown

Complete the king’s crown by adding a plush, soft hat to the metal crown.
Then, sketch in the king’s arms. First, draw in the forearms, which are a sausage-like rectangle for each arm. Add an extra line to the king’s left arm to indicate the upper arm.
Our king will be holding a globus cruciger and sceptre. At this point, we will indicate the globe by simply drawing a circle in the king’s hand, and the sceptre as a rod in the king’s other hand, with a rectangle to indicate the hand holding it.
Finally, draw a straight line for the ground where the robe ends and use it to place two lumps for the king’s shoes.
Step 6: Add details to the king's hand and robes.

In this step, we will draw out the king’s hand holding the globe using a series of rectangles. Start with a large rectangle at the bottom of the circle for the back of the hand, then add smaller rectangles for each of the fingers – the thumb on one side and three fingers on the other.
Next, draw more rectangles onto the ends of the king’s arms. These are the ermine-lined sleeve cuffs.
Finish off with two curved lines near the arms for a belt, and two more lines meeting up with the king’s feet to close the bottom ends of the robes.
Step 7: Add details to the globe and sceptre

The final step for our king sketch is to add details to the royal regalia.
For the globus cruciger, add the cross to the top of the sphere, as well as a band around the middle of it. Finish off with small circles to represent jewels.
For the sceptre, add a segmented bean shape near the top of the sceptre. Then draw a half-circle on top and a trapezoid at the bottom of it. Add another cross to the top of the sceptre.
How to draw a king: outline the drawing step by step
Step 1: Draw the king's crown

Outline the crown, starting with the metal part and then adding the cap. This is a direct outline of the sketch, except the circles haven’t been closed where they connect to the points of the crown, and the corners of the plush top are rounded off.
Step 2: Draw the king's face

Outline the king’s face next, drawing the eyes, nose, and ears as they were in the sketch. Add new details next: two small eyebrows above the eyes, and a thin line on either side of the nose to define it better.
Then draw the facial hair with a jagged line following the original sketched shape.
Step 3: Draw the hands and feet

Start by simply outlining the king’s feet, since they are the same as the sketch.
Then, move onto the hands, refining them into one shape for the king’s right hand, and adding bumps to indicate the knuckles on his left.
Next, add the ermine cuffs, being careful to leave out the part that will be covered by the globe.
Step 4: Draw the royal regalia

Outline the royal regalia, leaving out the lines that are hidden.
The only change to sketch here is that the individual segments on the sceptre top have been made more prominent.
Step 5: Draw the shoulder cover and the arms

Taking straight from the sketch, outline the top of the robe and the king’s arms. Smooth out any sharp corners.
Step 6: Outline the rest of the king's clothing

Outline the lower part of the king’s robe the same as it appears in the sketch.
Step 7: Add final details to the cloak
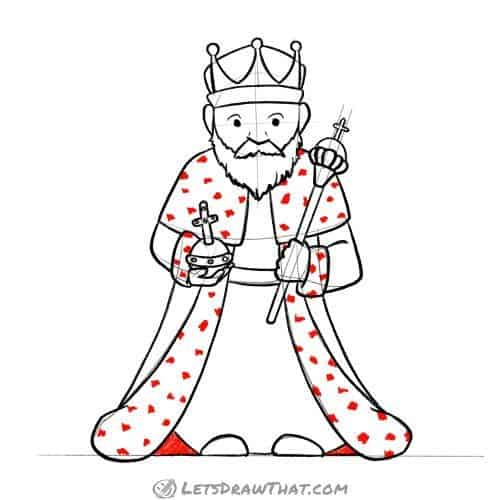
Shade the gaps at the bottom of the king’s robe.
Finally, add black spots to the shoulder cape and edges of the robe. These are what makes the cloak ermine – without them, we could not tell it is that type of luxurious fur.

How to draw a king: finished drawing
How to draw a king: finished outline drawing

Here is the completed king drawing, after we have cleaned up unused sketch lines with an eraser.
Not only we have learned how to draw a king, but we have also learned some fancy Latin words for the royal regalia.
How to draw a king: finished drawing coloured-in

Our usual final step is colouring in the picture. Here we keep a simple colour scheme.
The sceptre, globe and the crown are, of course, a golden yellow. Another typical colour is the dark red for the velvet coat and soft hat in the crown. The ermine lining and shoulder cover remain black and white.
Finally, the king’s robe is a lighter shade of the golden yellow, with simple dark grey for the belt and shoes.