Learn how to draw a book. A very easy step by step tutorial to draw a proper hardcover bound book, both closed and open, in great-looking perspective.

Today we will learn how to draw a book. The first book is a simple closed book using perspective. If you remember our how to draw a cube tutorial, drawing a book is very similar – it is just a flatter shape.
For the open book variation, we will brush up on the one-point perspective from our cube tutorial. Although this version looks harder, it is again drawn from just a simple, flat, 3D block.
min
You will need: pencil, fineliner pen, colored pencils, eraser and drawing paper or sketchbook
These are the favorites we use for drawings on Let's Draw That that we love and recommend:


Disclaimer: LetsDrawThat.com participates in the Amazon Associates Program. If you purchase a product using a link on our website, we earn a small commission, at no extra cost to you. This is one way how you can support this website.
Love drawing? Never miss a tutorial!

Watch the video here, or scroll below for the step-by-step instructions.
How to draw a book: a closed book in perspective

Our first book is basically a 3D flat block using perspective. This is a simple perspective – a variation on one-point perspective. This simple perspective puts the vanishing point far enough to the top left so that the sides of the book are parallel. It is actually easier to draw than it is to describe. So let’s get into it
How to draw a book: sketching a closed book step by step
Step 1: Draw a rectangle
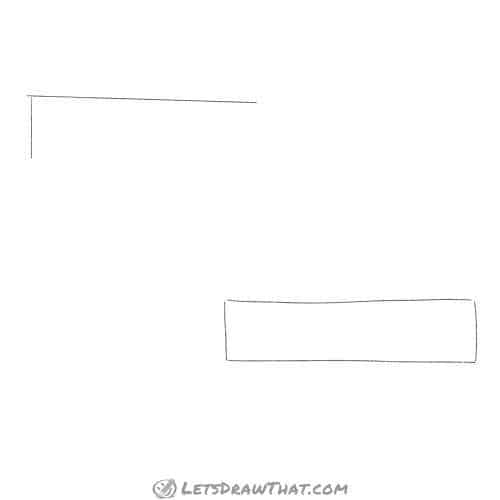
Start drawing your book with a nice flat rectangle.
Then draw another one up and to the left of the first one. We will need only a top and left side from that one, as the rest will be hidden. So save yourself some pencil lead and draw just those two lines.
Step 2: Draw a brick
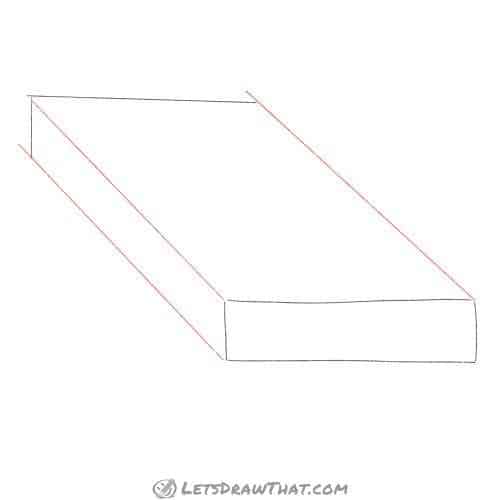
Join the two rectangles with lines at an angle – one from each corner. These should be nice and parallel, and all the same length.
If you did not get the top of the book quite right, now is the time to fix that. You are aiming for a nice, flat brick.
Step 3: Add the curved sides

The final sketch step is to draw a few curves to suggest the book’s rounded binding. Draw bands on the left side of the book – the book’s spine.
Then add one more, facing the same direction, to the bottom right corner This is the end of the book pages, which become curved when the book is closed as they are bound to the spine.
How to draw a book: outline a closed book step by step
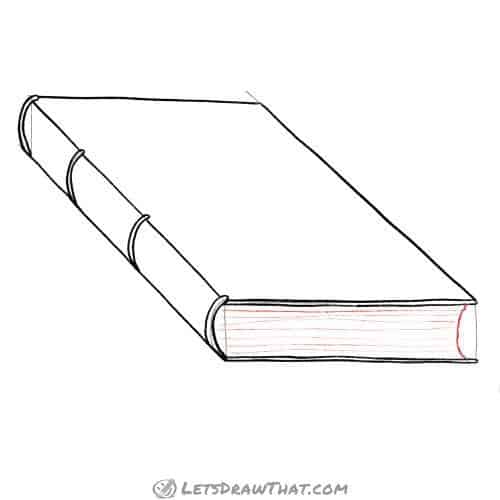
Step 1: Outline the raised bands and bottom of the cover

The book outline is as easy as the sketch. Draw the raised bands on the spine first. Then double up the bottom line for the front and back book cover.
Step 2: Draw the rest of the book outline

Next, draw the rest of the book outline – the top and right side of the book cover, and the two lines of the spine between the raised bands.
Step 3: Draw the book pages
The final step is to draw the book pages. Draw the arced page ends with a fuzzy, wavy line. Then suggest the pages of the book with few light lines.
Step 4: Decorate the book's front page
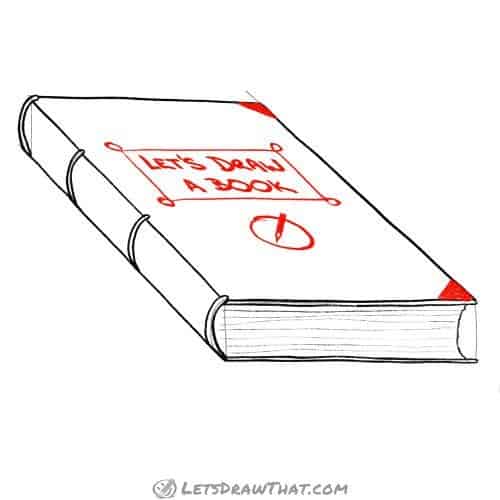
Well, the book drawing is done, but our book is a bit bare. We can easily fix that with a nice headline and logo. Do not forget to skew those as well into the same perspective as the entire book. You can also add two reinforced corners for some extra detail and interest. There!
Need to brush up on your perspective drawing?

How to Draw a Cube: 3 Different Ways and Perspectives
How to draw a cube: learn 3 common ways to show three dimensional cube on a flat paper - simple 3D view and 1 point and 2 point perspective.How to draw a book: finished closed book drawing
How to draw a book: finished closed book outline drawing

Here is the completed outline of the book drawing, after we have erased the sketch lines.
How to draw a book: finished closed book drawing coloured-in

And here is our usual complete coloured-in book picture. Since the book looks quite old with the raised bands and reinforced corners, we have gone here for a simple, old fashioned brown book cover with a golden yellow label.
How to draw a book: an open book in perspective
Our open book variation is again drawn from just a simple flat 3D block, distorted through one-point perspective. By simply curving the pages, we get a nice, open book that looks nothing like a boring and plain block.
How to draw a book: sketching an open book step by step
Step 1: Draw a rectangle and the page split middle line

Start the open book drawing with a simple flat rectangle again. Then draw a straight line going up from the middle – this will mark the middle split between the pages.
Step 2: Mark the book edges

In the next step, we mark the different book edges.
Start with the curved sides of the page block – as the book lies open, the flatter pages at the bottom are longer than the bent ones at the top.
Then mark the top edge of the book – since we are drawing in one-point perspective, the top will be shorter than the bottom.
Finally, draw a little oval at the middle of the lower book edge. This is the hole between the book’s spine and the tiedown – the page binding.
Step 3: Draw the book sides
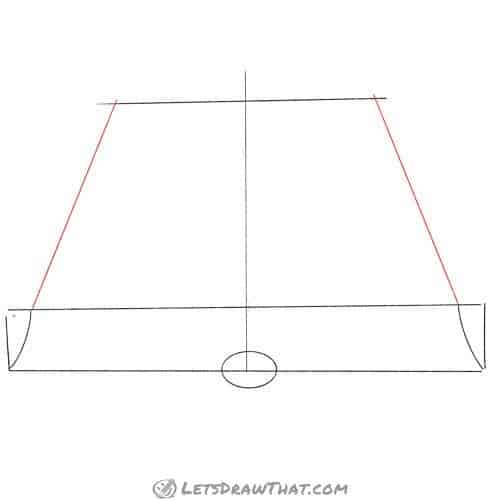
Here comes the one-point perspective. Draw the two long sides of the book – start from the top of the page block curve, and draw two lines symmetrically angled together towards the top edge of the book.
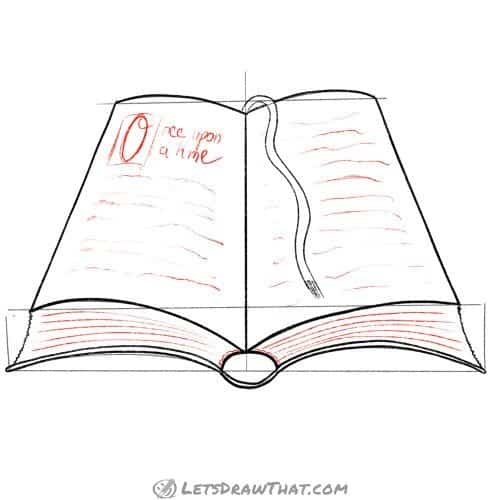
Step 4: Draw the book's pages

Now that we have our base perspective nailed, let’s make our book less squarish. The pages in an open book are nicely bent – so let’s change those straight edges into nice curves.
The bottom cover edges start where the oval intersects the bottom line, and curves all the way to the lower far corners of our base rectangle.
The lower page edge curve goes from the middle of the oval to the outer page corners. The final double-hop goes from the top left corner to the middle line and back to the right corner for the upper page edge.
How to draw a book: outline an open book step by step
Step 1: Draw the bottom book cover

Let’s start outlining our book by doubling up on the book cover. Draw two lines that follow the bottom sketched double-hop around the spine oval.
Step 2: Draw the book pages

Next, outline the pages – the two lines for the outer edges and the centerline, as well as the bottom curved edges and the rest of the bookbinding oval.
We have left out the top edge for a reason – there is an important detail coming up next.
Step 3: Draw the bookmark

Many proper hardcover books feature an integrated bookmark sewn into the spine – just a simple piece of ribbon. That is what we draw next. Draw two squiggly lines for the bookmark and add a split end (a few short lines).
Now you can outline the top edge of the page – leaving out the small part covered by the bookmark!
Also, to complete the book drawing, draw the two wavy fuzzy curves for the bottom page edges.
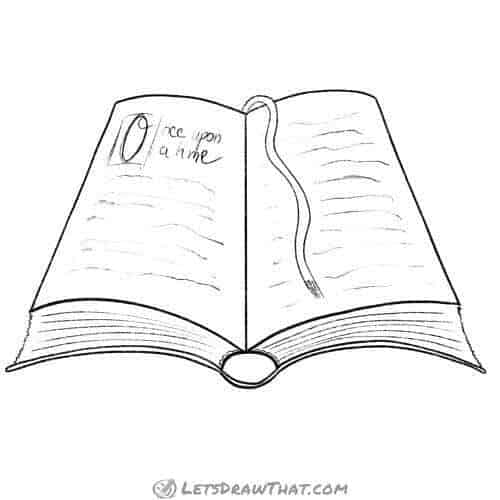
Step 4: Add the final book details
The final details that perfect our book drawing are to suggest some text onto our pages – do not forget to bend the text lines similar to the page edges. And last but not least – draw some very light lines to suggest the individual pages inside the bottom page block.
Learn to draw a pencil next:

How to draw a pencil: realistic and cartoon
Learn how to draw a pencil: Start with a simple round pencil. Next, draw a classic six-sided pencil. Finally, just for some fun, let's turn that pencil into a cartoon character.How to draw a book: finished open book drawing
How to draw a book: finished open book outline drawing

Clean up the sketch lines with an eraser. As you see, drawing an open book is not that hard either.
How to draw a book: completed open book outline

And here is the coloured in version. We have gone for a red bookmark, with the yellowish-beige pages of an old book. There is a bit of brown for the cover, and a touch of light blue to mark out the individual pages.