How to draw a bear: base sketch step by step
Step 1: Sketch the bear's head and front legs

Our how to draw a bear tutorial starts with the usual simple sketch. Draw a flat oval for the bear’s head.
Then drop down two slightly curved lines, one from each side of the head – these will be the outer outline of the bear’s front legs.
Finish the front legs sketch with two “D” shaped paws. Notice how the “D” is not entirely closed.
Finally, add two curved lines back up for the inner sides of the bear’s legs
Step 2: Sketch the bear's back and rear leg
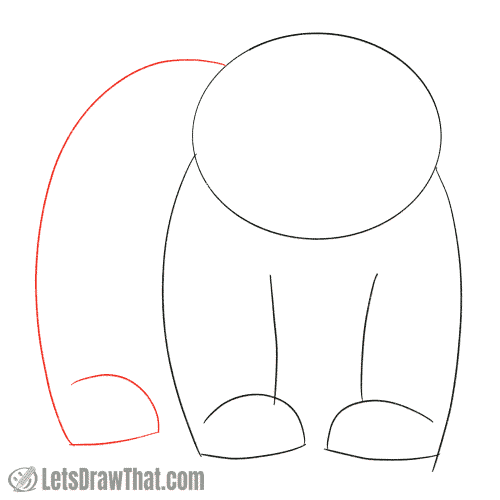
Now sketch the bear’s back and the rear leg. Draw another, simple, upside-down “J” curve that starts from the head for the bear’s back. Curve it all the way down to the ground to draw the outer edge of the rear leg.
Complete the rear leg with another “D” shaped paw on the ground. We have drawn just a few lines, and the simple sketch is already starting to look like a bear drawing.
Step 3: Sketch the bear's chest

Next, sketch the bear’s chest. This is drawn as a slightly curved, wide-open “V”.
The longer side on left is the bear’s belly curve, starting just above the rear leg and going down to the chest mid-point between the front legs. Then the chest comes up towards the front leg’s armpit.
Once you have drawn the chest, draw the inner line for the rear leg.
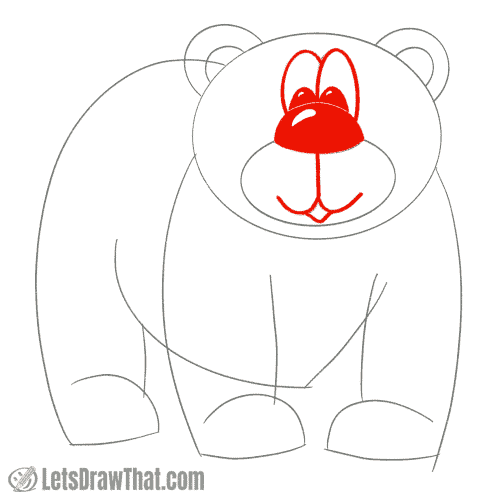
Step 4: Sketch the bear's muzzle and nose

With the bear’s body done, it is time to move to sketch the bear’s face.
Sketch a smaller oval covering the lower half of the bear’s head – this will be the bear’s muzzle.
Then draw a simple nose on the top of the muzzle. Same as the nose on the teddy bear drawing, draw it as two half curves – one “C” shaped at the top and the second, flatter one, at the bottom.
Step 5: Sketch the bear's face and ears
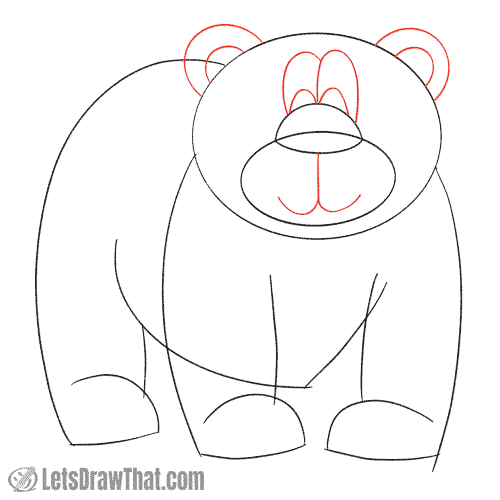
Here is the final stage of sketching the bear’s face. Draw two big cartoony eyes on top of the bear’s nose – two larger ovals for the eye white, and two smaller half ovals for the inner pupils.
Then draw an anchor-shaped mouth onto the muzzle – again, this is the same as the mouth on many other animals we have drawn – the hamster, cat, tiger. lion and of course the teddy bear.
Finally, our bear needs some ears. This bear’s ears are simple half-circles sitting on the side of the head. Double up the half-circle to mark the inner ear.
If you are after a very easy way how to draw a bear, you can simply outline this sketch. But surely we can do better than that!

How to draw a bear: outline the bear drawing step by step
Step 1: Draw the bear's face
Let’s continue with our how to draw a bear tutorial and see how we can improve the simple sketch while outlining our bear drawing.
Start by drawing the bear’s face. Color in the nose, leaving a small white drop-shaped patch for the shine on the nose.
Then outline the eyes, filling in the pupils. Again, leave a tiny white patch for the shine in the eyes on the top left of each pupil.
Then draw the bear’s mouth – outline the anchor shape from the sketch, and add a small open mouth – just a tiny curve at the bottom.
Step 2: Draw the bear's head
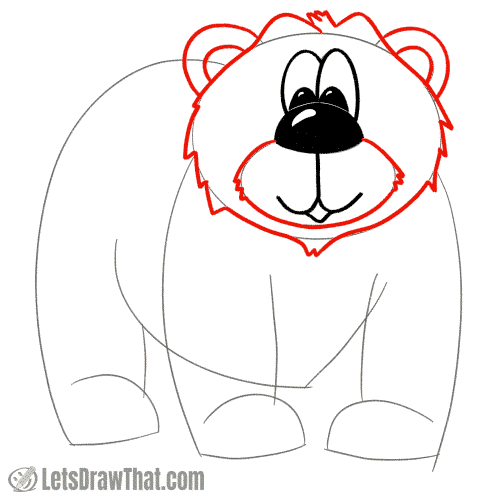
With the face complete, it is time to draw the bear’s head. We are again using our trusty zig-zag scruffy fur trick from the scruffy dog or monkey drawing.
Start by outlining the bear’s muzzle. Add just two or three small “V” shaped zig-zags on the sides, and outline the rest of the muzzle as a smooth line following the sketch.
Now that you had some practice, it is time to draw the head outline. Here we are adding two large raised eyebrows above the cartoony eyes, with a small patch of scruffy hair in between. Then draw the sides of the head, adding a few “V” hairs on the cheeks. Finish the head outline at the chin with another small patch of scruffy hair.
Finally, outline the ears, just following the smooth sketch lines.
Step 3: Draw the bear's front legs and paws

Next, draw the bear’s front legs and paws. Start by splitting the paws into separate fingers- draw them as three “J” lines, one next to the other. Then draw the “C” shaped top of the paw, rounding off the transition to the first finger.
Next, draw the bear’s legs. Notice the improved leg shape – we are curving around the simple leg sketch with sort of a wide-open “S” curve. The leg is wider at the top for the thigh muscle, narrowing towards the knee, and then widening out again for the calf muscle to meet with the heel on the paw.
Draw the inner line on the left leg in a similar way. We are leaving the right leg half-drawn for now – we will come back to it after we have drawn the bear’s chest.
Step 4: Draw the bear's chest, belly line, and the collar hair

It is time to draw the bear’s chest and belly. Use the zig-zag scruffy fur line again to outline the part of the lower body sketch line that is not hidden behind the front leg.
Next comes an improvement that was not on the sketch. Double up the chest shape with a small “V” line under the bear’s chin, to add some scruffy hair collar to the bear’s upper chest.
Step 5: Draw the bear's back and rear leg

Well, our bear drawing is almost done. All it needs is to outline the back and the rear leg.
Again, we are improving the shape of the leg a bit, narrowing the leg down above the knee. Draw most of the line smooth, with just some small hair scruff at the heel.
Finally, do not forget to draw the inner line on the front leg, now that the chest line is in place.
Step 6: Draw the bear's claws

Here is a final, small improvement and the very last step in our how to draw a bear tutorial – to be a proper wild animal, our bear needs some claws. Draw those as small drop shapes, one nail on each finger.
Oh, and one last line – add a simple double up behind the left front leg to suggest the second rear leg – we do not want our bear to be maimed.

How to draw a bear: finished drawing
How to draw a bear: finished outline drawing

And here is the result of our “how to draw a bear” tutorial, once we have erased the sketch lines – a nice wild bear, with a very friendly-looking cartoony face.
Finished bear drawing coloured-in
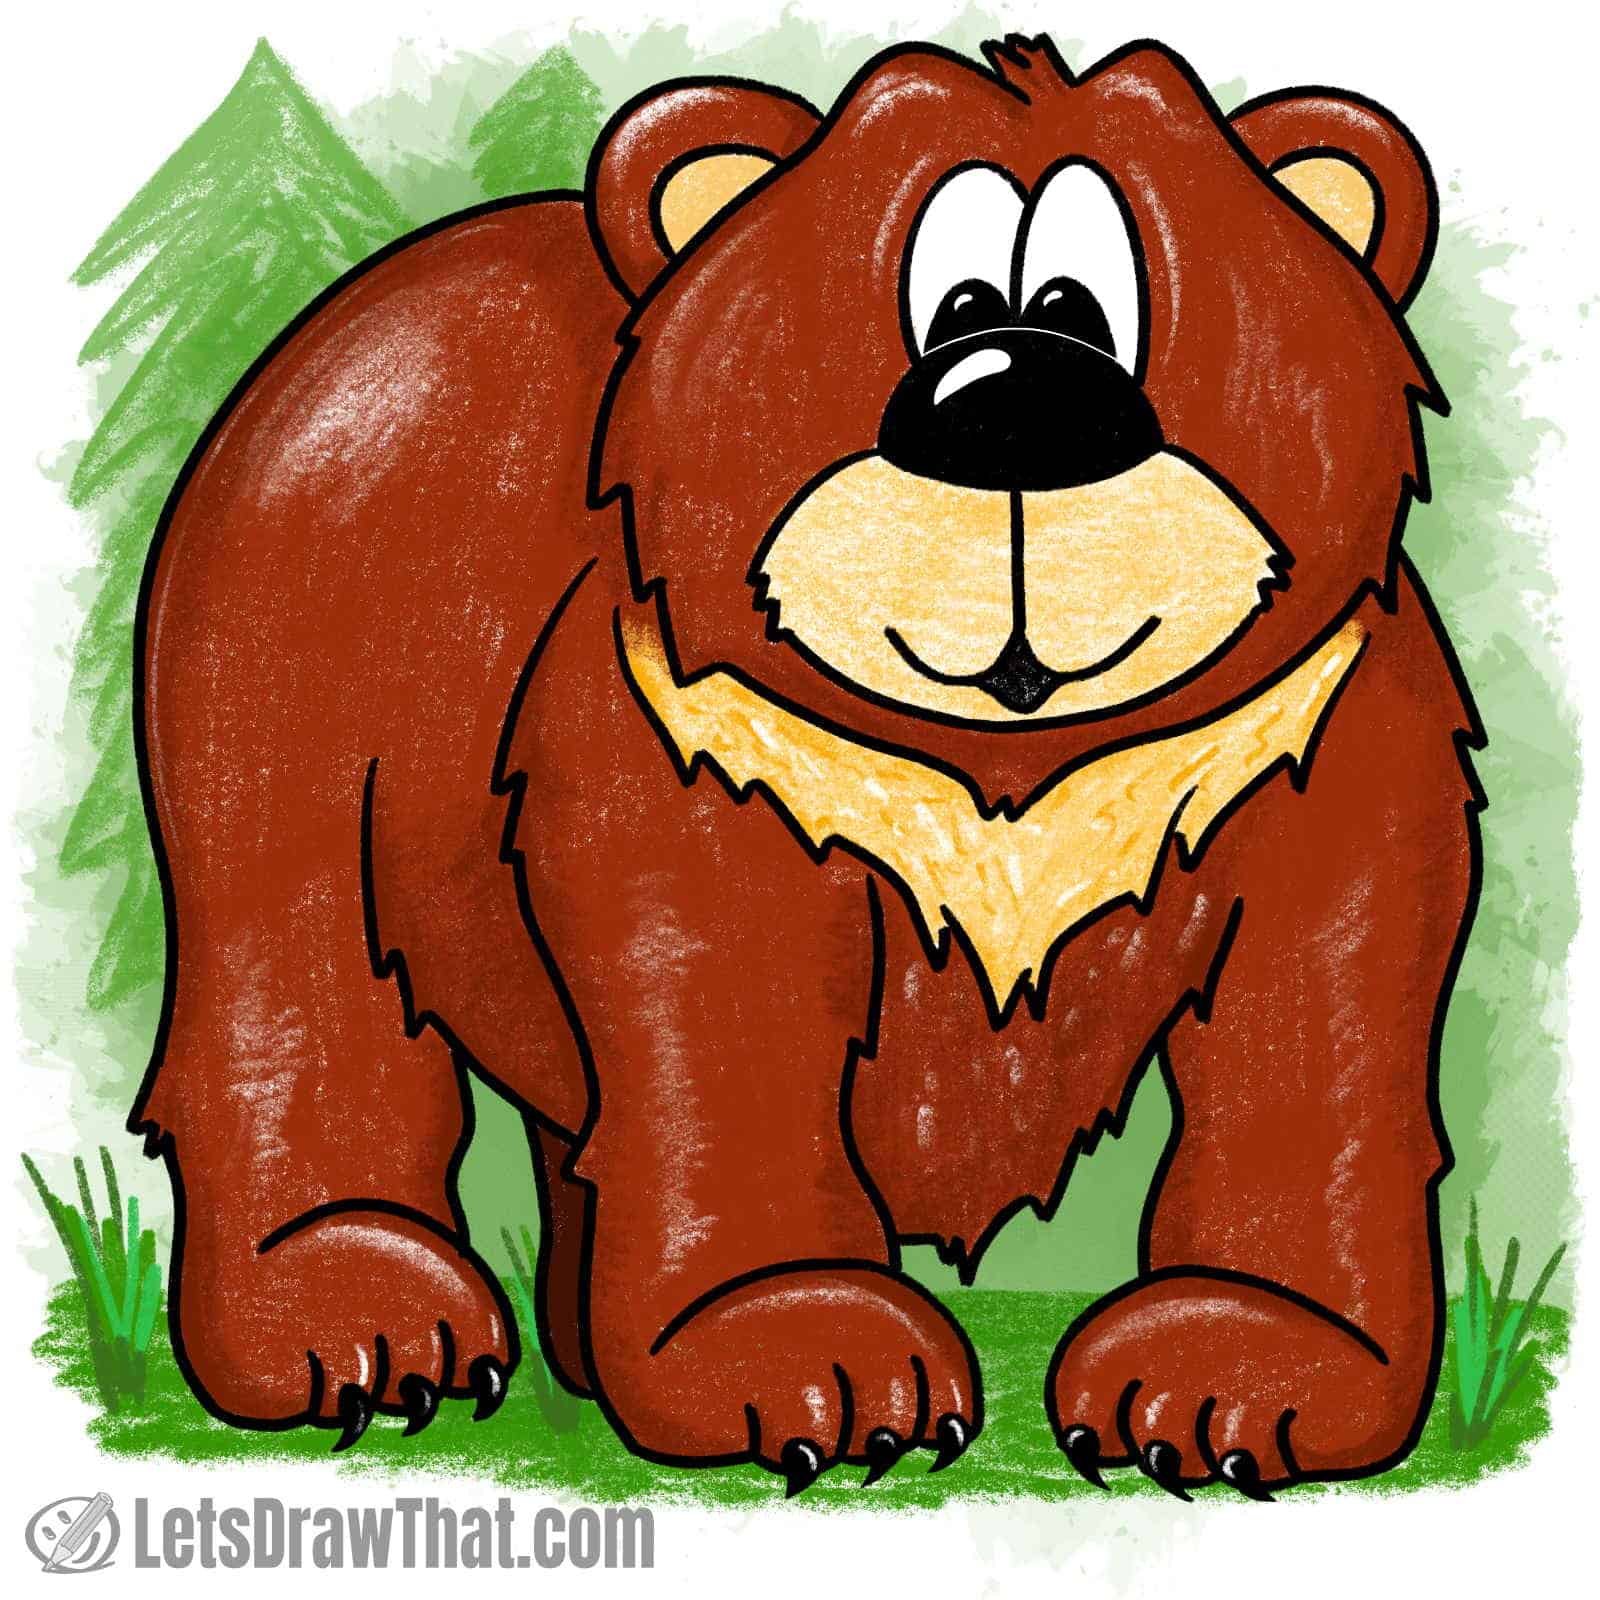
Finally, here is the bear drawing colored in. We have used a simple brown color for the bear’s fur. Notice the darker shading on the chest and the fourth leg that is almost hidden. We have also left out lighter “shine” patches on the bum and legs, to make them look more like the round objects they are.
The bear’s muzzle, chest hair collar, and inner ears are colored in light beige or dark yellow, depending on which color you have.
Add some green grass under the bear’s paws and we are done. Yay, now you know how to draw a bear!